


Contents: Examination ⬇ Replacement ⬇
The necessity of performing this operation should be determined during the inspection of the technical condition of the engine control system (see "Engine management system - technical condition check and fault diagnostics").
Warning! Before performing the operation, be sure to read the section "Safety precautions for maintenance and repair of the engine management system".
To complete the work you will need a multimeter.
Note: To check the ignition module, you must contact a specialized service center. You can only check the voltage supply to the module yourself.
Examination
1. Prepare the car for work (see "Preparing the car for maintenance and repair").
2. Remove the decorative engine cover (see "Engine trim panel - removal and installation").
3. Disconnect the wiring harness connector from the ignition module (see below).
4. Turn on the multimeter in voltmeter mode and connect the positive wire to terminal 2 of the wiring harness connector (black wire), and the negative wire to the vehicle's ground. Within two seconds after turning on the ignition and when the starter is turned on, the voltage should be 12 V.
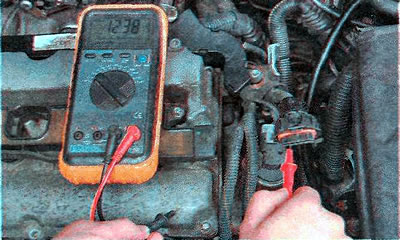
If there is no voltage, the fuse Ef6 and the ECM relay E4 are faulty (see "Fuse and relay mounting blocks") or power supply chain (see "Checking and repairing electrical circuits").
Replacement
1. Disconnect the wiring harness connector from the ignition module.
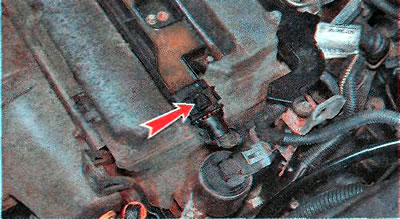
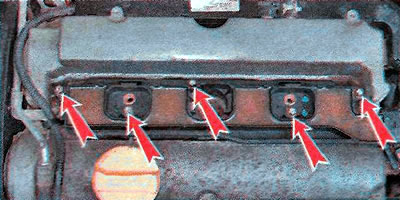
2. Using the TORX E10 key, unscrew the five bolts securing the ignition module.
3. Remove the module together with the spark plug tips.
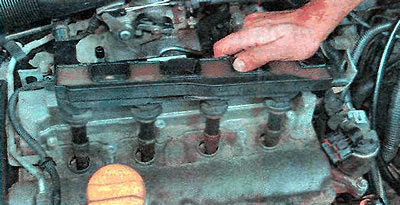
4. Inspect the module and tips for damage and cracks. If damage is detected, replace the module.
5. Install the ignition module in the reverse order. Lubricate the high-voltage wire tips with technical petroleum jelly before installation.
Visitor comments