
In the latter case, you should first determine and eliminate the cause of air entering the hydraulic drive, and only then proceed with its pumping. The presence of air in the hydraulic drive of the brake system can be determined by summing up the brake pedal - it becomes «soft» (there is no stop at the end of the pedal stroke) and increased pedal travel (the pedal drops below its normal position). Bleeding of brake mechanisms is carried out in the following sequence: right rear, left front, left rear, right front.
To complete the work you will need:
- transparent vinyl tube with an inner diameter of 4-5 mm;
- a special or 9 mm ring wrench for the fitting of the front caliper;
- special or box wrenches 7 mm or 11 mm for the rear brake fitting (depending on the type - drum or disk);
- container for draining brake fluid;
- fresh brake fluid recommended by the manufacturer (see «Reference data»);
- manhole or overpass (desirable).
We work with an assistant.
Execution sequence
1. We prepare the car for work (see «Preparing the car for maintenance and repair»).
2. Remove the reservoir cover of the main brake cylinder.
Warning! To prevent air from entering the hydraulic drive of the brake system during pumping, make sure that the level of brake fluid in the reservoir does not fall below the MIN·mark.
3. We clean the fitting of the brake cylinder of the rear right wheel and the surface around it from dirt.
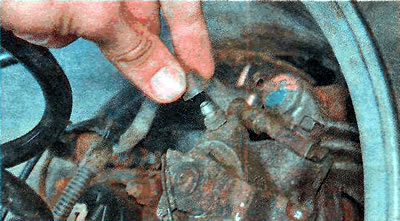
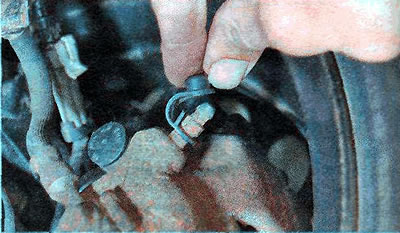
4. Remove the protective rubber cap from the bleed valve of the rear right wheel:
- drum brake mechanism;
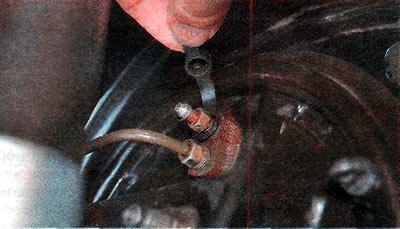
- disc brake mechanism.
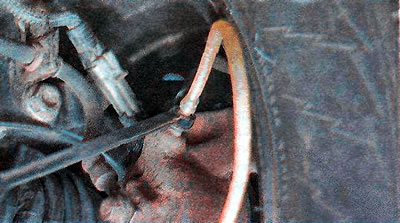
5. We put a special or 7 mm spanner key on the bleed valve (or 11 mm for disc brakes), and then a clear vinyl tube. We lower the other end of the tube into a transparent container partially filled with brake fluid.
6. The assistant presses the brake pedal several times and keeps it pressed.
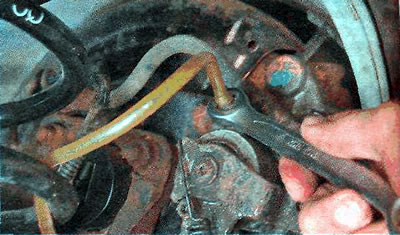
7. Turn off the fitting until the liquid starts to exit from it:
- drum brake mechanism;
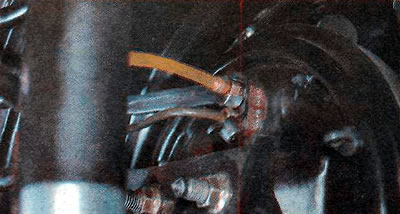
- disc brake mechanism.
8. After the brake fluid stops coming out of the tube, we wrap the fitting.
9. Repeat the steps described in paragraphs 6-8 until the release of brake fluid with air bubbles from the cylinder fitting stops; Periodically check the brake fluid level in the master cylinder reservoir.
10. After complete removal of air from the rear wheel drive, finally tighten the fitting, remove the vinyl tube and key from the fitting, put a protective rubber cap on the fitting.
11. According to the established sequence, remove the protective rubber cap from the bleeder valve of the brake caliper of the front left wheel.
12. We put a special or 9 mm ring wrench on the bleed valve, and then a transparent vinyl tube. We lower the other end of the tube into a transparent container partially filled with brake fluid.
13. The assistant presses the brake pedal several times and keeps it pressed.
14. Turn off the fitting until the liquid starts to exit from it.
15. After the brake fluid stops coming out of the tube, we wrap the fitting.
16. We repeat the steps described in paragraphs 13-15 until the brake fluid with air bubbles stops coming out of the caliper fitting, periodically check the brake fluid level in the master brake cylinder reservoir.
17. After complete removal of air from the front wheel drive, we finally tighten the fitting, remove the vinyl tube and key from the fitting, put a protective rubber cap on the fitting.
18. Next, in the same way, we pump the left rear and front right brake mechanisms in the indicated order, monitoring the fluid level in the reservoir of the main brake cylinder.
19. Pressing the brake pedal, we check the operation of the hydraulic drive and the absence of fluid leakage from the bleeder fittings. If the pedal «soft» or it falls below its normal working position, we re-confirm the tightness of the system and repeat the pumping of the hydraulic drive.
Visitor comments