


Caution: Remember that dust generated during wear of the clutch slave disk friction linings may contain asbestos, which is harmful to health. Do not blow off dust with compressed air and try not to inhale it. Do not use petroleum-based solvents to wipe clutch components - use only special brake cleaners or pure methyl alcohol. Place used rags in a hermetically sealed container.
1. The slave cylinder assembly with the release bearing is attached to the inside of the clutch dome and to remove it, it is necessary to dismantle the gearbox.
2. Wipe the outside of the cylinder thoroughly, then loosen the union nut and disconnect the hydraulic line from the cylinder (see accompanying illustration), - immediately wipe up any traces of spilled brake fluid with a rag. Unscrew the 3 mounting bolts and remove the cylinder from the gearbox input shaft.
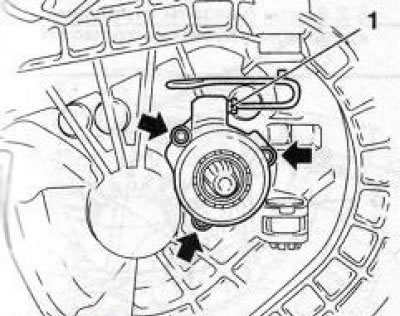
3.2 Clutch slave cylinder installation diagram - arrows indicate mounting bolts
3. Remove the sealing ring installed between the cylinder and the manual transmission housing - the ring must be replaced without fail. Take precautions against dirt getting into the box.
4. A failed slave cylinder cannot be repaired. If brake fluid leaks develop, replace the cylinder assembly.
5. Before installation, make sure that the mating surfaces of the cylinder and the manual transmission housing are absolutely clean and dry. Place the new sealing ring in the receiving groove on the transmission housing.
Note: When installing a new slave cylinder assembly, the protective clamp must be removed (red color). Lubricate the inner cylinder sealing ring with clean transmission oil and carefully install the cylinder on the manual transmission input shaft. To avoid damaging the inner sealing ring, you can use a special device.
Note: Each transmission has its own device!
6. Further installation is carried out in the reverse order of removal. Do not forget to bleed the hydraulic circuit (see Section 4).
Visitor comments