


Contents: Removal ⬇ Installation ⬇
Removal
1. Place the vehicle on a two-post lift.
2. Disconnect the battery.
3. Remove the fuel tank filler neck access hatch (figure 3.74).
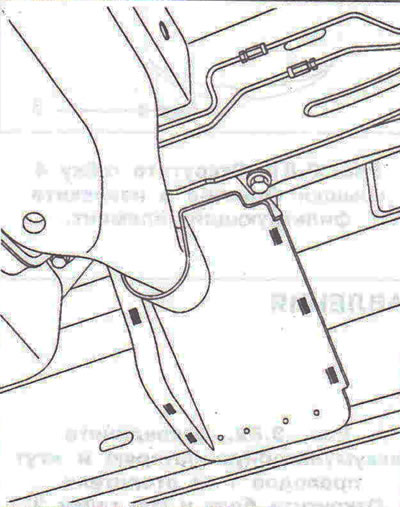
Figure 3.74. Remove the fuel tank filler neck access hatch.
4. Disconnect the anti-pressure pipe 1 and the fuel tank filler pipe 2 (figure 3.75).
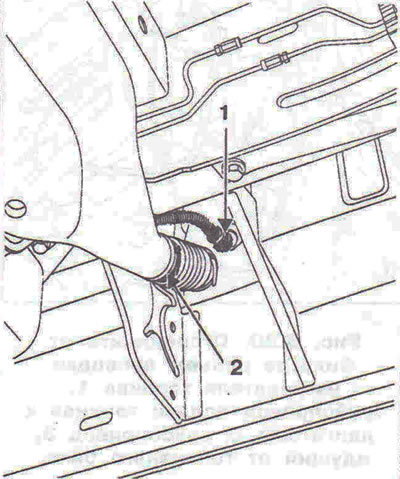
Figure 3.75. Disconnect the anti-pressure pipe 1 and the fuel tank filler pipe 2.
5. Place a hydraulic jack under the fuel tank to support it.
6. Unscrew the 3 bolts securing the fuel tank (figure 3.76).
7. Lower the fuel tank slightly to allow access to the fuel lines and wiring harness.
8. Disconnect the wiring connector 4 of the pump, the fuel drain line 5 and the fuel outlet line 6 (figure 3.77).
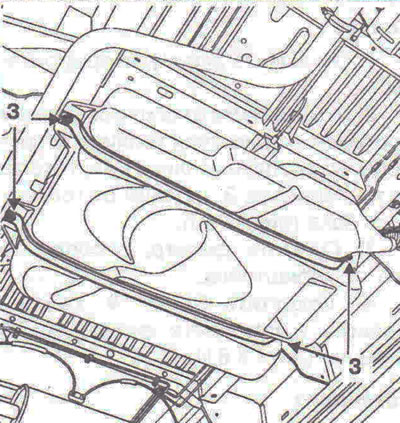
Figure 3.76. Unscrew bolts 3 securing the fuel tank.
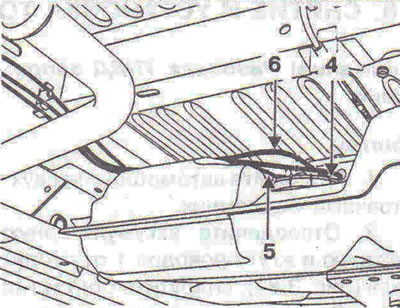
Figure 3.77. Disconnect the wiring connector 4 of the pump, the fuel drain line 5 and the fuel outlet line 6.
9. Remove the fuel tank, then drain the fuel if necessary.
10. Unscrew the pump mounting nut 7 using tool Mot. 1397 (figure 3.78).
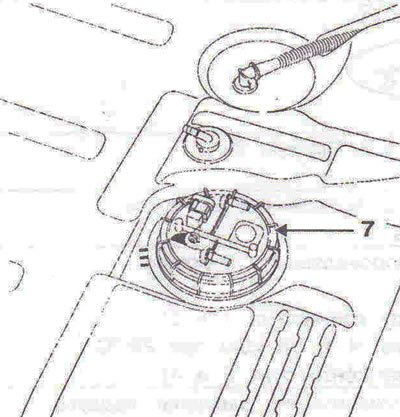
Figure 3.78. Unscrew the pump mounting nut 7 using tool Mot. 1397.
11. Allow the fuel in the sensor to drain completely, then remove the fuel pump and level sensor assembly. Be careful not to damage the float.
Note: If several hours must pass between removal and installation of the fuel pump and level sensor assembly, tighten the nut onto the tank to prevent deformation.
Installation
12. Replace the sealing ring.
13. Install the fuel pump and fuel level sensor assembly in place, positioning the sensor pointer 8 opposite the three marks 9 on the tank (figure 3.79). Install the nut and tighten it to 60 Nm. After tightening, make sure that the indicator 8 of the fuel pump and level sensor assembly is opposite the marks 9 of the fuel tank.
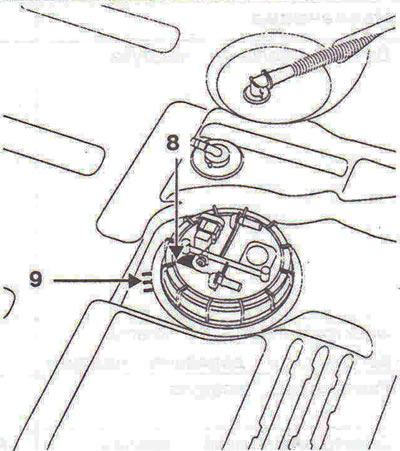
Figure 3.79. Install the fuel pump and fuel level sensor assembly in place, positioning the sensor pointer 8 opposite the three marks 9 on the tank.
14. Further installation is carried out in the reverse order of removal.
Visitor comments