
2. Remove the air cleaner to make access easier if necessary.
3. Working with the remote control rod on the servo side, retract the spring leg and release the return spring (Pic. 9.63).
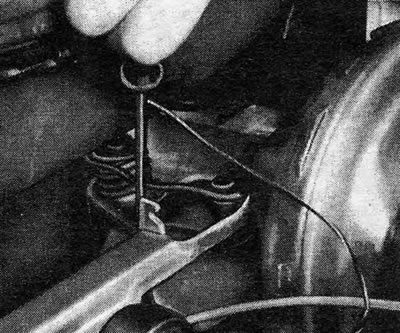
Pic. 9.63 — Removing the crank spring at the end of the remote control rod on the servo side
4. Remove the snap ring and pull out the king pin to release the remote control rod and bellcrank. Remove the kingpin using pliers (Pic. 9.64).
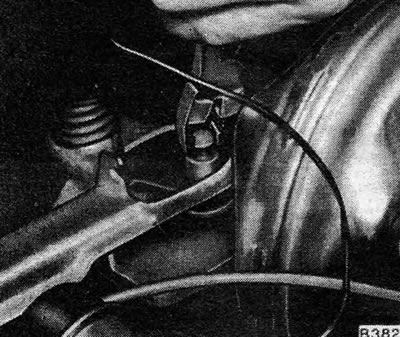
Pic. 9.64 — Removing the crank arm pin with pliers
5. Working with the remote control rod on the brake pedal side, remove the rubber cover from the crank housing.
6. Twist the remote control rod to unscrew it from the pin on the crank arm (Pic. 9.65).
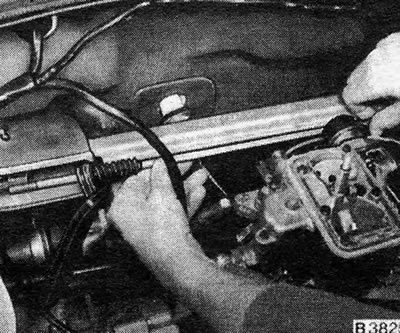
Pic. 9.65 — Unscrewing the remote control rod from the crank arm pin
7. Screw a new rod into the trunnion, making sure that the corrugated dust membranes are installed on the rod.
8. Connect the remote control rod to the bell crank at the servo assembly.
9. Install the kingpin and circlip. Connect the spring.
10. Check and adjust the remote control rod as indicated in Section 23, paragraphs 23 and 24.
11. Reinstall the parts removed at the beginning.
Visitor comments