
Figure 11.64. Sliding type hatch cover control handle
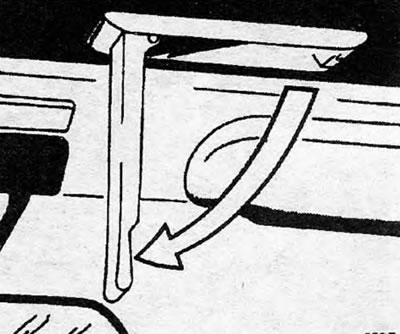
1. In order to open this type of sliding roof, it is necessary to remove the control handle from its stock until it comes out completely.
2. Slide the hatch cover as desired, and then lock it in this position by returning the control handle back to its stock.
3. To remove the sliding hatch cover, lower the handle completely down and slide the cover panel back.
4. Remove the screws from the trim of the handle stock.
5. Remove the headliner at the mounting clips.
6. Unscrew the front and rear guide plates after moving the headliner to the side (see Figure 11.65).
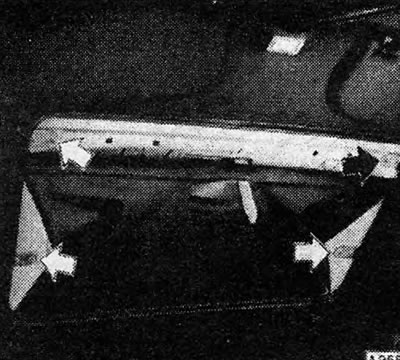
Figure 11.65. The guide plates of the sliding hatch cover are indicated by arrows
7. Fold the headliner up and forward toward the front of the vehicle, keeping the mounting springs under tension.
8. Slide the sunroof sliding panel forward along one side until the rear slide (IN) gets hurt with the side (WITH) (see Figure 11.66).
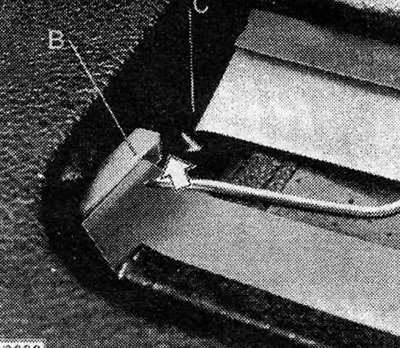
Figure 11.66. Manhole cover skid (IN) and side (WITH)
9. Remove the sunroof panel from the vehicle.
10. Reinstallation is carried out by performing the above steps in reverse order, but the following must be kept in mind.
11. Apply a small amount of lubricant to the frame runners.
12. Make sure both support arms are facing outward.
13. When installing the mounting plates, make sure that the curved media arms can move freely (see Figure 11.67).
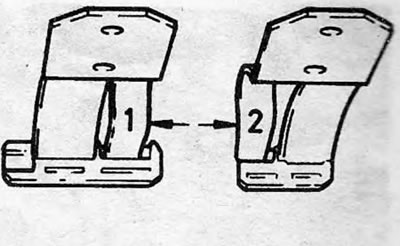
Figure 11.67. Hatch Cover Mounting Plates - Clamps Shown (1 and 2) carrier levers
Visitor comments