
Operating cables
2. Operating cables should always be replaced in pairs, even if only one is damaged.
3. After the sunroof structure has been removed, unscrew the gutter mounting screws and remove the gutter. Also remove the crank drive mechanism.
4. Remove the plugs from the rear ends of the roof rails.
5. Pull the cables out of the roof guides. Separate them from the sliding guide blocks (see Figure 11.80).
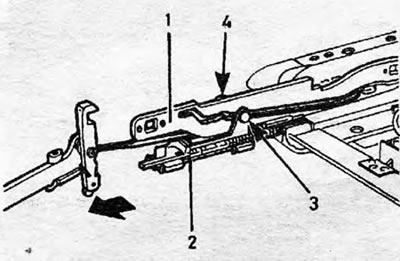
Figure 11.80. Design of the end of the operating cable.; 1. Sliding block guides; 2. Cable; 3. Bolt; 4. Retaining clamp
6. Install new cables into the roof guides. Install the sliding blocks and secure them with pins and clamps. Spring clips are placed on the outer sides of the guides (see Figure 11.81).

Figure 11.81 Installation of cables.
7. Slide the cable guides forward until the cable pins are aligned as shown in Figure 11.79. Adjust the crank drive mechanism as described above.
8. Install the roof rail caps and gutter.
Gutter guide
9. Unscrew the gutter mounting screws and remove the gutter. Also remove the crankshaft and roof rail end caps.
10. Partially pull the cables until the drain guide and tie rod can be removed from the sliding block (see Figure 11.82).
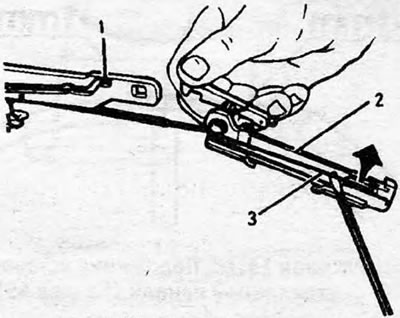
Figure 11.82 Gutter guide design. 1. Sliding block guide; 2. Drain guide; 3. Tie rod
11. Install the new guide and tie rod. Push the sliding block and gutter guide forward until the arm fits into the notch of the roof guide.
12. Adjust the cable guides and crankshaft as described in Section 51 (see points 6 and 7) and in Section 49 (see paragraphs 22 to 25 inclusive).
13. Install the roof rail caps and gutter.
Front guide
14. The process is similar to that described for removing the drain guide. The front guide is attached to the sliding block guide (see Figure 11.83).
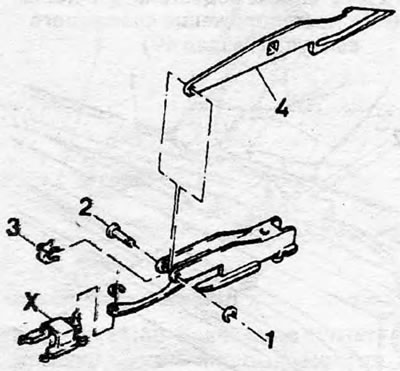
Figure 11.83. Front guide design. 1. Spring clamp; 2. Hairpin; 3. Spring clamp; 4. Front guide; X. sliding block
15. When installing, lightly lubricate the sliding block surfaces. Adjust the cable and crank guides as described above.
Sliding block
16. Proceed as if replacing the cable until you can access the slide block guide. Remove the spring clip and disconnect the sliding block from its guide (see Figure 11.84).
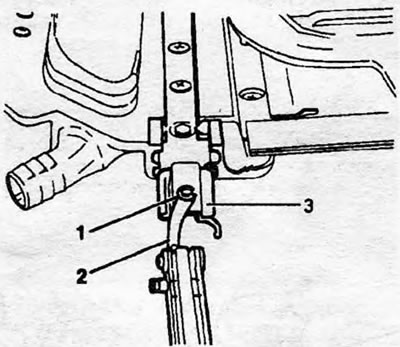
Figure 11.84. Sliding block design. 1. Retaining ring; 2. Connecting rod; 3. Sliding block
17. Install the new slide block and secure it with a new spring clip. Lightly lubricate the surfaces of the sliding block.
18. Reassembly is carried out by performing the above steps in reverse order; adjust the cable guides and crank drive as described above.
Sliding block guide
19. Again, the process is similar to that described for replacing the cable. For assembly details, refer to Figure 11.85.
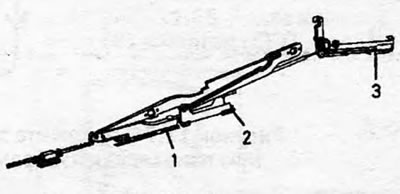
Figure 11.85. Sliding block guide design 1. Front guide; 2. Cable guide; 3. Drain guide
Visitor comments