
Warning! When installing the crankshaft bearing caps, new bolts must be used.
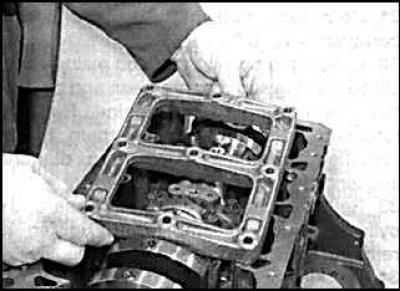
Location of the identification marks of the main bearing caps
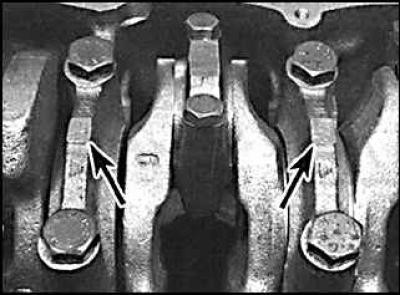
bearing caps
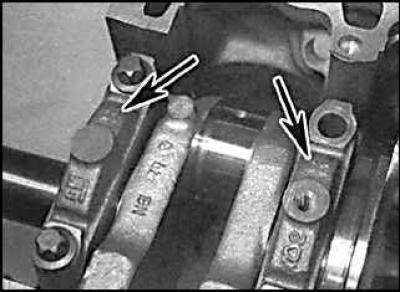
Bearing caps N1 and N2 only (indicated by arrows) are factory marked.
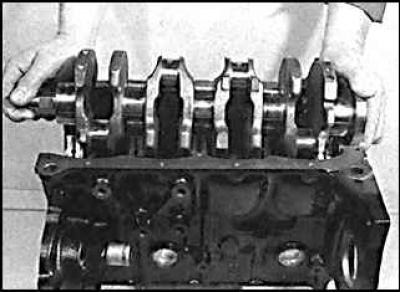
Removing the crankshaft
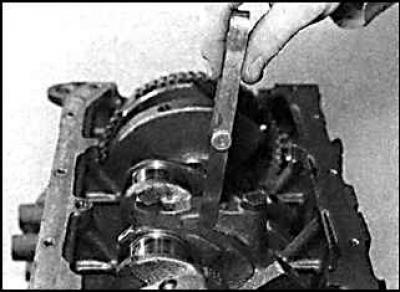
1. Remove the crankshaft sprocket, chains and flywheel.
2. Loosen the bolts evenly and gradually and remove the main bearing block from the base of the main bearing caps.
3. Remove pistons and connecting rods.
4. Check crankshaft end play.
5. Label the main bearing caps 1 to 5.
6. Gradually and sequentially unscrew the bolts securing the main bearing caps.
7. Remove the main bearing caps along with the liners.
8. Remove the crankshaft and remove the rear crankshaft oil seal. Remove the upper main bearing shells.
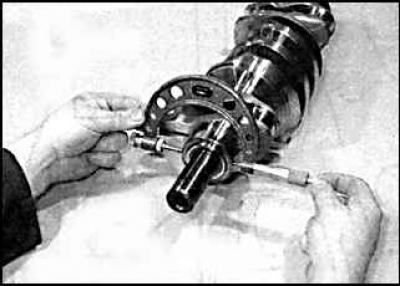
Checking the axial play of the crankshaft
The end play of the crankshaft is checked when it is installed in the engine block.
Checking the crankshaft end play using a dial gauge
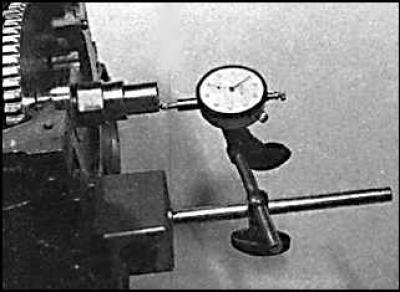
Axial play is checked with a dial indicator, the bracket of which is mounted on the engine block, and the measuring tip rests on the end of the crankshaft. By moving the crankshaft from stop to stop along the axis, measure the amount of axial play. The result of the measurement indicates the need to use new thrust half rings.
Checking the axial play of the crankshaft using feeler gauges
In the absence of a dial indicator, the axial play of the crankshaft can be measured with a feeler blade by moving the crankshaft to one side until it stops and measuring the clearance between the N 2 main bearing and the crankshaft.
1. Clean the crankshaft using an appropriate solvent and dry it with compressed air.
2. Check the crankshaft main and connecting rod journals for wear, corrosion and cracks.
3. Wear of the connecting rod journal is characterized by metallic knocks during engine operation, especially under load at low speeds and a decrease in oil pressure.
4. The wear of the crankshaft main journals is characterized by strong engine vibration and metallic knock, which increases with increasing engine speed, as well as a decrease in oil pressure.
5. Check the crankshaft journals for roughness. Any noticeable roughness indicates that the crankshaft needs to be reground or replaced.
6. If the crankshaft has been reground, check for burrs around the grease holes. If there are burrs, remove them with a fine file or scraper and carefully clean the holes and channels from chips.
7. Using a micrometer, measure the diameter of the crankshaft main and connecting rod journals and compare the results with specifications. Measure the necks at several points, both in diameter and along the length of the neck, which will reveal ovality and taper, if present.
8. Check the oil seal contact surfaces at each end of the crankshaft for wear or other damage. If the wear of the neck from the seal is large, then the crankshaft may need to be replaced.
9. On some engines, if the crankshaft journals have been ground to a repair size, it is necessary to install oversized liners.
Installing the crankshaft
1. Remove the crankshaft from the cylinder block.
2. Clean the back of the bushing and its mounting location in the cylinder block and main bearing caps. Install the earbuds in place.
3. Lubricate the bearing surface with clean engine oil and install the crankshaft into the engine block.
4. Measure the end play of the crankshaft.
5. Lubricate the lower bearing shells in the main bearing caps with clean engine oil and check that the tabs on the bearing shells are in the cap grooves. Install the main bearing caps one through four and screw them in without tightening.
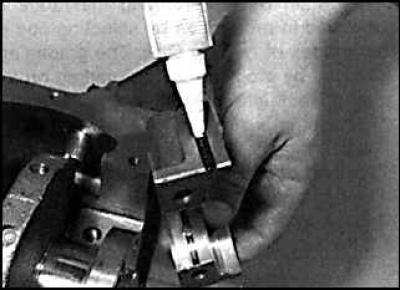
6. Check that the rear bearing cover is clean and dry, then apply a layer of sealant to the grooves on each side of the cover and install the cover to the engine block.
7. Lubricate the crankshaft bearing cap bolts with clean engine oil, insert them into the caps and tighten by hand.
8. Gradually and in a diagonal sequence from the center to the edge, tighten the bearing cap bolts in several steps.
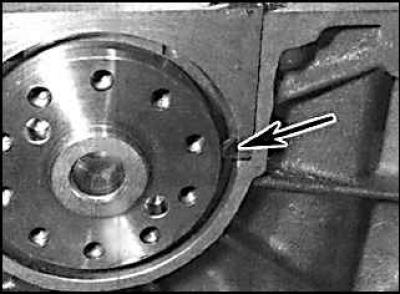
9. After tightening the main bearing cap bolts, press the sealant into the groove of the crankshaft rear cover. Filling the groove with sealant must be done until the sealant emerges from the hole indicated by the arrow. Wipe off excess sealant.
10. Check that the crankshaft rotates smoothly and without binding.
11. Install pistons with connecting rods.

12. Check that the bearing caps and main bearing block are clean and dry. Install the main block to the engine with the tube on the block pointing towards the timing chain. Then install the bolts and in a diagonal sequence from the center to the edge, tighten the bolts to the required torque.
13. Install a new left crankshaft oil seal, then install the flywheel, chains, sprockets and cylinder head.
Visitor comments