
Disassembly
1. Remove the camshaft, levers and hydraulic lifters of the cylinder head. Remove the glow plugs and remove the cylinder head from the engine.

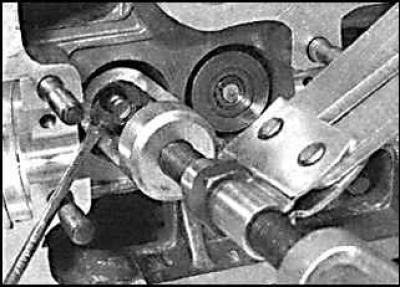
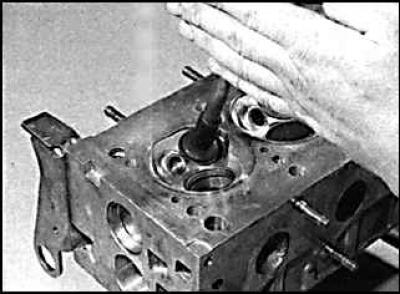
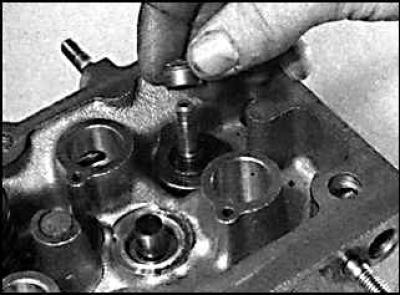
2. On all models, using a valve spring compressor, compress each spring and remove cotters from the valve face.
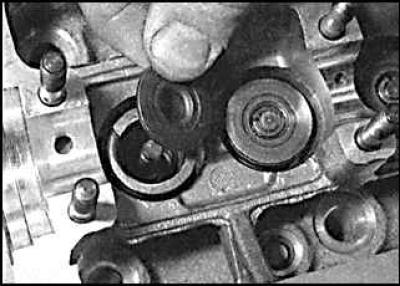
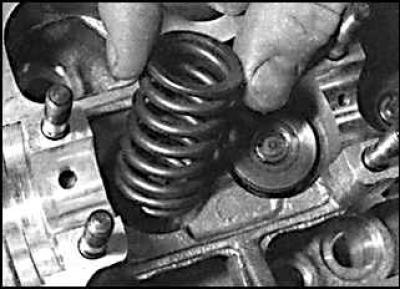
3. Remove the spring compressor and remove the spring cup and spring.
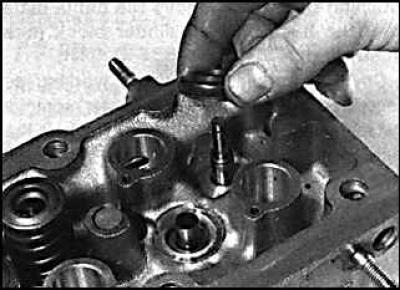
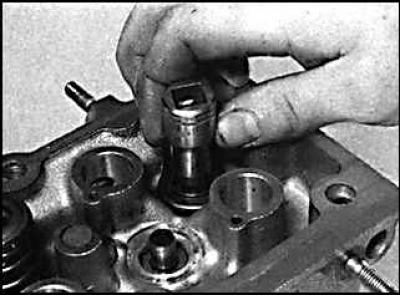
4. Using pliers, being careful, remove the oil seal.
5. Remove the spring seat.
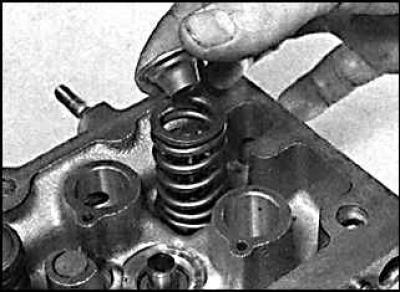
6. When the valve spring is compressed and the spring cup is not removed from the crackers, it is necessary to hit the spring cup with a hammer through a block of wood, which will release the crackers.
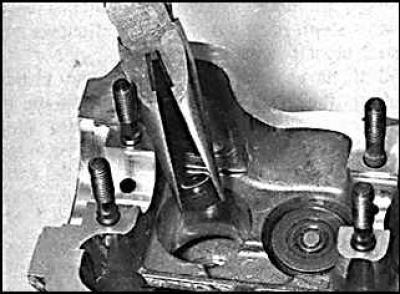
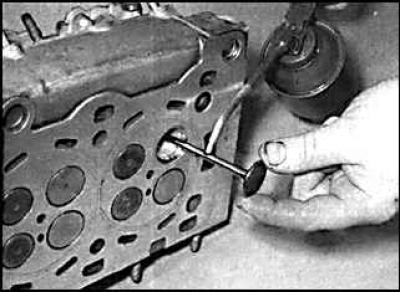
7. Remove the valve through the combustion chamber. Store each valve in a separate plastic bag along with the spring plate, spring, spring seat and crackers for further installation in their places.
Cleaning the cylinder head
1. Remove the remnants of the old gasket from the cylinder head.
2. Clean the carbon from the combustion chambers, then wash the head in an appropriate solvent.
3. Remove carbon deposits from the valve, possibly even with a wire brush.
Examination
Cylinder head
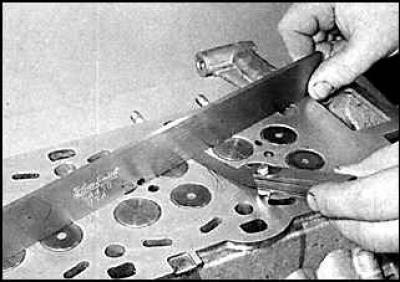
Checking the flatness of the cylinder head
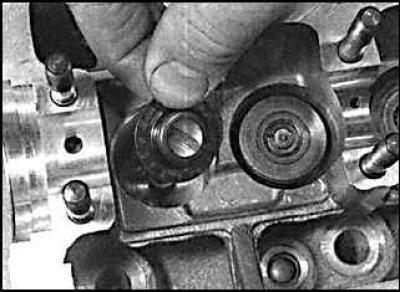
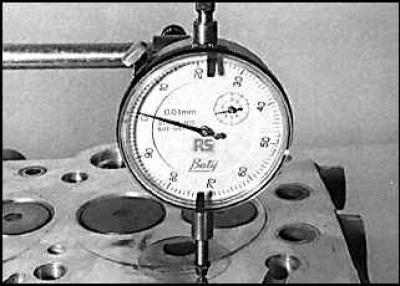
Measurement of swirl chamber protrusion from the cylinder head
1. Carefully inspect the cylinder head for cracks or other damage. If there are cracks, the head must be replaced.
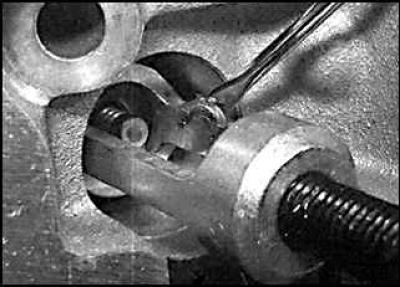
2. Using a metal ruler and feeler gauge, check the flatness of the mating surface of the cylinder head. With a non-flatness of more than 0.1 mm, it is necessary to regrind the head, while its height must meet the requirements.
3. Check the condition of the valve seats. If they are burnt, worn, or defective, they must be replaced. If the wear of the valve seat is negligible, they must be lapped. Check the valve guides for wear by inserting the valve stem into them and moving it to the side. The movement should be small. If movement is excessive, remove valve and measure valve stem diameter. Replace valve if necessary. If the valve stem is not worn, the guide bushing is worn and needs to be replaced. Valve guides should be replaced at a service station.
4. If the valve seats must be reground, this operation must be carried out after the installation of new valve guides.
Valves
1. Check each valve seat for localized corrosion, burns, cracks, and general wear. Check the valve stem for wear and bending. Check valve stem end wear. If there are any defects, the valve must be replaced.
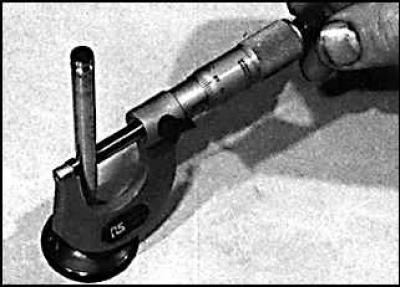
2. Using a micrometer, measure the diameter of the valve stem at several points along the length of the stem. Any significant difference in the data obtained indicates wear on the valve stem and a mandatory replacement of the valve.
3. If the valves are in satisfactory condition, they should be inserted into their places and lapped. If the valve discs or seats are badly worn, they must be machined or even replaced before lapping.
Lapping of valves
1. Install the cylinder head with the combustion chambers up on wooden blocks.
2. Lubricate the valve seat and valve seat with lapping paste, place the valve in place and place the suction cup with holder on the valve seat (pen). By rotating the valve with the suction cup in different directions, grind the valve, and periodically it is necessary to lift the valve to redistribute the lapping paste.
3. If coarse lapping paste is used, lap until a uniform matte surface appears on the valve seat and valve.
4. Then wipe off the paste compound used and repeat the lapping process with the fine paste. Lapping is carried out until a light gray-matte color appears.
5. Carefully remove traces of lapping paste using an appropriate solvent.
Valve elements
1. Check valve springs for signs of damage.
2. Install the springs with one of the ends on the frame, check the deviation of the spring axis from the vertical plane and the length of the springs. If one of the springs is damaged, all the springs in the set must be replaced.
3. Replace oil seals regardless of their condition.
Cylinder head assembly
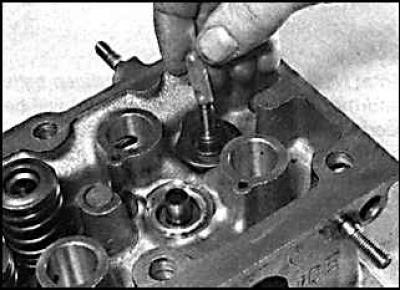
1. Lubricate the valve stems with engine oil and insert them into place. Install the valves in the places where they were lapped.
2. Install the spring seat.
3. Install a thin walled protective sleeve on the valve stem.
4. Dip the slinger cap in fresh engine oil and install it over the valve stem, being careful not to damage its sealing lips. To install the oil seals, use a special metal mandrel.
5. Install the valve spring and spring cup.
6. Using the special tool, compress the valve spring and install the crackers in the recess of the valve stem and lubricate them. Remove the spring compressor tool. Repeat this operation for the rest of the valves.
7. Tap the end of the valve stem with a hammer through a wooden block so that all valve elements are clearly installed in their places.
8. Install the head to the cylinder block and install the hydraulic tappets, levers and camshaft.
Visitor comments