
Warning! When installing the camshaft sprocket and upper guide, new bolts must be used.
Removing
1. Remove a wire of weight from the accumulator and a cover of a head of the block of cylinders.
2. Remove the brake vacuum pump.
3. Set the piston of the first cylinder to top dead center on the compression stroke and fix the crankshaft.
4. To improve access to the fuel pump sprocket cover, do the following:
- remove the air filter cover and front exhaust pipe;
- remove the auxiliary drive belt;
- unscrew the mounting nut from the power unit suspension frame and raise the engine so as not to deform the hoses and pipes.
5. Remove the upper chain tensioner.
6. Remove the drive belt tensioner.
7. Unscrew bolts and remove a cover of an asterisk of the fuel pump.
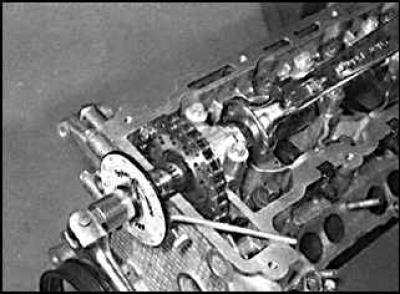
8. Apply alignment marks between the top chain and sprockets, and between the camshaft sprocket and camshaft.
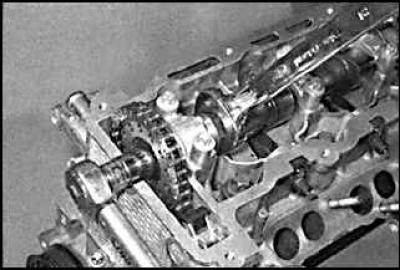
9. Unscrew the bolts and remove the upper chain guide.
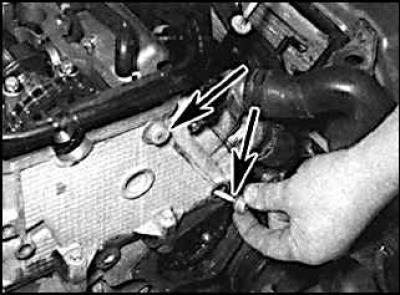
10. Before unscrewing the upper chain guide bolts (indicated by arrows) they must be heated in order to soften the composition that prevents the bolts from unscrewing.
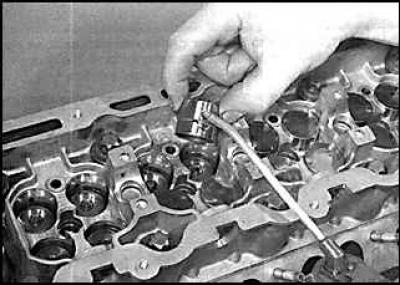
11. Using a wrench, fix the camshaft from turning and unscrew the bolts securing the camshaft sprocket. Before unscrewing the bolt, remove the crankshaft lock pin and after unscrewing the bolt, install the pin in place.
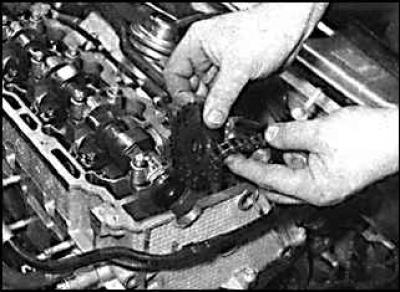
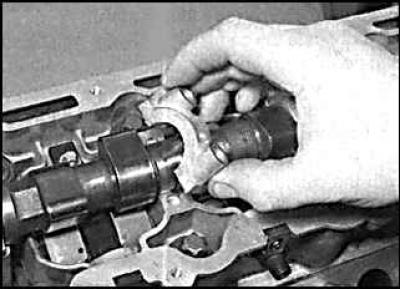
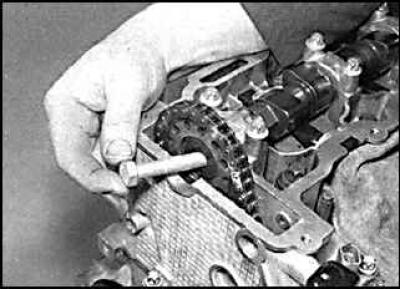
12. Remove the chain from the camshaft sprocket and remove the sprocket from the engine.
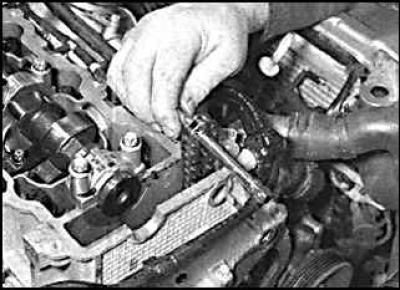
13. When removing the sprocket, place a screwdriver or steel rod under the chain to prevent the chain from falling into the cylinder head.

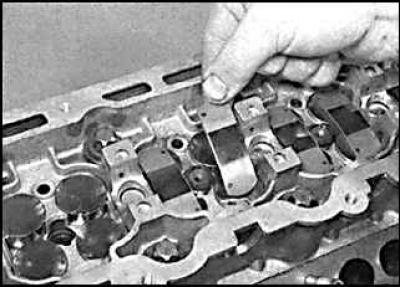
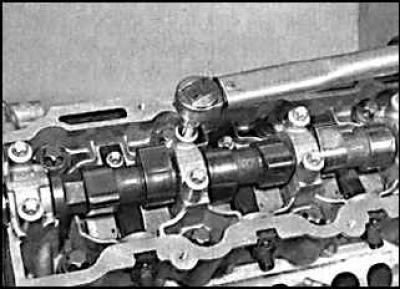
14. Pay attention to identification marks (indicated by arrows) on the camshaft bearing caps. The covers are numbered 1 to 5 from the front of the engine.
15. Working in a spiral from outside to inside, loosen the camshaft bearing caps half a turn in each pass until the bolts are completely unscrewed. This is necessary to gradually and evenly relieve the pressure of the valve springs. Remove the camshaft bearing caps.
16. Remove the levers from the top of the cylinder head and store them in separate numbered bags.
17. To remove the hydraulic tappets, remove the cross fuel feed pipe and, using a rubber suction cup or magnet, remove the hydraulic tappets and place them in a suitable container.
Examination
1. Check the running surfaces of the camshaft bearings and cam contours for signs of wear. If there is any wear, the camshaft must be replaced.
2. Check crankshaft end play. If the axial play exceeds the allowable limits, the camshaft must be replaced.
3. Check up a condition of hydraulic pushers and sockets for pushers in a head of the block of cylinders.
Installation
1. Lubricate the hydraulic tappets with clean engine oil and reinstall them. Install the injector cross tube.
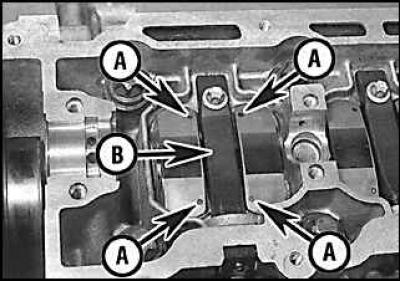
2. Install the camshaft levers in the cylinder head with marks (A) to the transverse fuel supply pipe (IN).
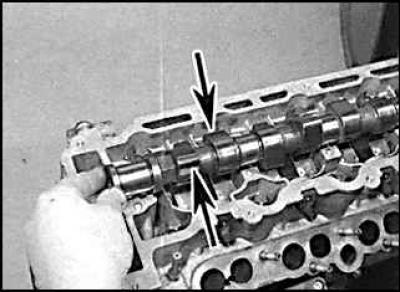

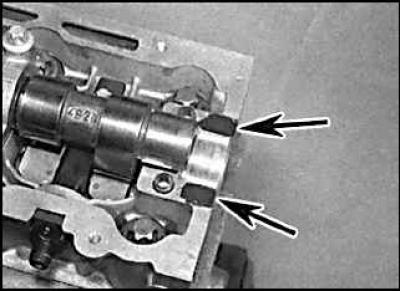
3. Lubricate the camshaft levers with clean engine oil and install the camshaft into the cylinder head. At the same time, the cams of the first cylinder (indicated by arrows in the figure on the left) point upwards, and the groove on the left end of the camshaft (indicated by the arrow in the figure on the right) must be parallel to the surface of the cylinder head.
4. Check that the mating surfaces of the bearing caps and cylinder head are clean and dry and lubricate the camshaft journals and cams with clean engine oil.
5. Apply a thin coat of sealant to the upper surface of the cylinder head mating with the left camshaft bearing cap and install the cap. Places of application of sealant are indicated by arrows.
6. Install the camshaft bearing caps according to the identification marks.
7. Tighten the bearing cap bolts gradually and in sequence, turning each bolt half a turn in one pass, until each cap contacts the cylinder head. Then, in the same sequence, tighten the bolts in several stages to the required torque. Gradual and even tightening of the bolts is necessary to evenly compress the valve springs.
8. Using the marks previously made, check that the top chain is correctly installed on the fuel pump sprocket and fit the chain onto the camshaft sprocket. Install the sprocket on the end of the camshaft and install a new mounting bolt.
9. Install the top chain guide.
10. Using the locking pins, check that the timing mechanism is correctly installed. Remove the lock pins.
Secure the camshaft against rotation and tighten the camshaft sprocket bolt in several stages.
11. Tighten the camshaft mounting bolt to the required angle.
12. Install the upper chain tensioner.
13. Check that the mating surfaces of the fuel pump sprocket cover and chain cover are clean and dry. Install the fuel pump sprocket cover with a new gasket or a thin layer of sealant and tighten the cover bolts to the correct torque.
14. Install the drive belt tensioner.
15. Install the right power unit support and lower the engine.
16. Install the cylinder head cover.
17. Install the front exhaust pipe, air cleaner housing and crankshaft sensor.
18. Install the brake vacuum pump.
Visitor comments