
OpelBook.ru
Cars AvtoVAZ Cars Mitsubishi Cars BMW Cars Mercedes Cars Nissan Cars Toyota Cars Chevrolet
English Русский
Български
Беларускі
Український
Српски
Hrvatski
Română
Polski
Slovenský
Magyar
 |  Sitemap  |  Contacts  |    


Main Astra Corsa Insignia Kadett Omega Vectra Zafira Others Articles
Omega A (1986-1993) Omega B (1993-1999) Omega B2 (1999-2003)
  • Main
  • Omega
  • Omega B
  • Power unit
  • Diesel engine 2.0 l
  • Oil radiator — removal and installation

Oil radiator — removal and installation (Opel Omega B)

            0

Contents: Removal ⬇ Installation ⬇
The oil cooler is mounted on the front left side of the engine block. On pre-1998 engines, the oil cooler is located inside the oil filter housing, and on 1998 and later models, it is bolted to the front of the oil filter housing.

Removal


1. Raise the front of the vehicle and support it on stands.

Models before 1998.


2. Clamp the coolant supply hoses to the oil cooler. Loosen the clamps and remove the hoses from the radiator.

3. Wipe the area around the oil filter housing, remove the bolts and remove the housing and gasket from the cylinder head.
3. Wipe the area around the oil filter housing, remove the bolts and remove the housing and gasket…


3. Wipe the area around the oil filter housing, remove the bolts and remove the housing and gasket…


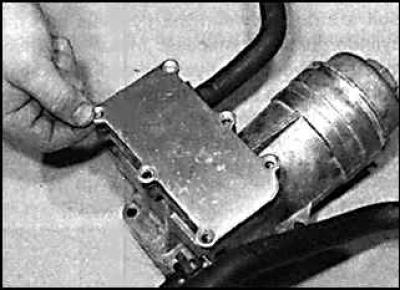
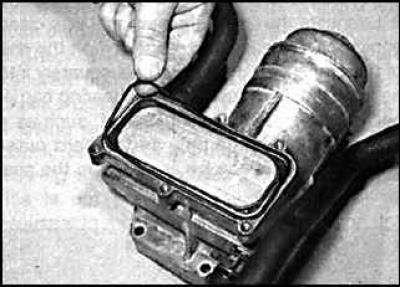
4. Unscrew the screws and remove the oil cooler cover (drawing on the left) and the gasket from the front of the oil filter housing (drawing on the right).


4. Unscrew the screws and remove the oil cooler cover (drawing on the left) and the gasket from the…


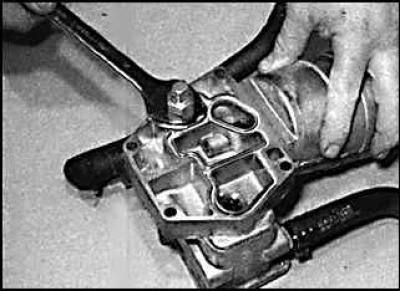
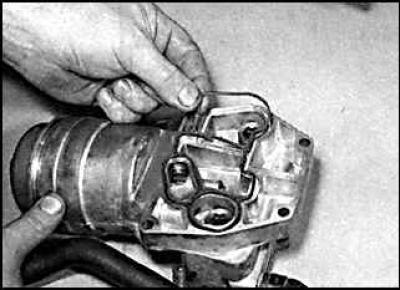
5. Remove the bolts from the rear of the oil filter housing
5. Remove the bolts from the rear of the oil filter housing

5. Remove the bolts from the rear of the oil filter housing


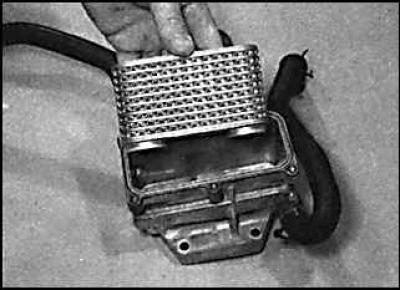
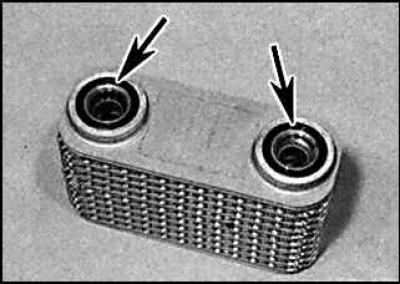
6. Remove the oil cooler (drawing on the left) together with sealing rings (indicated by arrows in the figure on the right).

Models since 1998.


7. Clamp the coolant supply hoses to the oil cooler. Loosen the clamps and remove the hoses from the oil cooler.


8. Wipe the area around the oil cooler, remove the bolts and remove the oil cooler and gasket from the oil filter housing.

Installation


Installation


(Text copied from an internet website: opelbook.ru)

Installation is performed in the reverse order of removal. In this case, it is necessary to install a new gasket and sealing rings.


This article is available at russian, bulgarian, belarusian, ukrainian, serbian, croatian, romanian, polish, slovak, hungarian
Checking the article: Fedorova Varvara

Share information:

Previous articles
Opel Omega B: Diesel engine 2.0 l
Next articles

Oil pump — removal, inspection and installation
Oil pan — removal and installation
Cylinder head
Camshafts and tappets
Chains and sprockets
Chain tensioners — removal and installation
Crankshaft sealing rings
Flywheel — removal, inspection and installation
Powertrain suspension — check


See similar ones from other Opel car manuals:
▶ Radiator — removal, inspection and installation Opel Astra F (1991-1998, petrol)
▶ Removal and installation the cooling system radiator Opel Corsa B (1993-2000)
▶ Replacing the power steering radiator Opel Insignia A (2008-2017)
▶ Removal and installation the radiator Opel Kadett D (1979-1984)
▶ Inspection and cleaning of the radiator Opel Vectra A (1988-1995, petrol)
Link to this page in different formats

Visitor comments


No comments yet


How much will 17 + 11 =


Omega B2 (1999-2003) 
  • General information
  • User manual
  • Maintenance
  • Troubleshooting
  • Power unit
  • Petrol 4-cylinder
  • Petrol 6-cylinder
  • Engine overhaul
  • Diesel engines 2.0 l
  • Diesel engines 2.5 l
  • Cooling and heating
  • Injection system (gasoline)
  • Fuel system (diesel)
  • Fuel system
  • Exhaust system
  • Ignition system
  • Transmission
  • Clutch
  • Mechanical gearbox
  • Automatic gearbox
  • Main gear and shafts
  • Chassis
  • Brake system
  • Car suspension
  • Steering
  • Body
  • Body elements
  • Electrical equipment
  • Equipment and devices
  • Electrical circuits
Omega B (1993-1999) 
  • General information
  • User manual
  • Tips for the car owner
  • Maintenance (gasoline)
  • Maintenance (diesel)
  • Power unit
  • Petrol engine SOHC 2.0 l
  • Petrol engine DOHC 2.0 l
  • Petrol engines 2.5 and 3.0 l
  • Repair of gasoline engines
  • Diesel engine 2.0 l
  • Diesel engine repair 2.0 l
  • Diesel engine 2.5 l
  • Cooling and heating
  • Power system (petrol)
  • Emission reduction
  • Fuel system (diesel 2.0 l)
  • Fuel system (diesel 2.5 l)
  • Launch system
  • Ignition system
  • Transmission
  • Clutch
  • Mechanical gearbox
  • Automatic gearbox
  • Drive shafts
  • Chassis
  • Brake system
  • Wheel suspension
  • Steering
  • Body
  • Exterior
  • Interior
  • Doors and windows
  • Electrical equipment
  • Equipment and devices
  • Wiring diagrams (early)
  • Wiring diagrams (late)
Omega A (1986-1993) 
  • General information
  • User manual
  • Maintenance
  • Changes and additions
  • Troubleshooting
  • Power unit
  • Gasoline engines
  • Diesel engines
  • Cooling system
  • Fuel system (gasoline)
  • Fuel system (diesel)
  • Ignition system
  • Transmission
  • Clutch
  • Mechanical gearbox
  • Automatic gearbox
  • Cardan shaft
  • Drive shafts
  • Chassis
  • Brake system
  • Car suspension
  • Steering
  • Body
  • Exterior
  • Interior
  • Electrical equipment
  • Power devices
  • Lighting and appliances
  • Electrical circuits
OpelBook.ru © 2017–2026 · Mobile version · · Sitemap: EN BG BY UA RS HR RO PL SK HU · Feedback · Site search
Astra F, petrol · Astra G, petrol · Astra G · Astra H · Astra J, petrol · Corsa B · Corsa C, petrol · Corsa C · Insignia A · Kadett D · Kadett E · Omega A · Omega B · Omega B2 · Vectra A, petrol · Vectra A · Vectra B, petrol · Vectra B · Vectra C · Zafira A, petrol · Frontera A, petrol · Frontera B · Ascona C · Vivaro A ·
We want your visit to be comfortable 🤝! We use cookies 🍪 to make that happen.