
Note: See the caution at the beginning of this chapter. A minor leak from the radiator can be repaired without removing it with a tool "Holts Radweld".
The heatsink can be removed along with the fan and shroud. If desired, the fan and its casing can be removed.
Disconnect the negative battery terminal.
Drain the coolant from the cooling system.
If required, disconnect the wiring connectors from the fan and switch at the bottom right of the radiator.
Disconnect the top hose from the radiator.
On automatic transmission models, clamp the radiator hoses, then disconnect them.
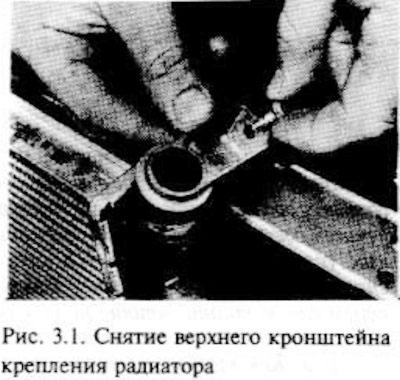
Loosen the bolts of the two upper radiator brackets and remove them.
Lift the radiator up to release the bottom bosses and remove it from the vehicle.
If there is a suspicion of clogging of the radiator, it is necessary to flush (countercurrent). Remove dirt from radiator fins with compressed air (wear safety goggles) or use a soft brush. Please note that the ribs can be easily damaged, in addition, they are sharp.
If necessary, you can have a specialist check the radiator by testing "in the duct" to detect internal blockages.
A leaking radiator can be repaired by a specialist. Do not attempt to weld or solder a leaking heatsink as you may damage the plastic parts.
Minor radiator leaks can be repaired with radiator sealant as instructed.
If the radiator needs to be sent in for repair or replaced, remove all hoses and the fan switch.
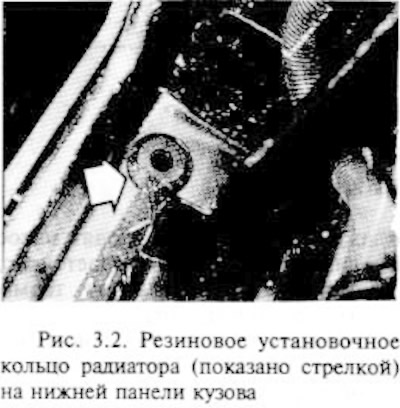
Check the condition of the radiator mounting rubber gaskets and replace them if necessary.
Installation is carried out in the reverse order of removal, taking into account the following points.
Make sure the radiator rubber gaskets are in good condition; if necessary, replace them.
If required, install new o-rings when connecting the transmission fluid heat exchanger hoses. Add fluid if necessary.
Fill the cooling system.
Visitor comments