
2. Move the selector lever to position «N».
3. Remove the dipstick from the pipe.
4. Unscrew the dipstick tube from the hanger, then cut the strap and separate the filler tube from the receiver tube.
5. Unfasten the cooling fan shroud from the radiator.
6. Disconnect the lowering cable (kickdown) from the throttle lever, then squeeze the cable housing and disconnect it from the suspension. On carburetor models, first remove the air filter as described in Section 3.
7. Disconnect the inhibitor switch plug located on the baffle and pull the wiring harness out of the filler tube.
8. Turn off a forward distributive pipe of system of release from a fixing arm of an intermediate part and a final collector. Also unscrew the mounting bracket and heat shield.
9. Loosen the slider coupling nut on the front of the driveshaft one full turn.
10. Remove the bolts securing the front driveshaft flex plate to the transmission output flange. Slide the shaft back from the output flange and tie it aside.
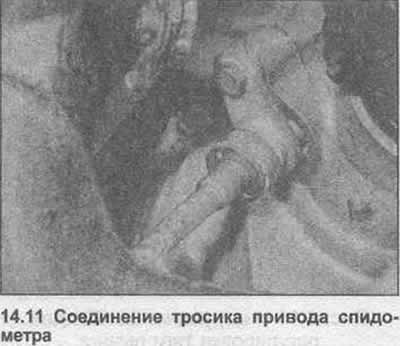
11. Unscrew the knurled nut, disconnect the speedometer drive cable from the transmission (photo).
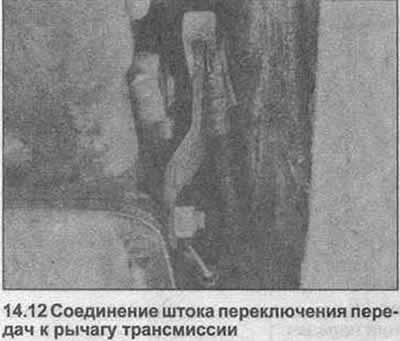
12. Disconnect the shift rod from the transmission lever by releasing the spring clip and pivot pin (photo).
13. Place a container under the transmission pan, unscrew the drain plug and drain the fluid (photo). Finally, install and tighten the drain plug.

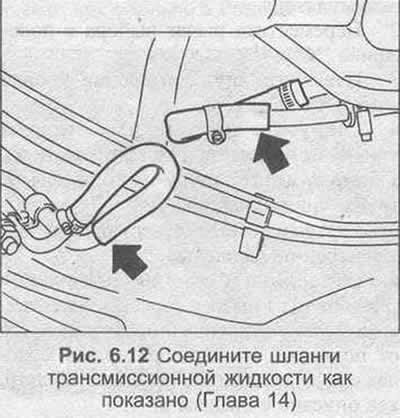
14. Loosen the brackets, disconnect the flexible rubber hoses from the bottom. To ensure proper assembly and prevent dust and dirt from entering, disconnect the diagonally opposite ends of the hoses, then reattach them to adjacent pipes.
15. Remove the bolts securing the front suspension to the engine.
16. Remove the transmission front cover and front suspensions.
17. Turn off bolts fixing the hydrotransformer to a driving disk. To gain access to all bolts, turn the engine with a wrench on the crankshaft pulley bolt.
18. Disconnect the torque converter from the drive plate.
19. Support the transmission with a jack.
20. Remove the two lower bolts securing the transmission to the engine.
21. Unscrew the rear mount cross member from the bottom, then lower the transmission slightly.
22. Disconnect wires from solenoid valve and downshift mechanism (kickdown).
23. Remove the remaining bolts securing the transmission to the engine.
24. Lower the transmission and move it away from the engine, making sure the torque converter remains with the pump.
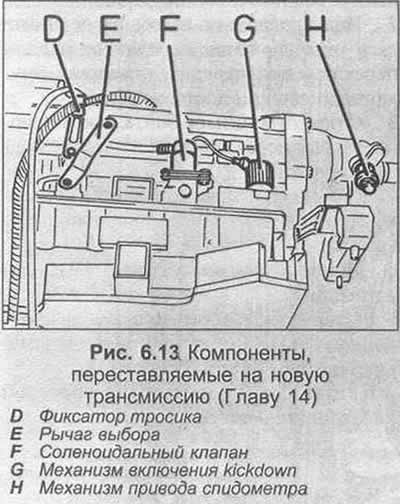
25. If a new transmission is being installed, the following parts must be moved from the old block:
- Rear mount crossbar
- liquid lines
- Inhibitor switch and wiring
- cable lock
- Selection lever
- Solenoid valve
- Downshift mechanism (kickdown)
- Speedometer drive mechanism
26. Installation - Reverse the removal procedure, but complete the following additional steps:
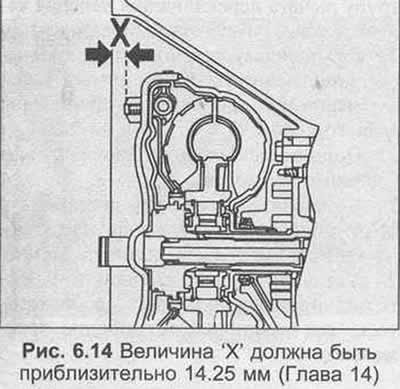
- (a) Before connecting the transmission to the engine, check that the torque converter is in the correct position. Value «X» must match the one shown in Fig. 6.14
- (b) Apply a small amount of grease to the torque converter center pin
- (c) Apply locking compound to the rear mount cross member bolt threads
- (d) Tighten all nuts and bolts to the specified torque specification
- (e) Adjust the lowering cable (kickdown) (Chapter 16), and selector lever rod (Chapter 17)
- (j) Fill the transmission with the specified fluid (Chapter 2)
Visitor comments