


Contents: Adjustment on a removed carburetor ⬇ Adjustment on the car ⬇ Checking and adjusting the starting…⬇ Adjusting the air damper drive cable ⬇ Adjusting the fuel level in the…⬇ Adjusting engine idle speed ⬇
Adjustment on a removed carburetor
Move the air damper control lever all the way to the stop and make sure that the air damper is completely closed.
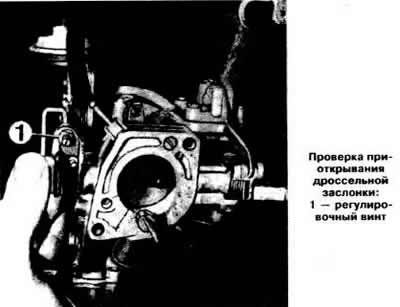
Measure the throttle valve opening value with a drill from the side of the idle transition system gap, which should be within 0.6-0.7 mm. If necessary, obtain the required opening value with stop screw 1 (see photo) of the throttle valve.
Adjustment on the car
Move the air damper control lever all the way to the stop and make sure that the air damper is completely closed.
Start the engine and check the fast idle speed, which should be within 3600-4000 rpm.
If the engine speed does not fit within the specified limits, use the stop screw 1 of the throttle valve to set the required engine crankshaft speed at fast idle.
Checking and adjusting the starting gap of the air damper on a car
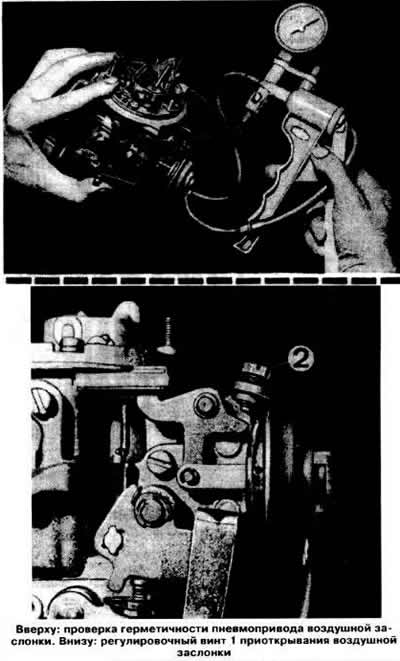
Checking and adjusting the starting clearance of the air damper should be done only with a fully functional pneumatic drive of the air damper. To do this, make sure that the pneumatic drive is tight by creating a vacuum in it that should not change.
Remove the air filter.
Move the air damper control lever all the way to the stop and make sure it is completely closed.
Start the engine and check the air damper starting clearance by inserting a drill between the lower edge of the damper and the carburetor wall. The starting clearance should be within 4.25-4.75 mm. If necessary, set the required starting clearance with adjusting screw 1 (see photo) for opening the air damper.
Adjusting the air damper drive cable
Loosen the cable fastening.
Tighten the cable fastening tab so that the distance between the tab and the end of the cable sheath (dimension "X", see photo) is within 25-30 mm.
Material provided by this website OPELBOOK
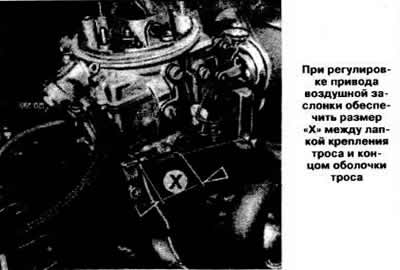
Insert a 4 mm drill bit between the choke control handle on the instrument panel and the threaded end of the drive cable, then tighten the cable end clamp bolt.
Remove the drill and ensure that the required operating clearance and tension of the air damper drive cable are present.
Adjusting the fuel level in the float chamber
The fuel level in the float chamber can be adjusted directly on the vehicle or on the removed carburetor.
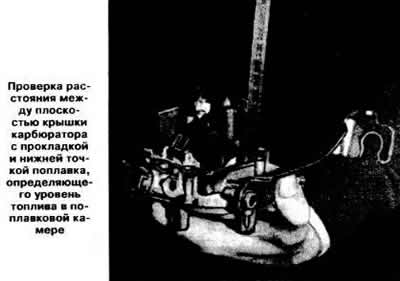
Remove the carburetor cover, place it in a vertical position and measure the distance between the plane of the cover with the sealing gasket and the lowest point of the float, which should be within 23.5-24.0 mm.
The check can also be carried out with the carburetor cover in a horizontal position, turning it upside down with the float. In this case, the specified size should be 37 mm.
The adjustment is made by bending the float tongue.
Adjusting engine idle speed
Before adjusting the engine idle speed, perform the following operations:
- make sure the air damper is fully open;
- warm up the engine. To do this, let the engine run at a crankshaft speed of about 2000 rpm until the thermostat opens. In no case should you warm up the engine at idle, because if the engine runs for several minutes at idle, then the measurements of the carbon monoxide content in the exhaust gases will be distorted;
- check the cleanliness of the air filter element and replace it with a new one if necessary (when adjusting the engine idle speed, do not remove the air filter);
- check the functionality of the ignition system and the ignition timing;
- check for air leaks, paying particular attention to the connection of the vacuum hoses and the condition of the throttle body gasket;
- make sure there are no significant exhaust gas leaks in the exhaust tract;
- make sure that powerful current consumers (electric fan of the engine cooling system, headlights, rear window heating element, etc.) turned off.
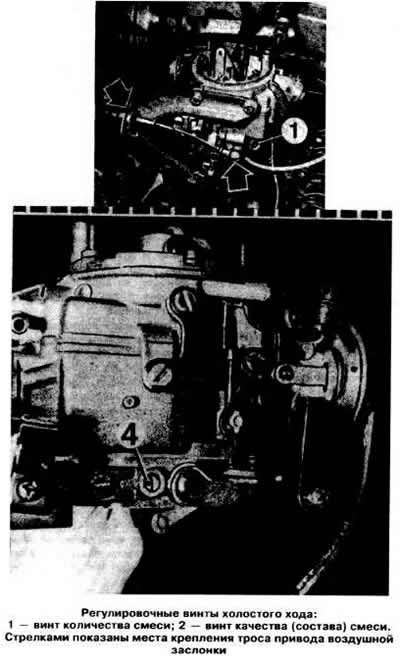
Using mixture quantity screw 1 (see photo), set the engine crankshaft speed within 850-900 rpm.
It is best to adjust the carbon monoxide (CO) content in the exhaust gases using a gas analyzer. If you do not have one, adjust the CO content as follows;
- make sure that the idle speed is within the specified limits;
- remove the plug of the adjusting screw 2 (see photo) of the quality (composition) of the mixture and. turning the screw, achieve the highest crankshaft speed;
- using adjusting screw 1, increase the idle speed by 50 rpm, then using adjusting screw 2, decrease the speed by the same amount;
- after adjustment, install a new plug on the mixture quality (composition) adjustment screw.
The CO content is adjusted using a gas analyzer as follows:
- remove the plug of the adjusting screw 2 for the mixture quality (composition) and, by turning the screw, achieve a CO content in the exhaust gases within 0.5-1.5%;
- if necessary, use screw 1 to restore the crankshaft speed to 850-900 rpm;
- repeat the specified operations until the required values of rotation speed and CO content are simultaneously obtained;
- after adjustment, install a new plug on the mixture quality (composition) adjustment screw.
Visitor comments