
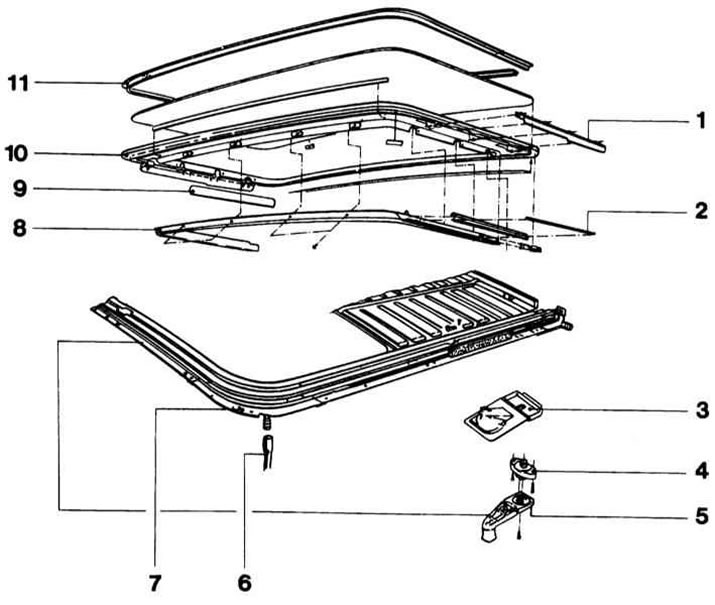
1 - Side visor
2 - Brush
3 - drive cover
4 - Crank drive
5 - Drive handle
6 - Water drain hose
7 - Drive housing
8 - edging
9 - Side visor
10 - Glass cover
11 - Sealant, not separately replaced
Sliding Roof Panel Assembly Components
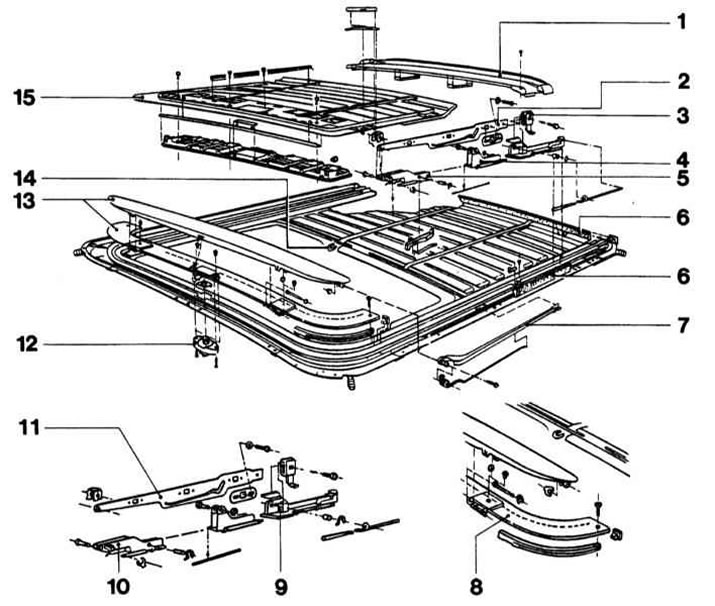
1 - Drainage
2 - Rocker guide
3 - Clamp
4 - Rear guide
5 - Front guide
6 - Seal
7 - Wind deflector lever
8 - Wind deflector with cover
9 - Rear guide
10 - Front guide
11 - Rocker guide
12 - Crank drive
13 - Wind deflector
14 - Roof cutout seal
15 - Sun visor
Replacing and adjusting the drive of the sliding roof panel
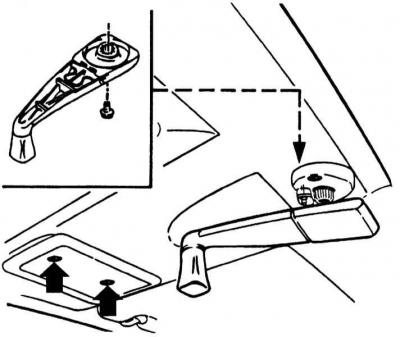
1. Remove the dome light (see chapter Onboard electrical equipment).
2. Remove the handle and cover from the crank drive.
Removing the crank handle
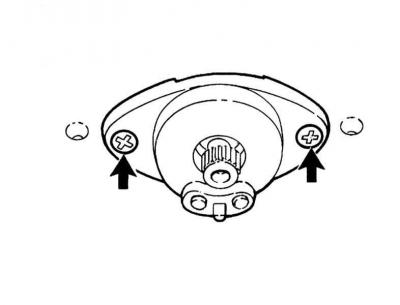
3. Turn out screws of fastening and remove a crank drive from the drive case.
Screws of fastening of a crank drive
4. Put the crank drive in the installation position. Reinstall the drive handle, the pin points in the direction of travel of the vehicle.
Crank Drive Components
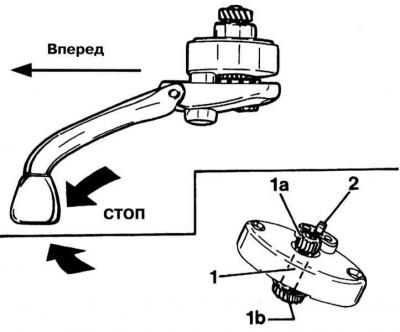
1 - Gear
1a - Straight crank teeth
1b - Skewed rope teeth
5. Turn the knob clockwise until it stops.
6. Turn the knob back three full turns. If the crank drive does not turn fully, replace the drive.
7. Fasten the handle and install the lamp cover.
Sliding Roof Cable Adjustment (Corsa model)
1. Remove the glass cover, drain and crank drive.
2. Slide the link guide with the cable guide all the way forward.
3. Move the connecting pin (1) cable guide back so that the adjustment marks match (2) guide rail.
Sliding Panel Drive Components
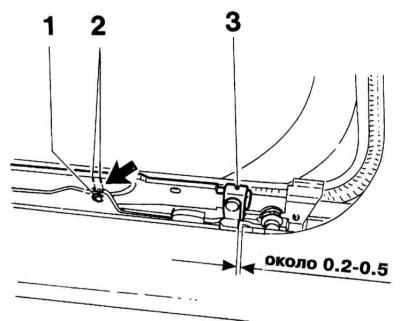
4. Install clamp (3) the slider guide so that the clamp slide passes the rear edge of the tire groove with an offset of 0.2 ÷ 0.5 mm.
Visitor comments