OpelBook.ru
Cars AvtoVAZ Cars Mitsubishi Cars BMW Cars Mercedes Cars Nissan Cars Toyota Cars Chevrolet
English Русский
Български
Беларускі
Український
Српски
Hrvatski
Română
Polski
Slovenský
Magyar
 |  Sitemap  |  Contacts  |    


Main Astra Corsa Insignia Kadett Omega Vectra Zafira Others Articles
Zafira A (1999-2005, petrol)
  • Main
  • Zafira
  • Zafira A
  • Electrical equipment
  • Equipment and devices
  • Instrument cluster — removal and installation

Instrument cluster — removal and installation (Opel Zafira A)

            0

Contents: Removal the instrument cluster of…⬇ Removal the instrument panel of the…⬇ Glass replacement ⬇ Installation ⬇

Removal the instrument cluster of the Astra model


1. Prepare the car for work (see "Preparing the car for maintenance and repair").

2. Using a thin slotted screwdriver, pry up the plugs at the bottom of the instrument panel trim to the right and left of the steering column.
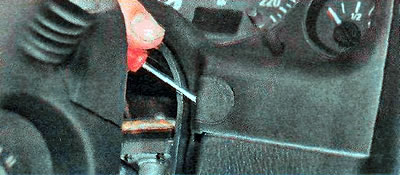
2. Using a thin slotted screwdriver, pry up the plugs at the bottom of the instrument panel trim to…


3. Using a TORX T20 key, unscrew the two upper...
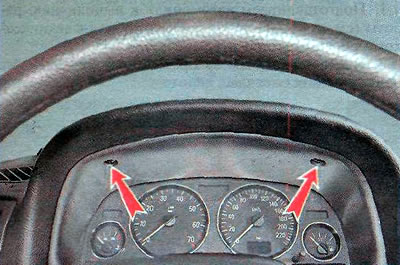
3. Using a TORX T20 key, unscrew the two upper...


...bottom left...
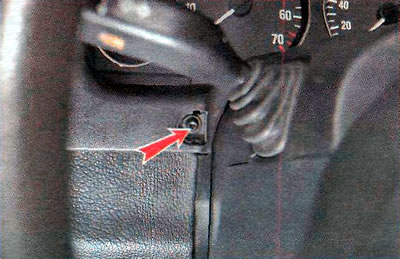
...bottom left...


...and the lower right screws securing the instrument panel trim.
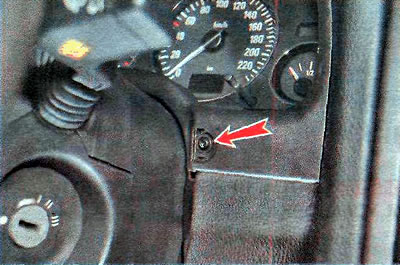


...and the lower right screws securing the instrument panel trim.


4. Pulling it towards you, remove the instrument panel cover.
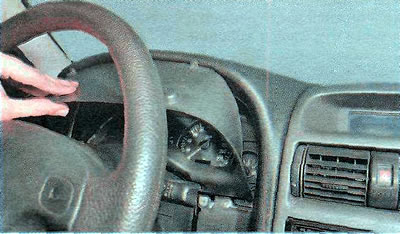
4. Pulling it towards you, remove the instrument panel cover.


5. Using a TORX T20 key, unscrew the two screws securing the instrument panel.
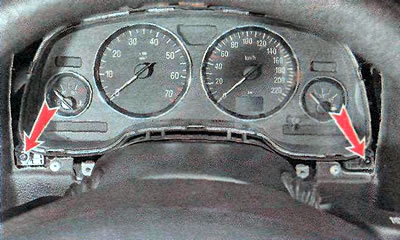
5. Using a TORX T20 key, unscrew the two screws securing the instrument panel.


6. Release the upper instrument panel retainer by sliding it from right to left, thereby disconnecting the wiring harness connector.
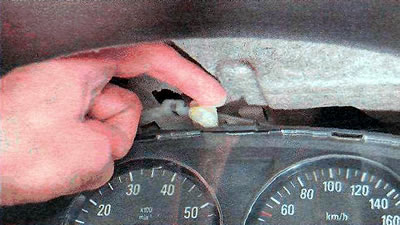
6. Release the upper instrument panel retainer by sliding it from right to left, thereby…


7. Remove the instrument panel from the panel.
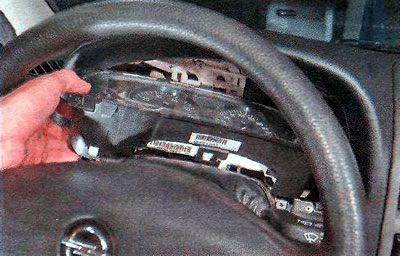


7. Remove the instrument panel from the panel.


Removal the instrument panel of the Zafira model


1. Prepare the car for work (see "Preparing the car for maintenance and repair").

2. Remove the car radio and its mounting frame (see "Car radio - removal and installation").

3. Move the center console trim down (see "Zafira climate control unit - check and replacement").

4. Remove the control unit for external and internal lighting (see "External and internal lighting control unit - removal, replacement of backlight lamp and installation").

5. Remove the fuse box cover (see "Mounting Blocks - Replacing Fuses and Relays").

6. Lower the steering column as far down as possible and pull it towards you (see "Adjusting the position of the steering wheel and seat").

7. Disconnect the steering column switches from the steering column (see "Steering column switches - checking and replacement").

8. Using a thin slotted screwdriver, pry up and remove the upper section of the left ventilation grille.
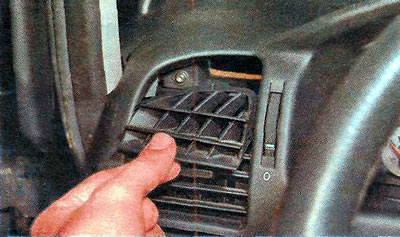
8. Using a thin slotted screwdriver, pry up and remove the upper section of the left ventilation…


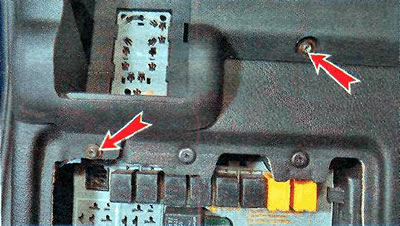
9. Using a TORX T20 key, unscrew the nine screws securing the instrument panel trim: the upper left...


[Text copied from an internet website: OPELBOOK.ru]
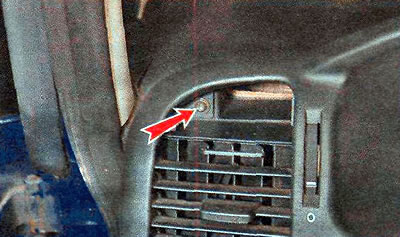
9. Using a TORX T20 key, unscrew the nine screws securing the instrument panel trim: the upper…


...the two lower left ones...

...the two lower left ones...


...two above the instrument panel...
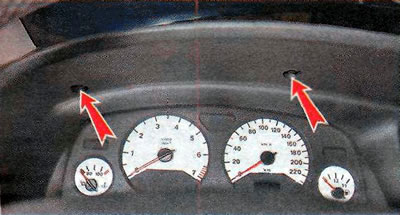
...two above the instrument panel...


...one above the multifunction display...
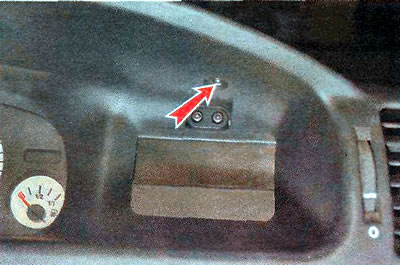
...one above the multifunction display...


...one behind the central ventilation grille...
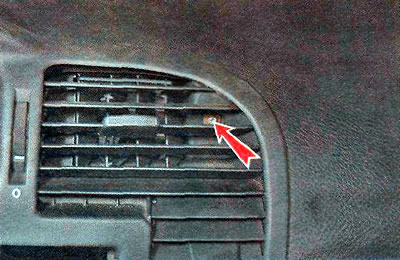


...one behind the central ventilation grille...


...lower right...
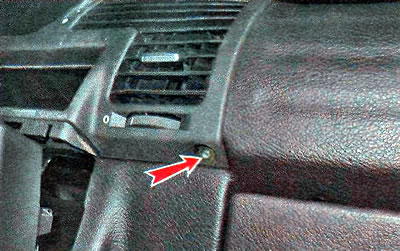
...lower right...


...and one to the right of the steering column.
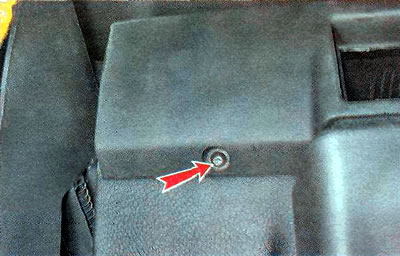
...and one to the right of the steering column.


10. Move the left edge of the overlay, pressing the retainer outward...
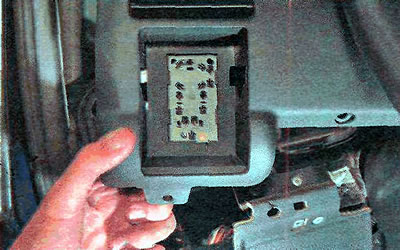
10. Move the left edge of the overlay, pressing the retainer outward...


...we move the wiring harness block of the lighting control unit down.
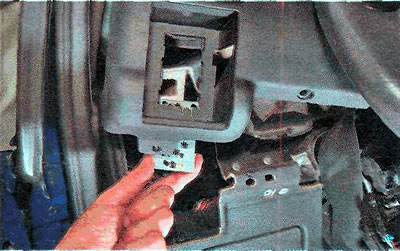


...we move the wiring harness block of the lighting control unit down.


11. Pull the entire cover slightly towards you and disconnect the wiring harness connector from the multifunctional display from the inside.
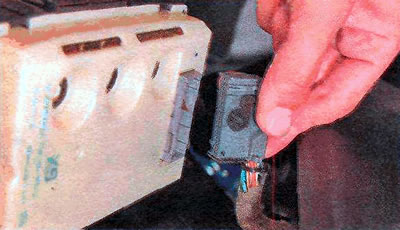
11. Pull the entire cover slightly towards you and disconnect the wiring harness connector from the…


12. Remove the cover assembly with the multifunctional display.
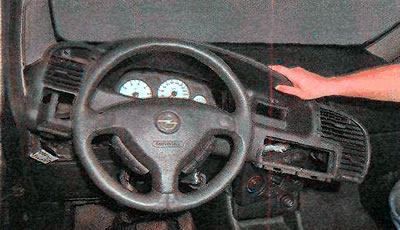
12. Remove the cover assembly with the multifunctional display.


13. Further removal of the instrument panel is similar to removal from the Astra model (see above).


Glass replacement


In case of damage (abrasions, cracks) the instrument panel protective glass can be replaced separately. To do this, press and remove nine protective glass clips from the holders one by one and remove it.
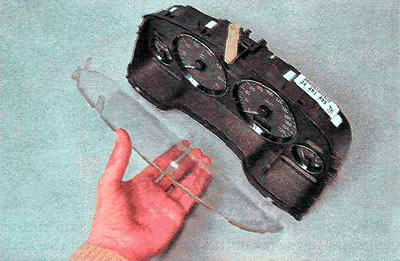
In case of damage (abrasions, cracks) the instrument panel protective glass can be replaced…


Installation


We install the parts in reverse order.


This article is available at russian, bulgarian, belarusian, ukrainian, serbian, croatian, romanian, polish, slovak, hungarian
Checking the article: Chernov Alexander

Share information:

Previous articles
Opel Zafira A: Equipment and devices
Next articles

Description of the design of control and measuring instruments and sensors
Open Door Sensor — Checking and Replacing
Reverse Light Switch — Checking and Replacing
Brake light switch — replacement and adjustment
Passenger door power window control keys — checking and replacing
Electric window control unit — check and replacement
Instrument cluster — replacing bulbs
Multifunction display — removal, replacement of lamps and installation
Oil Pressure Sensor — Checking and Replacing
Low Brake Fluid Sensor — Checking and Replacing
Cigarette lighter — adjustment and replacement of the socket, replacement of the backlight lamp
Car radio — removal and installation


See similar ones from other Opel car manuals:
▶ Instrument cluster components — removal and installation Opel Astra F (1991-1998, petrol)
▶ Removal and installation the instrument cluster Opel Corsa B (1993-2000)
▶ Instrument cluster fuse box Opel Insignia A (2008-2017)
▶ Instrument cluster of the Opel «Kadett E» model «GL» Opel Kadett E (1984-1995)
▶ Instrument cluster Opel Omega B (1993-1999)
Link to this page in different formats

Visitor comments


No comments yet


How much will 10 + 12 =


Zafira A (1999-2005, petrol) 
  • General information
  • Governing bodies
  • User manual
  • Maintenance
  • Power unit
  • Engine repair
  • Control system
  • Cooling system
  • Exhaust system
  • Transmission
  • Clutch
  • Mechanical gearbox
  • Automatic gearbox
  • Front wheel drives
  • Chassis
  • Hubs, wheels and tires
  • Front suspension
  • Rear suspension
  • Steering
  • Brake system
  • Body
  • Maintenance and care
  • Exterior
  • Side doors
  • Climate control
  • Electrical equipment
  • Equipment and devices
  • Power devices
  • Lighting and signaling
  • Windshield wipers and washers
  • Electrical circuits
OpelBook.ru © 2017–2026 · Mobile version · · Sitemap: EN BG BY UA RS HR RO PL SK HU · Feedback · Site search
Astra F, petrol · Astra G, petrol · Astra G · Astra H · Astra J, petrol · Corsa B · Corsa C, petrol · Corsa C · Insignia A · Kadett D · Kadett E · Omega A · Omega B · Omega B2 · Vectra A, petrol · Vectra A · Vectra B, petrol · Vectra B · Vectra C · Zafira A, petrol · Frontera A, petrol · Frontera B · Ascona C · Vivaro A ·
We want your visit to be comfortable 🤝! We use cookies 🍪 to make that happen.