
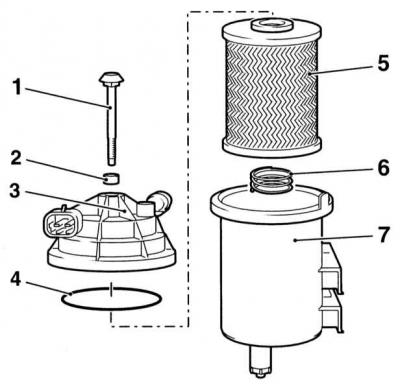
1 - Central bolt
2 - Sealing element
3 - Cover
4 - O-ring
5 - Filter element
6 - Spring
7 - Housing
1. Drain the diesel fuel from the fuel filter (see Removal of sludge from the diesel engine fuel filter).
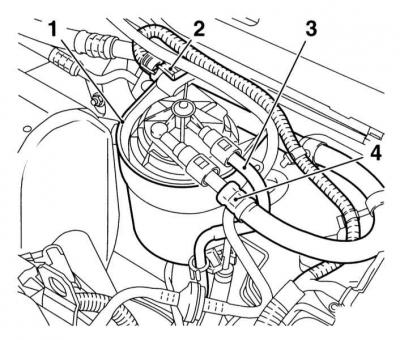
2. Disconnect the electrical wiring from the temperature-sensitive sensor-switch and the filter heating element installed between the fuel filter and its support bracket.
3. Slightly loosen the filter's central fixing bolt, open the quick-connect fittings, and disconnect the hoses from the filter.
4. Remove the filter housing from the support bracket.
5. Lower the filter housing into a suitable drain container, then unscrew the central bolt, give the lower nut and drain the remaining fuel (see illustration Fuel filter design).
6. Remove the cover and sealing ring, remove the filter element, spring and bottom seal - the sealing elements must be replaced without fail (see illustration Fuel filter design).
7. Thoroughly clean the filter housing.
8. Fit the lower seal and spring into the housing, if appropriate, insert the lower nut into the housing (one type of nut is built into the bottom seal, the other is screwed onto the end of the central bolt).
9. Fill the housing with a new filter element, then, if possible, fill the filter housing with clean diesel fuel to facilitate the task of removing air from the power system path - ideally, the level of filled fuel should reach the upper cut of the housing.
10. Place the cover on the body (don't forget to put in a new o-ring), then install the central bolt, - also check the position of the sealing ring. Tighten the bolt with the required force - do not allow the cover to be deformed.
11. Start the engine and bleed the power system (see chapter Power and exhaust systems).
Visitor comments