


Adjusting nut
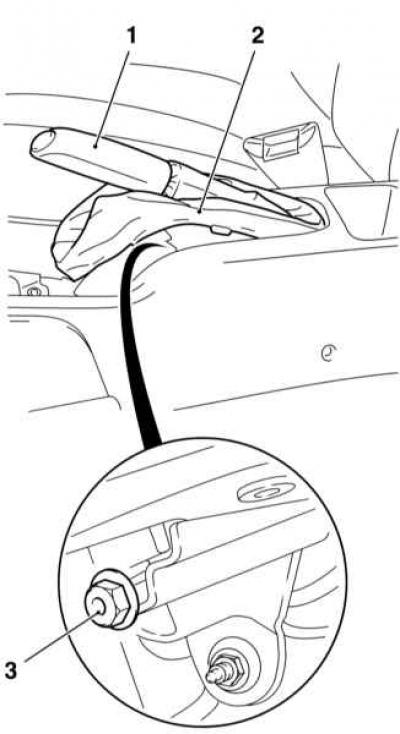
1 — Parking brake lever
2 - Protective case
3 - Adjusting nut
1. Support the front wheels with wheel chocks, jack up the rear of the car and place it on supports.
Material was taken from a resource [www.OPELBOOK.ru]
2. Remove the center console cover, release the parking brake lever boot from the console and lift it up to gain access to the adjusting nut at the front of the lever (see illustration Adjusting nut). The adjusting nut is located in front of the parking brake lever - first lift the protective cover.
3. Release the lever completely and slightly unscrew the nut to obtain slack in the cable.
4. Press the foot brake pedal at least five times. On models with drum brakes on the rear wheels, ask an assistant to listen for the operation of the rear shoe clearance adjustment mechanism - continue pressing the pedal until the regulator stops clicking.
5. Fully cock and then release the lever again.
6. Raise the lever three clicks, then tighten the adjusting nut until the rear wheels begin to seize - it should still be possible to turn the wheels manually. Both rear wheels should turn with the same resistance, otherwise check the freedom of movement of the drive cables in their casings.
7. Fully cock the lever and check the reliability of the locking of both wheels. Fully release the lever - both wheels should begin to rotate freely.
8. Place the cover on the center console and install the center console cover.
9. Set the parking brake and lower the vehicle to the ground.
Visitor comments