
OpelBook.ru
Cars AvtoVAZ Cars Mitsubishi Cars BMW Cars Mercedes Cars Nissan Cars Toyota Cars Chevrolet
English Русский
Български
Беларускі
Український
Српски
Hrvatski
Română
Polski
Slovenský
Magyar
 |  Sitemap  |  Contacts  |    


Main Astra Corsa Insignia Kadett Omega Vectra Zafira Others Articles
Vectra A (1988-1995, petrol) Vectra A (1988-1995) Vectra B (1995-2002, petrol) Vectra B (1995-2002) Vectra C (2002-2008)
  • Main
  • Vectra
  • Vectra B
  • Chassis
  • Brake system
  • Replacing the front brake pads

Replacing the front brake pads (Opel Vectra B)

            0

Warning! Always replace all pads on one axle of the vehicle, even if one pad has reached the wear limit. If the pads are to be reinstalled, they must be marked before removal.


When brake pads are in operation, brake dust is generated, which contains asbestos, which is harmful to health, so when cleaning brake pads, do not use compressed air or inhale the dust.


1. Raise the front of the car and secure it on stands. Remove the front wheels.

2. Disconnect the electrical connector from the brake pad wear sensor.
2. Disconnect the electrical connector from the brake pad wear sensor.


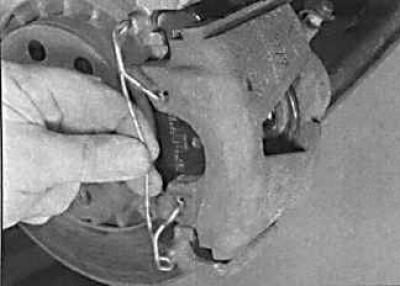
3. Remove the retaining spring from the outside of the caliper.
3. Remove the retaining spring from the outside of the caliper.


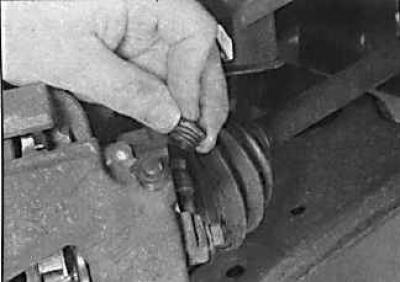
4. Remove the dust caps from the inner ends of the guide bolts.
4. Remove the dust caps from the inner ends of the guide bolts.


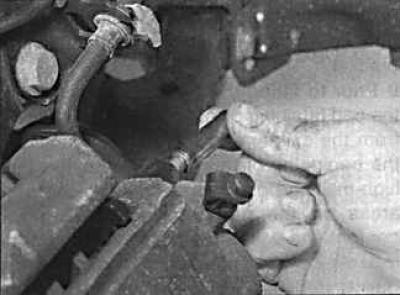
5. Remove the caliper guide bolts.


5. Remove the caliper guide bolts.


6. Lift the caliper with the inner shoe.
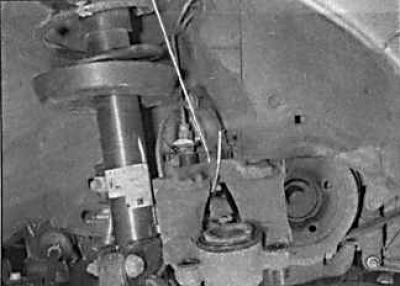
6. Lift the caliper with the inner shoe.


7. Using soft wire, tie it to the front post.

(Source is on the website: opelbook)

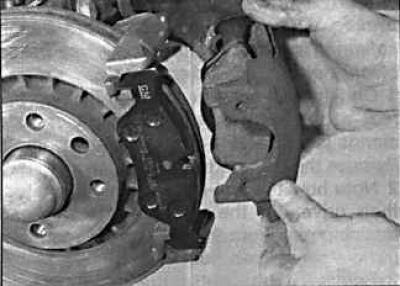
8. Remove the inner pad from the caliper piston.
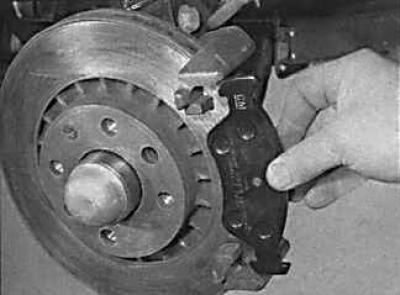
8. Remove the inner pad from the caliper piston.


9. Remove the outer pad from the caliper bracket.

10. Clean dust and dirt from the caliper and rust from the edge of the brake disc.
10. Clean dust and dirt from the caliper and rust from the edge of the brake disc.


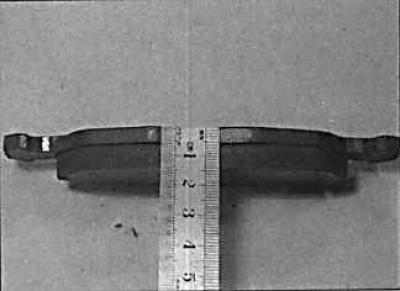
11. Measure the thickness of the brake pads.


12. If the pads are suitable for further use, clean them using a wire brush or rag.

13. Before installing the pads, check that the guide bolts move freely in the caliper.

14. If new brake pads are to be installed, press the piston into the caliper with a wooden rod or a hammer handle. Make sure that the piston is not warped and that the surfaces of the piston and dust boot are not damaged. When the piston is pushed in, the brake fluid is forced out of the brake cylinder into the expansion tank. Therefore, constantly monitor the fluid level in the tank, and if necessary, pump out a small amount of it from the tank.
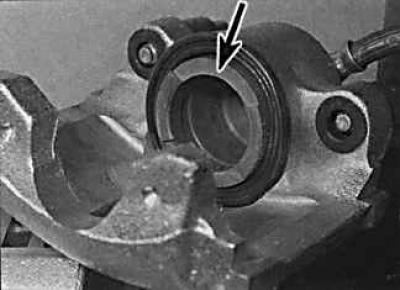
14. If new brake pads are to be installed, press the piston into the caliper with a wooden rod or a…


15. Check that the notches on the caliper piston are positioned as shown in the figure. If necessary, rotate the piston to the correct position.
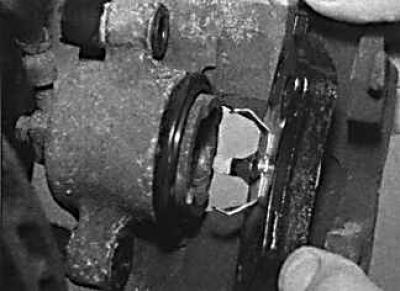
15. Check that the notches on the caliper piston are positioned as shown in the figure. If…


16. Install the inner shoe on the caliper. The spring clip should fit into the piston recess.


17. Install the outer brake shoe.

18. Install the caliper with the inner shoe onto the caliper holder.
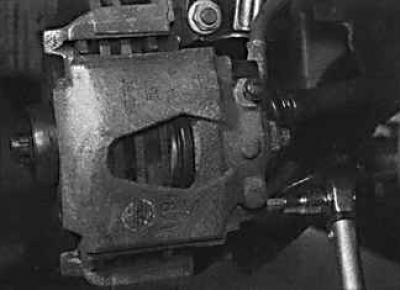
18. Install the caliper with the inner shoe onto the caliper holder.


19. Screw in the caliper guide bolts and tighten them to the specified torque.

20. Install the dust caps onto the caliper guide bolts.
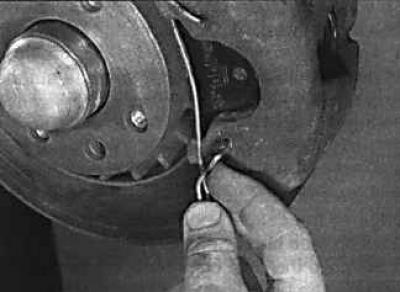
20. Install the dust caps onto the caliper guide bolts.


21. Install the retaining spring onto the caliper, with the ends of the spring positioned in the caliper hole.

22. Connect the brake pad wear sensor.

23. Press the brake pedal several times to press the brake pads against the brake disc. Check the brake fluid level in the reservoir.

24. Repeat the above steps on the second wheel.

25. Install the wheels and lower the vehicle.

26. Check the brake fluid level.


This article is available at russian, bulgarian, belarusian, ukrainian, serbian, croatian, romanian, polish, slovak, hungarian
Checking the article: Pavlovsky Nikolay

Share information:

Previous articles
Opel Vectra B: Brake system
Next articles

Brake lines and hoses
Bleeding the hydraulic brake system
Technical specifications
Replacing rear brake pads on disc brakes
Replacing rear brake shoes on drum brakes
Replacing handbrake brake pads
Front and rear brake discs
Front brake disc — removal and installation
Rear brake disc — removal and installation


See similar ones from other Opel car manuals:
▶ Replacing the front disc brake pads Opel Astra H (2004-2009)
▶ Replacing the front disc brake pads Opel Corsa B (1993-2000)
▶ Replacing the front brake pads Opel Insignia A (2008-2017)
▶ Replacing the front brake pads Opel Frontera A (1991-1998, petrol)
▶ Replacing brake pads Opel Kadett E (1984-1995)
Link to this page in different formats

Visitor comments


No comments yet


How much will 30 + 32 =


Vectra C (2002-2008) 
  • General information
  • User manual
  • Vehicle device
  • Maintenance
  • Troubleshooting
  • Power unit
  • Engine repair
  • Cooling system
  • Power and control system
  • Engine electrics
  • Transmission
  • Clutch
  • Car gearbox
  • Drive shafts
  • Chassis
  • Car suspension
  • Steering
  • Brake system
  • Body
  • Exterior
  • Interior
  • Doors, locks and windows
  • Heating and ventilation
  • Electrical equipment
  • Equipment and devices
  • Headlights and lighting
  • Electrical circuits
Vectra B (1995-2002) 
  • General information
  • User manual
  • Weekly checks
  • Maintenance (gasoline)
  • Maintenance (diesel)
  • Troubleshooting
  • Power unit
  • SOHC gasoline engine
  • DOHC petrol engine
  • Diesel engine 1.7 liter
  • Diesel engine 2.0 liters
  • Engine repair
  • Cooling system
  • Fuel system (gasoline)
  • Fuel system (diesel)
  • Charging system
  • Launch system
  • Ignition and preheat
  • Transmission
  • Clutch
  • Mechanical gearbox
  • Automatic gearbox
  • Drive shafts
  • Chassis
  • Brake system
  • Wheel suspension
  • Steering
  • Body
  • Exterior
  • Interior
  • Doors and windows
  • Heating and ventilation
  • Electrical equipment
  • Equipment and devices
  • Electrical circuits
Vectra B (1995-2002, petrol) 
  • General information
  • Maintenance
  • Help with malfunctions
  • Power unit
  • Engine repair
  • Exhaust system
  • Cooling system
  • Fuel system
  • Multec injection system
  • Four point injection
  • Transmission
  • Clutch
  • Gearbox and drive
  • Chassis
  • Wheel suspension
  • Steering
  • Brake system
  • Wheels and tires
  • Body
  • Exterior
  • Interior
  • Electrical equipment
  • Fuses and electronics
  • Power devices
  • Ignition system
  • Lighting and signaling
  • Equipment and devices
  • Heating and ventilation
  • Electrical circuits
Vectra A (1988-1995) 
  • Power unit
  • Engine repair
  • Ignition system
  • Lubrication system
  • Cooling system
  • Injection system
  • Fuel system (carburetor)
  • Fuel system (diesel)
  • Exhaust system
  • Transmission
  • Clutch
  • Car gearbox
  • Chassis
  • Front suspension
  • Rear suspension
  • Steering
  • Brake system
  • Wheels and tires
  • Body
  • Exterior
  • Interior
  • Electrical equipment
  • Electrical circuits
Vectra A (1988-1995, petrol) 
  • General information
  • User manual
  • Maintenance
  • Power unit
  • SOHC engine
  • DOHC engine
  • Cooling and ventilation
  • Fuel system (carburetor)
  • Fuel system (injector)
  • Exhaust converter
  • Transmission
  • Clutch
  • Mechanical gearbox
  • Automatic gearbox
  • Drive shafts
  • Chassis
  • Brake system
  • Car suspension
  • Steering
  • Body
  • Body elements
  • Electrical equipment
  • Power devices
  • Equipment and devices
  • Electrical circuits
OpelBook.ru © 2017–2026 · Mobile version · · Sitemap: EN BG BY UA RS HR RO PL SK HU · Feedback · Site search
Astra F, petrol · Astra G, petrol · Astra G · Astra H · Astra J, petrol · Corsa B · Corsa C, petrol · Corsa C · Insignia A · Kadett D · Kadett E · Omega A · Omega B · Omega B2 · Vectra A, petrol · Vectra A · Vectra B, petrol · Vectra B · Vectra C · Zafira A, petrol · Frontera A, petrol · Frontera B · Ascona C · Vivaro A ·
We want your visit to be comfortable 🤝! We use cookies 🍪 to make that happen.