


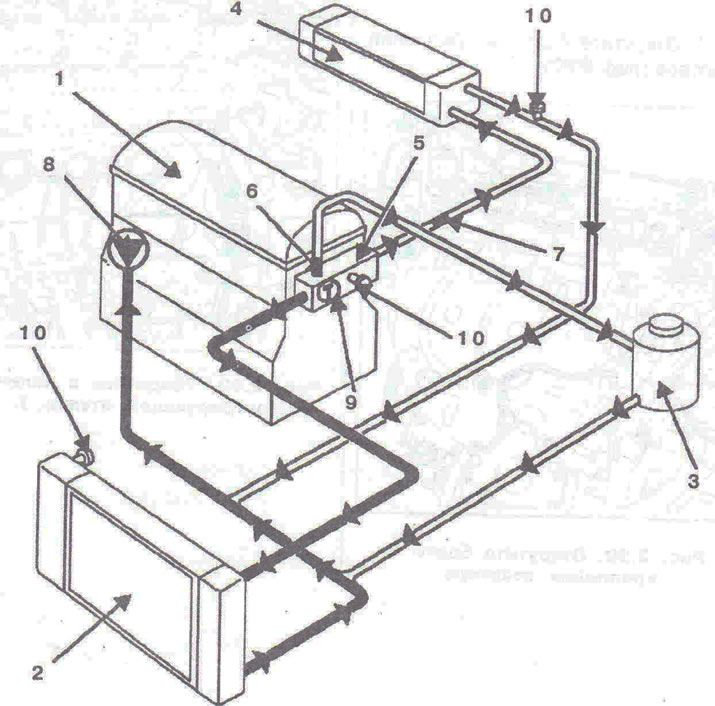
Figure 2.95. Cooling system diagram: 1 - Engine; 2 - Radiator; 3 - Hot tank with degassing after thermostat; 4 - Heater radiator; 5 - Thermostat bracket; 6 - Pipe diameter 3 mm; 7 - Pipe diameter 8 mm; 8 - Cooling system pump; 9 - Thermostat; 10 - Air bleed valve.
Removal and installation the cooling system radiator
Removal
1. Place the vehicle on a two-post lift.
2. Remove the carpet under the left seat and the battery cover 1 (figure 2.86).
3. Disconnect the battery.
4. Unscrew the five bolts 2 securing the radiator grille (figure 2.96).
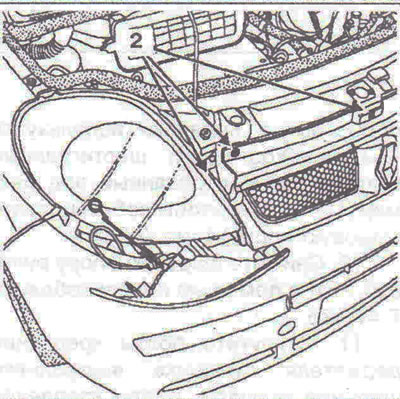
Figure 2.96. Unscrew the five bolts 2 securing the radiator grille.
5. Drain the coolant through the lower radiator hose using tool Mot. 1448.
6. Remove the upper radiator hose.
7. Disconnect the cooling fan resistor wiring connector, wiring connector 3 from the cooling fan (figure 2.97). Unhook the 4 fan supports. Remove the fan. Remove the air damper 5.
8. Unhook the condenser from the radiator (figure 2.98).
9. Remove the two radiator mounting pins 7, unscrew the two upper radiator mounting bolts and remove the radiator (figure 2.99).
Installation
10. Installation is carried out in the reverse order of removal.
[Text copied from an internet website OPELBOOK]
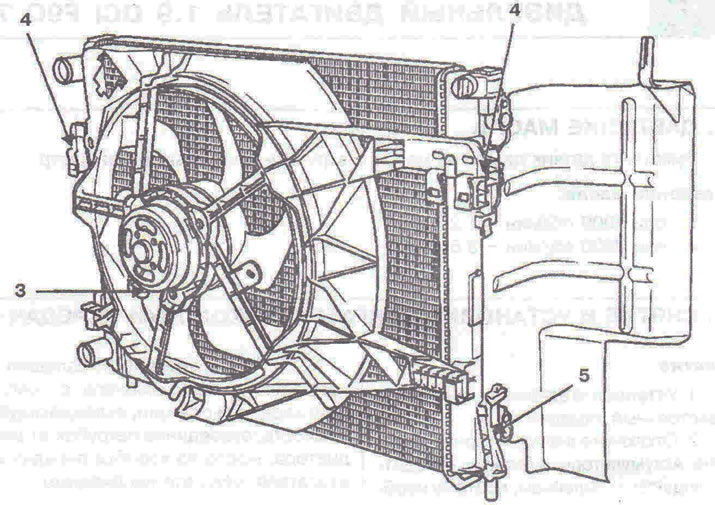
Figure 2.97. Disconnect wiring connector 3 from the cooling system fan. Unhook the 4 fan supports. Remove the air damper 5.
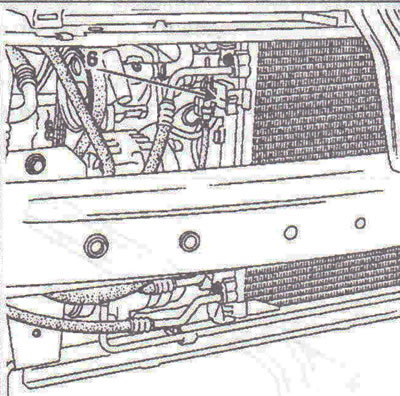
Figure 2.98. Disconnect the capacitor from the radiator.
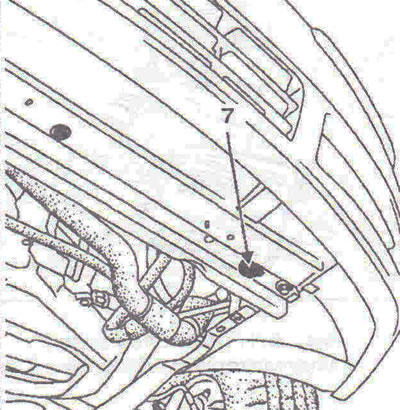
Figure 2.99. Remove the two radiator mounting pins 7, unscrew the two upper radiator mounting bolts and remove the radiator.
Visitor comments