


DOHC Engine
The parts to be removed are shown in the illustration. point 5 (Removing and installing the radiator).
1. Disconnect the plug connection of the electric motor.
2. Remove the radiator as described in the relevant section.
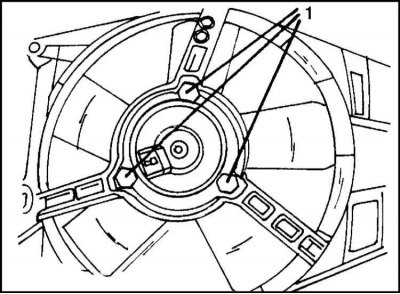
3. Loosen the radiator mounting bolts (illustration).
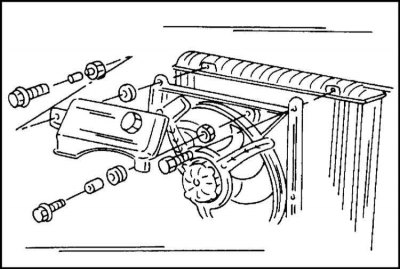
4. Loosen the nuts (1) shown in the illustration and remove the fan housing.
5. Remove the retaining ring from the motor shaft. Remove the wing assembly.
The fan is installed in the reverse order of its removal. The impeller is secured to the electric motor shaft with a retaining ring.
After installing the radiator and filling the system with fluid, start the engine and check the operation of the fan.
Engine 2.0 l OHC until the end of 1996 (including viscous coupling)
In this engine, the cooling fan is removed together with the viscous coupling.
1. Disconnect the ground cable from the battery.
2. Remove the V-belt as described in the relevant section.
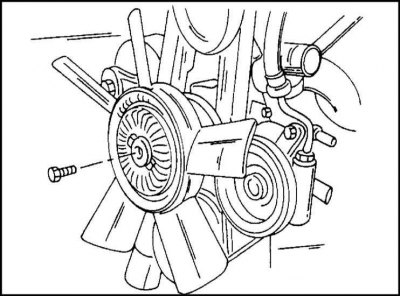
3. Remove the center bolt from the fan. The bolt is shown in the illustration and has a left-hand thread. When unscrewing the bolt, the impeller should be held from turning.
4. Remove the viscous coupling and pulley.
The fan is installed in the reverse order of its removal. Tighten the bolt to a torque of 26 Nm (left hand thread!).
Engine 2.4 l (including viscous coupling)
In this engine, the cooling fan is removed together with the viscous coupling.
1. Disconnect the ground cable from the battery.
2. Remove the V-belt as described in the relevant section.
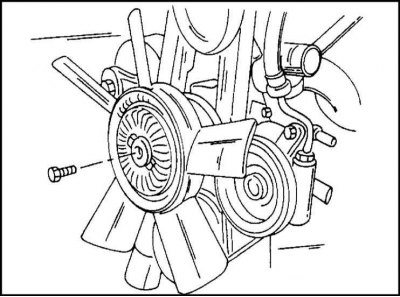
3. Remove the center bolt from the fan. The bolt is shown in the illustration and has a left-hand thread.
4. Remove the viscous coupling and pulley.
The fan is installed in the reverse order of its removal. Tighten the bolt to a torque of 26 Nm (left hand thread!).
2.0L OHC engine produced since 1997.
This engine requires unbolting and removing the entire fan frame from the inside of the radiator. Next, the fan is removed.
1. Disconnect the ground cable from the battery and unplug the plug connection at the fan motor.
[Material taken from an internet portal: www.OPELBOOK.ru]
2. Remove the fan as described above.
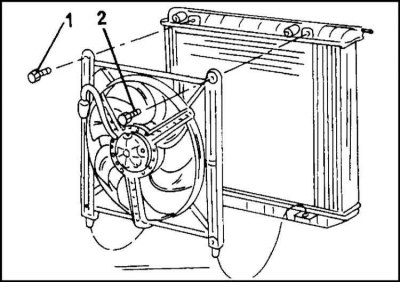
3. Remove bolts (1) and (2) from the inside of the radiator (illustrated) and remove the entire fan housing from the lower brackets.
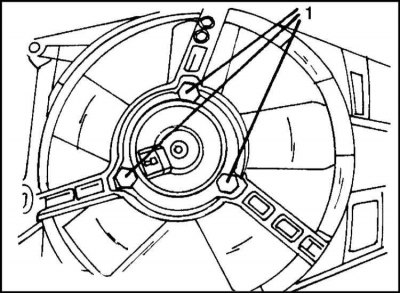
4. Unscrew the three nuts on the inside of the electric motor (see illustration.) and remove the housing.
5. Remove the retaining ring from the fan motor shaft using a screwdriver and disassemble the unit.
The fan is assembled in the reverse order of disassembly.
Visitor comments