
Removing
1. Block the front wheels. Jack up the rear of the car and place it on axle stands.
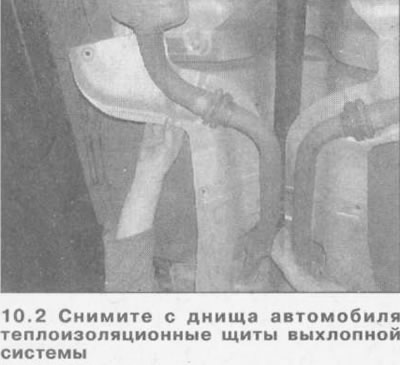
2. On models equipped with a catalytic converter, unscrew the fastening bolts and remove both heat-insulating shields of the converter from the bottom of the car (see illustration).
3. Working on the spline joint, mark the front and rear of the driveshaft with alignment marks. If the halves of the shaft separate from each other during removal, connect them using marks so as not to disturb the balance of the shaft.
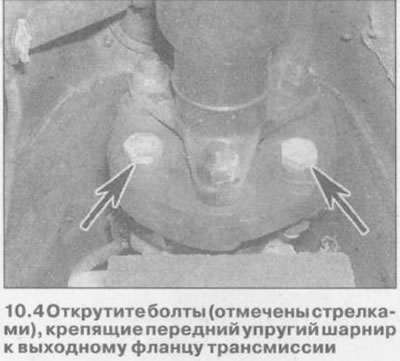
4. Using a socket or end adapter, remove the bolts securing the front elastic joint to the transmission output flange (see illustration).
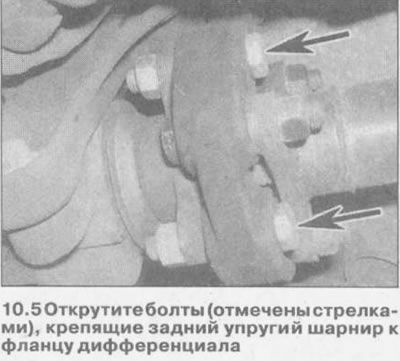
5. At the rear of the propeller shaft, unscrew the bolts securing the rear elastic joint to the differential flange (see illustration).
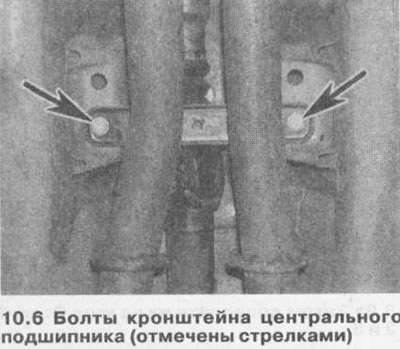
6. Support the center of the propeller shaft with an axial support, then unfasten the bracket for its central bearing from the bottom, marking the location of the spacers (see illustration).
7. Slide the front of the shaft back in the spline slots to separate it from the transmission output flange.
8. Remove the cardan shaft by sliding it forward. Try not to separate the shaft parts from each other (see point 3).
9. Unclip the center bracket from the bearing, marking the location of all spacers.
10 Detach the front and rear elastic joints from the driveshaft. Note that some models have a vibration damper on the front of the shaft.
Installation
11. Install in reverse order, paying attention to the following:
- A) before installation, coat the internal grooves of the drive shaft with differential oil,
- b) tighten all nuts and bolts with the tightening torque specified specifications.
Visitor comments