
2. Clamp the rear part of the driveshaft in a vise, attaching wooden blocks with recesses for the shaft to their jaws.
3. Mark the shaft parts with alignment marks, then slide the front out of the slots.
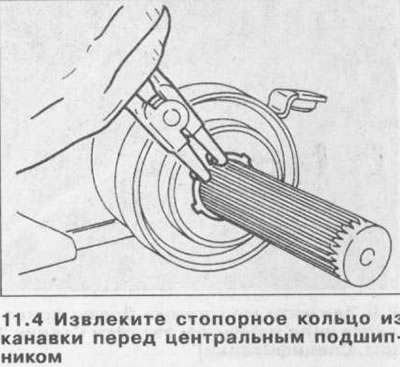
4. Pull out the rubber bush, then, using special pliers, remove the retaining ring from the groove in front of the central bearing (see illustration). Remove the dust seal.
5. Remove the center bearing from the bracket.
6. Clamp the center bearing in a vise and push or knock out the back of the driveshaft from it. Remove the dust seal.
7. In the same way, push or knock out the center bearing from the casing and remove the dust cap.
8. Clean the removed components and the end of the propeller shaft. Lightly grease the grooves.
9. Install a new ball bearing in the housing and install the dust seal.
10. Clamp the universal joint of the rear part of the shaft in a vice and install the central bearing on the grooves, resting the metal tube against its inner ring. Make sure the bearing is in contact with the shoulder.
11. Attach the bracket to the central bearing with bolts and tighten the bolts with the tightening torque specified specifications.
12. Clamp the rear of the shaft in a vise and install the front dust seal and circlip (the last one should fit into the groove).
13. Install the rubber bushing on the grooves.
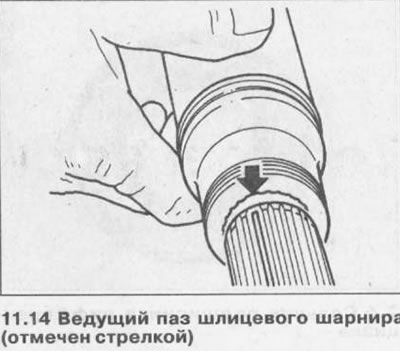
14. Connect the front and rear of the shaft, matching the previously made marks. Please note that there is a leading groove (see illustration).
15. Install the cardan shaft as described in Chapter 10.
Visitor comments