
OpelBook.ru
Cars AvtoVAZ Cars Mitsubishi Cars BMW Cars Mercedes Cars Nissan Cars Toyota Cars Chevrolet
English Русский
Български
Беларускі
Український
Српски
Hrvatski
Română
Polski
Slovenský
Magyar
 |  Sitemap  |  Contacts  |    


Main Astra Corsa Insignia Kadett Omega Vectra Zafira Others Articles
Omega A (1986-1993) Omega B (1993-1999) Omega B2 (1999-2003)
  • Main
  • Omega
  • Omega A
  • Power unit
  • Gasoline engines
  • Engine — removal

Engine — removal (Opel Omega A)

            0

1. Remove the hood as described in Section 11.

2. Disconnect the negative battery cable.

3. Remove the air cleaner on carbureted models, or disconnect and remove the air duct from the throttle body and air flow sensor on fuel injected models.

4. Remove the radiator as described in Section 2.

5. Disconnect the accelerator cable, throttle cable, automatic transmission kickdown cable, and cruise control cable, if equipped.

6. Unbolt the power steering pump and suspension assembly and set them aside (photo). There is no need to disconnect the hoses.
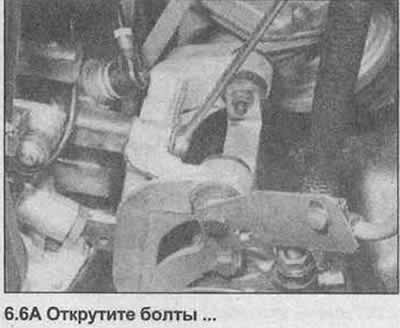
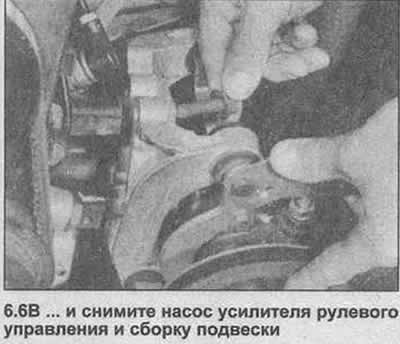
6. Unbolt the power steering pump and suspension assembly and set them aside (photo). There is no…


6. Unbolt the power steering pump and suspension assembly and set them aside (photo). There is no…


7. If equipped, remove the air conditioning compressor (Section 11) and move it to the side without disconnecting the refrigerant hoses.

(Original posted on the website: www.opelbook.ru)


8. Disconnect the heater hoses at the bulkhead (photo).
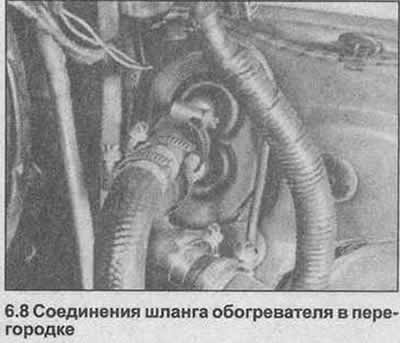
8. Disconnect the heater hoses at the bulkhead (photo).


9. Disconnect and plug the fuel supply and return hoses. Unscrew the mounting bracket from the intake manifold.

10. Disconnect the high-voltage wire from the ignition coil.

11. Locate the coolant hoses on the right side of the engine and disconnect them (photo). Also disconnect the brake booster hose.
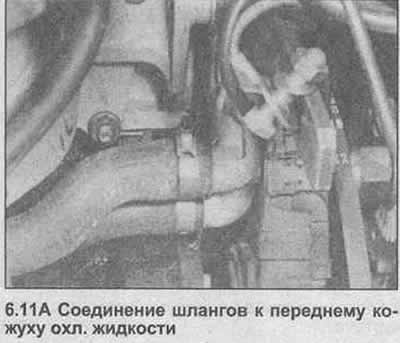
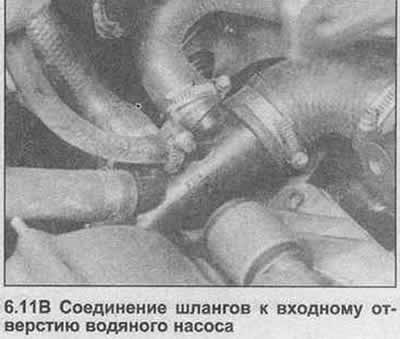
11. Locate the coolant hoses on the right side of the engine and disconnect them (photo). Also…


11. Locate the coolant hoses on the right side of the engine and disconnect them (photo). Also…


12. Unscrew the engine grounding straps (photo).
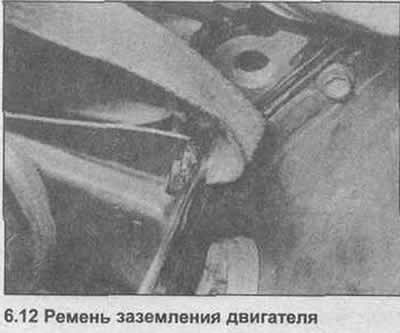


12. Unscrew the engine grounding straps (photo).


13. Disconnect the upper hose from the thermostat housing.

14. Note the location and distribution of the engine wiring harness. Disconnect and remove the harness. To ensure quick and accurate installation, label each wire with tape. On fuel injected models, the harness should be disconnected at the top of the engine (photo) and near the air flow sensor.
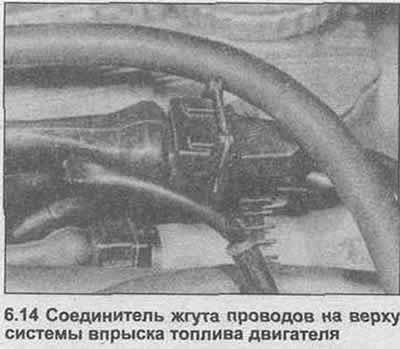
14. Note the location and distribution of the engine wiring harness. Disconnect and remove the…


15. Apply the handbrake, then jack up the front of the car and secure it on axle stands.

16. Unbolt the exhaust outlet pipe from the exhaust manifold, remove the gasket. Where present, unbolt the exhaust hanger at the rear of the gearbox.

17. Unscrew and remove the front gearbox cover.

18. On models with a manual transmission, disconnect the clutch cable from the release lever and the transmission.


19. On models with automatic transmission, remove the bolts securing the torque converter to the drive plate, see. Section 6.

20. Remove the lower bolts securing the gearbox to the engine.

21. Lower the car to the ground.

22. Attach the winch to the engine and lift it slightly. There are lifting eyes at the front and rear of the engine.

23. Support the gearbox with a jack.

24. Unscrew the nuts from the top of both engine mounting brackets, unscrew the right mounting bracket from the block (photo).
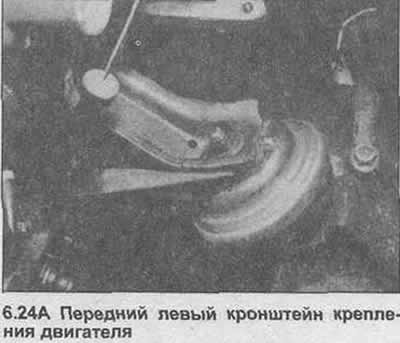
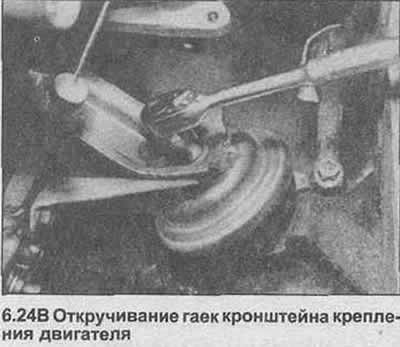
24. Unscrew the nuts from the top of both engine mounting brackets, unscrew the right mounting…


24. Unscrew the nuts from the top of both engine mounting brackets, unscrew the right mounting…


25. Remove the upper bolts securing the gearbox to the engine.

26. Move the engine forward so that it is clear of the transmission. On models with automatic transmission, make sure that the torque converter is securely in contact with the transmission fluid pump, otherwise it may fall and spill fluid.


27. After freeing the engine from the gearbox, lift the engine out of the engine compartment (photo).
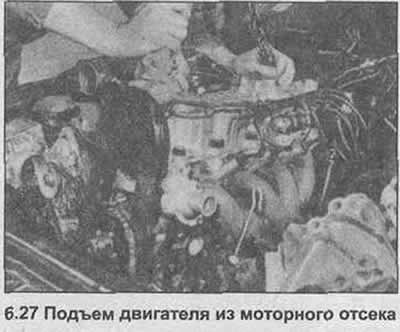
27. After freeing the engine from the gearbox, lift the engine out of the engine compartment…


28. If the engine is to be removed, drain the oil and install the drain plug before lowering the engine onto the work bench.


This article is available at russian, bulgarian, belarusian, ukrainian, serbian, croatian, romanian, polish, slovak, hungarian
Checking the article: Zinoviev Kirill

Share information:

Previous articles
Opel Omega A: Gasoline engines
Next articles

Engine Removal Method
Basic operations requiring engine removal
Basic operations possible with the engine in a car
Technical support
General description
Petrol Engine Specifications
Engine disassembly — general description
Engine Auxiliaries — Removal
Engine — complete disassembly
Pallet — removal and installation with engine in car
Engine Mounting Brackets — Replacement
Cylinder head — removal and installation with engine in car


See similar ones from other Opel car manuals:
▶ Engine bay — 1.4L C 14 NZ engine Opel Astra F (1991-1998, petrol)
▶ Starting the engine from an auxiliary power source Opel Corsa B (1993-2000)
▶ Engine compartment fuse box Opel Insignia A (2008-2017)
▶ Engine hood Opel Kadett E (1984-1995)
▶ Engine oil level Opel Vectra A (1988-1995, petrol)
Link to this page in different formats

Visitor comments


No comments yet


How much will 12 + 10 =


Omega B2 (1999-2003) 
  • General information
  • User manual
  • Maintenance
  • Troubleshooting
  • Power unit
  • Petrol 4-cylinder
  • Petrol 6-cylinder
  • Engine overhaul
  • Diesel engines 2.0 l
  • Diesel engines 2.5 l
  • Cooling and heating
  • Injection system (gasoline)
  • Fuel system (diesel)
  • Fuel system
  • Exhaust system
  • Ignition system
  • Transmission
  • Clutch
  • Mechanical gearbox
  • Automatic gearbox
  • Main gear and shafts
  • Chassis
  • Brake system
  • Car suspension
  • Steering
  • Body
  • Body elements
  • Electrical equipment
  • Equipment and devices
  • Electrical circuits
Omega B (1993-1999) 
  • General information
  • User manual
  • Tips for the car owner
  • Maintenance (gasoline)
  • Maintenance (diesel)
  • Power unit
  • Petrol engine SOHC 2.0 l
  • Petrol engine DOHC 2.0 l
  • Petrol engines 2.5 and 3.0 l
  • Repair of gasoline engines
  • Diesel engine 2.0 l
  • Diesel engine repair 2.0 l
  • Diesel engine 2.5 l
  • Cooling and heating
  • Power system (petrol)
  • Emission reduction
  • Fuel system (diesel 2.0 l)
  • Fuel system (diesel 2.5 l)
  • Launch system
  • Ignition system
  • Transmission
  • Clutch
  • Mechanical gearbox
  • Automatic gearbox
  • Drive shafts
  • Chassis
  • Brake system
  • Wheel suspension
  • Steering
  • Body
  • Exterior
  • Interior
  • Doors and windows
  • Electrical equipment
  • Equipment and devices
  • Wiring diagrams (early)
  • Wiring diagrams (late)
Omega A (1986-1993) 
  • General information
  • User manual
  • Maintenance
  • Changes and additions
  • Troubleshooting
  • Power unit
  • Gasoline engines
  • Diesel engines
  • Cooling system
  • Fuel system (gasoline)
  • Fuel system (diesel)
  • Ignition system
  • Transmission
  • Clutch
  • Mechanical gearbox
  • Automatic gearbox
  • Cardan shaft
  • Drive shafts
  • Chassis
  • Brake system
  • Car suspension
  • Steering
  • Body
  • Exterior
  • Interior
  • Electrical equipment
  • Power devices
  • Lighting and appliances
  • Electrical circuits
OpelBook.ru © 2017–2026 · Mobile version · · Sitemap: EN BG BY UA RS HR RO PL SK HU · Feedback · Site search
Astra F, petrol · Astra G, petrol · Astra G · Astra H · Astra J, petrol · Corsa B · Corsa C, petrol · Corsa C · Insignia A · Kadett D · Kadett E · Omega A · Omega B · Omega B2 · Vectra A, petrol · Vectra A · Vectra B, petrol · Vectra B · Vectra C · Zafira A, petrol · Frontera A, petrol · Frontera B · Ascona C · Vivaro A ·
We want your visit to be comfortable 🤝! We use cookies 🍪 to make that happen.