


On models with internal tripod type hinges, replacing their protective covers is only possible after removing the external hinges.
1. Remove the drive shaft (see section Removal and installation drive shafts). Remove the corresponding hinge (see section Checking the condition and replacing constant velocity joints (CV joints)). Please note that if you need to lure both covers, you only need to remove one hinge (on the right shaft there is also a torsional vibration damper).
2. Remove the cover from the shaft - if necessary, the cover to be replaced can simply be cut off.
3. Check the condition of the hinge and replace it if necessary (see section Checking the condition and replacing constant velocity joints (CV joints)). After washing the joint, completely remove all traces of old grease from it, then fill it with fresh grease of the required type.
4. Place the inner clamp of the boot onto the shaft, then put on the new boot so that it is fixed in the shaft groove with its narrow sleeve.
5. Fill the joint with the required type of grease, squeeze the remaining grease into the boot.
6. Place the joint on the shaft - do not forget to replace the retaining ring and ensure that it snaps securely into the receiving groove.
7. Pull the cover over the hinge and release the air from underneath it by prying up the outer edge with a screwdriver.
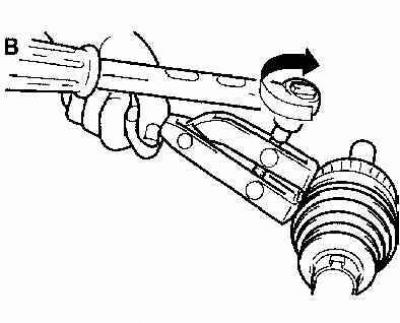
8. Secure the boot with new clamps. Using ring clamps, place the clamp on the boot and tighten it with nippers. Opel recommends using a special tool, although nippers work just as well if used carefully. When using bandage-type clamps, wrap the clamp around the boot, having previously lubricated it with molybdenum-containing grease, tighten as tightly as possible and hook the protrusion on one end of the clamp into the hole in the other. Finally, tighten the clamp by squeezing the loose U-shaped section with nippers, being careful not to damage the boot.
[Article posted on an online resource OPELBOOK]
Tightening the outer band clamp using special pliers HAZET 1847 and a torque wrench
9. Install the shaft on the vehicle (see section Removal and installation drive shafts).
Visitor comments