
OpelBook.ru
Cars AvtoVAZ Cars Mitsubishi Cars BMW Cars Mercedes Cars Nissan Cars Toyota Cars Chevrolet
English Русский
Български
Беларускі
Український
Српски
Hrvatski
Română
Polski
Slovenský
Magyar
 |  Sitemap  |  Contacts  |    


Main Astra Corsa Insignia Kadett Omega Vectra Zafira Others Articles
Astra F (1991-1998, petrol) Astra G (1998-2004, petrol) Astra G (1998-2004) Astra H (2004-2009) Astra J (2009-2015, petrol)
  • Main
  • Astra
  • Astra G
  • Power unit
  • Injection system (gasoline)
  • Removal and installation the exhaust manifold

Removal and installation the exhaust manifold (Opel Astra G)

            0

Contents: SOHC engines ⬇ Engines 1.4 and 1.6 l DOHC ⬇ Engines 1.8 l ⬇ 2.0L Engines ⬇

SOHC engines


1. Walk along the wiring harness from the lambda probe and disconnect the connector. Release the wiring harness from all intermediate fasteners so that the sensor can be removed together with the manifold.

2. Remove the exhaust pipe (see Exhaust and emission control systems).

3. Disconnect the heated air supply hose from the exhaust manifold pipe, unscrew the mounting bolts and remove the pipe.

4. Remove the high-voltage wire tips from the spark plugs of the first, second and third cylinders. Release and remove the heat shields of the spark plugs from the manifold - use the special KM-834 head.

5. Loosen the manifold mounting nuts to the cylinder head. Remove the manifold together with the sealing gasket and take it out of the engine compartment.

6. Check the manifold mounting studs for signs of corrosion and mechanical damage, and replace if necessary.

7. Make sure that the mating surfaces are absolutely clean and dry, install a new sealing gasket.

8. Install the manifold, screw on new mounting nuts and tighten them to the required torque.

9. Lubricate the threaded part of the heat shields with high-temperature grease, screw the shields on and tighten them to the required torque. Install the spark plug wire tips.

10. Install the branch pipe on the manifold, screw in the mounting bolts and tighten them to the required torque. Install the heated air supply hose.


11. Connect the electrical wiring to the lambda probe, ensure that it is laid correctly and that the harness is securely fastened.

12. Install the exhaust pipe (see Exhaust and emission control systems).

Engines 1.4 and 1.6 l DOHC


1. Remove the oil filler cap, unscrew the mounting screws and remove the engine protective cover. Walk along the wiring harness from the lambda probe and disconnect the contact connector. Release the wiring harness from all intermediate clamps so that the sensor can be removed together with the manifold.

2. Unscrew the bolts securing the exhaust system inlet pipe to the manifold, separate the pipe and remove the sealing gasket. Unscrew the three mounting bolts and remove the heat shield.

3. Loosen the manifold mounting nuts to the cylinder head. Remove the manifold with the gasket and take it out of the engine compartment.

4. Install the collector in its proper place (see above SOHC engines, p.6-8).

5. Install a new gasket between the manifold and the exhaust pipe, screw in the mounting bolts and tighten them to the required torque.

6. Connect the electrical wiring to the lambda probe, ensure that it is laid correctly and that the harness is securely fastened.

Engines 1.8 l


1. Remove the oil filler cap, unscrew the fastening screws and remove the engine protective cover. Unscrew the bolts securing the exhaust system inlet pipe to the manifold, separate the pipe and remove the sealing gasket.

2. Drain the cooling system (see Chapter Routine maintenance).

3. Loosen the clamp and disconnect the large hose from the thermostat housing.


4. Unscrew the three mounting bolts and remove the heat shield from the manifold.
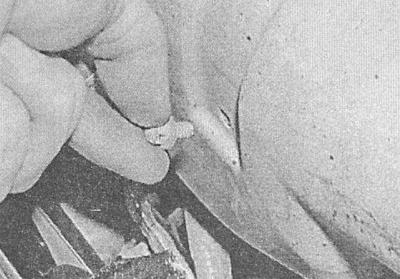
4. Unscrew the three mounting bolts and remove the heat shield from the manifold.


5. Loosen the engine oil dipstick guide tube bracket mounting bolt. Move the tube to the side.

6. Loosen the fastening nuts and remove the manifold; the sealing gasket must be replaced without fail.
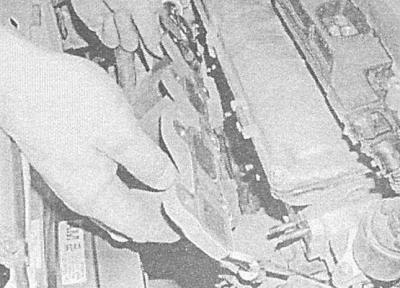
6. Loosen the fastening nuts and remove the manifold; the sealing gasket must be replaced without…


7. Install the collector (see above SOHC engines, p.6-8).

8. Replace the heat shield (the bottom bolt is shorter than the rest), connect the cooling system hose to the thermostat. Fill the cooling system (see Chapter Routine maintenance).

9. Connect the exhaust pipe to the manifold - do not forget to replace the sealing gasket.

10. Install the engine protective cover.

2.0L Engines


1. Remove the two transport eyes from the cylinder head.


2. Disconnect the front coolant hose from the head - do not disconnect the tube.

3. Loosen the mounting screws and remove the heat shield.

4. Loosen the fastening nuts and remove the manifold; the sealing gasket must be replaced without fail.

5. Install the collector (see above SOHC engines, p.6-8).

6. Connect the exhaust pipe to the manifold, tighten the mounting bolts to the required torque.

7. Install the heat shield on the manifold, screw in the bolts that secure it and tighten them to the required torque.

8. Connect the front coolant pipe to the cylinder head.

9. Install the transport eyes on the cylinder head - make sure the bolts are tightened securely.


This article is available at russian, bulgarian, belarusian, ukrainian, serbian, croatian, romanian, polish, slovak, hungarian
Checking the article: Pavlovsky Nikolay

Share information:

Previous articles
Opel Astra G: Injection system (gasoline)
Next articles

Removal and installation the intake manifold
Intake air temperature control system (models with central injection) — operating principle and serviceability check
Removal and installation of components of distributed fuel injection systems Multec-S and Simtec-70
Removal and installation of components of the Multec central fuel injection system
Checking the proper functioning of the fuel injection system
The operating principle of fuel injection systems


See similar ones from other Opel car manuals:
▶ Replacing the exhaust manifold seal (Z10XE, Z10XEP, without… Opel Corsa C (2000-2006, petrol)
▶ Exhaust manifold replacement — 1.6 and 1.8 L petrol engines Opel Insignia A (2008-2017)
▶ Exhaust manifold — removal and installation Opel Omega A (1986-1993)
▶ Exhaust manifold — removal and installation Opel Vectra A (1988-1995, petrol)
▶ Exhaust manifold — gasket replacement Opel Zafira A (1999-2005, petrol)
Link to this page in different formats

Visitor comments


No comments yet


How much will 16 + 20 =


Astra J (2009-2015, petrol) 
  • General information
  • Vehicle device
  • User manual
  • Faults en route
  • Maintenance
  • Power unit
  • Engine repair
  • Cooling and lubrication system
  • Engine power system
  • Exhaust system
  • Transmission
  • Clutch
  • Car gearbox
  • Drive shafts
  • Chassis
  • Front suspension
  • Rear suspension
  • Steering
  • Brake system
  • Wheels and tires
  • Body
  • Exterior
  • Interior
  • Doors and windows
  • Body Care
  • Heating and air conditioning
  • Security systems
  • Electrical equipment
  • Equipment and devices
  • Lighting and signaling
  • Power devices
  • Electrical circuits
Astra H (2004-2009) 
  • General information
  • Introduction to the guide
  • Troubleshooting
  • User manual
  • Maintenance
  • Power unit
  • Engine repair
  • Cooling and heating
  • Power and exhaust system
  • Ignition system
  • Launch and charge system
  • Transmission
  • Mechanical gearbox
  • Automatic gearbox
  • Drive shafts
  • Chassis
  • Brake system
  • Car suspension
  • Steering
  • Body
  • Interior
  • Exterior
  • Electrical equipment
  • Equipment and devices
  • Electrical circuits
Astra G (1998-2004) 
  • General information
  • Introduction to manual
  • User manual
  • Maintenance
  • Power unit
  • SOHC gasoline engines
  • DOHC gasoline engines
  • Diesel engines 1.7 and 2.0
  • Engine repair
  • Cooling system
  • Supply system
  • Injection system (gasoline)
  • Injection system (diesel)
  • Exhaust system
  • Charge and launch system
  • Ignition system (gasoline)
  • Preheat system (diesel)
  • Transmission
  • Manual gearbox
  • Automatic gearbox
  • Clutch
  • Drive shafts
  • Chassis
  • Brake system
  • Wheel suspension
  • Steering
  • Body
  • Exterior
  • Interior
  • Doors and windows
  • Ventilation and heating
  • Electrical equipment
  • Equipment and devices
  • Electrical circuits
Astra G (1998-2004, petrol) 
  • General information
  • User manual
  • Car care
  • Maintenance
  • Power unit
  • Single shaft engines
  • Twin shaft engines
  • Engine repair
  • Cooling and heating
  • Fuel and exhaust systems
  • Starting and charging system
  • Ignition system
  • Transmission
  • Clutch
  • Mechanical gearbox
  • Automatic gearbox
  • Drive shafts
  • Chassis
  • Brake system
  • Car suspension
  • Steering
  • Body
  • Interior
  • Exterior
  • Electrical equipment
  • Equipment and devices
  • Wiring diagrams Opel Astra
  • Wiring diagrams Opel Zafira
Astra F (1991-1998, petrol) 
  • General information
  • Maintenance
  • Power unit
  • Engine in car
  • Engine removed
  • Cooling system
  • Heating and ventilation
  • Fuel supply (carburetor)
  • Fuel supply (injector)
  • Emission control
  • Ignition system
  • Transmission
  • Clutch
  • Mechanical gearbox
  • Automatic gearbox
  • Drive shafts
  • Chassis
  • Brake system
  • Car suspension
  • Steering
  • Body
  • Exterior
  • Interior
  • Electrical equipment
  • Equipment and devices
  • Electrical circuits
OpelBook.ru © 2017–2026 · Mobile version · · Sitemap: EN BG BY UA RS HR RO PL SK HU · Feedback · Site search
Astra F, petrol · Astra G, petrol · Astra G · Astra H · Astra J, petrol · Corsa B · Corsa C, petrol · Corsa C · Insignia A · Kadett D · Kadett E · Omega A · Omega B · Omega B2 · Vectra A, petrol · Vectra A · Vectra B, petrol · Vectra B · Vectra C · Zafira A, petrol · Frontera A, petrol · Frontera B · Ascona C · Vivaro A ·
We want your visit to be comfortable 🤝! We use cookies 🍪 to make that happen.