
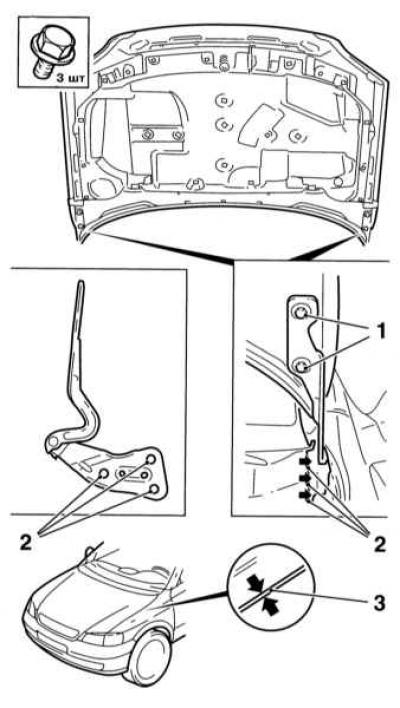
1 — Bolts of fastening of loops to a cowl
2 — Bolts of fastening of loops to a body element
Removing
1. Open the hood and lock it in the fully open position with a stop bar, then cover the fenders with special pads or just old blankets to protect them from damage during the dismantling of the hood.
2. Use a marker or scriber to circle the hinge strips to ensure that the hood is properly fastened during assembly (see illustration The layout of the hood hinge fasteners).
3. Ask an assistant to hold the hood and remove the stop.
4. Turn out fixing bolts and remove a cowl from hinges. Lay it carefully on a sheet of cardboard or spread out rags.
5. If necessary, remove the hinges (see Removal and installation of hood hinges). When installing a new hood, transfer all removable components from the old hood to it (see Removal and installation of a decorative grille of a radiator and Removal and installation of components of the lock of a cowl).
Installation and adjustment
Installation is in the reverse order.
1. When screwing in the mounting bolts, make sure that the mounting marks applied during the dismantling process are correct. Slowly lower the hood and make sure that the latch is properly seated in the lock slot. With the hood closed, check that the side clearances of its fit are the same. Make sure. That the front edge of the hood is flush with the surface of the fenders. The hood side clearances are adjusted by loosening the fixing bolts and shifting the hinge bars accordingly. The height of the hood position is determined by the height of the position of the latch of its lock (see Removal and installation of components of the lock of a cowl) and rubber pads of threaded supports in the front panel of the car.
Visitor comments