
Replacing spark plugs
Proper functioning of spark plugs is one of the most important conditions for the efficient operation of the engine. It is essential that only the specified type of spark plugs be fitted to the engine. With a good engine, cleaning spark plugs is a rare operation.
Location of identification marks
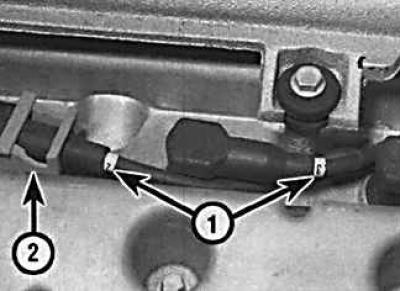
Location of high voltage wire identification marks (1) and wire removal tool (2).

1. On the DOCH 1.6L engine, remove the oil filler plug, unscrew the screws (indicated by arrows) and remove the shroud from the top of the engine. Reinstall the oil filler plug.
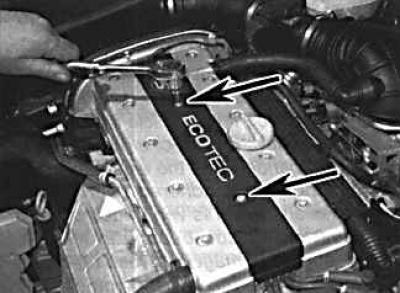
2. On 1.8L and 2.0L engines, unscrew the screws and remove the spark plug cover from the top of the cylinder head cover.
3. In the absence of marks on high-voltage wires (see fig. Location of identification marks) it is necessary to mark them so as not to be mistaken during their further installation.
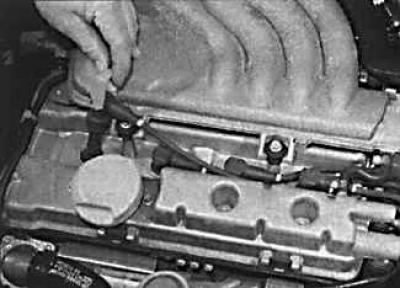
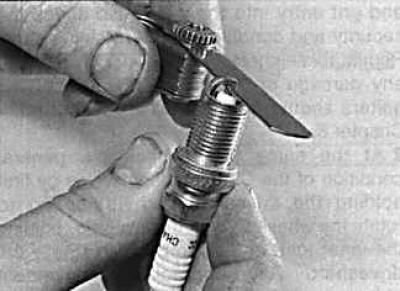
4. Remove the high voltage wires from the spark plugs by pulling on the spark plug tip.
5. Clean the spark plugs using a brush, vacuum cleaner or compressed air to prevent dirt from entering the engine cylinders after the spark plugs are removed.
6. Unscrew the spark plugs using a spark plug wrench.
7. Visual inspection of the working part of the spark plugs can show the condition of the engine. If the nose of the spark plug insulator is clean and white with no deposits, then the mixture is too lean. It also indicates that the spark plug is too hot, i.e. heat is slowly removed from the center electrode. If this is the case, then you need to adjust the composition of the mixture or replace the candle.
8. If the nose of the candle insulator is covered with a black coating, then this indicates that the mixture is too rich. If the plaque is black and oily, then this indicates engine wear and the need to check and repair it. If the nose of the insulator is covered with a light brown coating, then the mixture is optimal and the engine is in good condition.
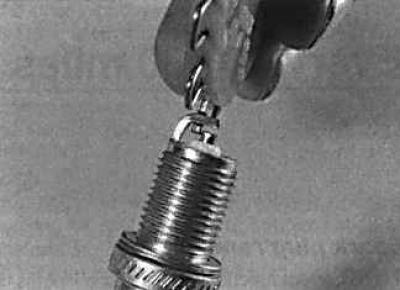
9. The gap between the electrodes of a spark plug is important, because too large or too small a gap changes the size of the spark, which leads to a decrease in engine efficiency. The gap must always comply with the technical requirements.
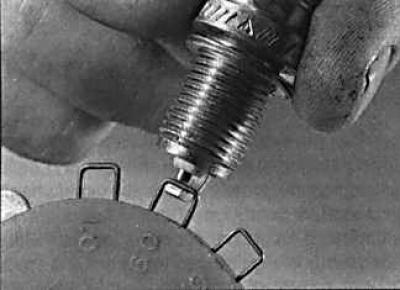
10. Gap check is carried out with a wire template (photo on the left) or probe (photo on the right).
11. Gap adjustment is carried out by bending the side electrode (in the photo - a spark plug with several side electrodes). In no case should the central electrode be bent, as this can lead to breakage of the insulator and failure of the candle.
12. To bend the side electrode of the candle, you must use a special tool.
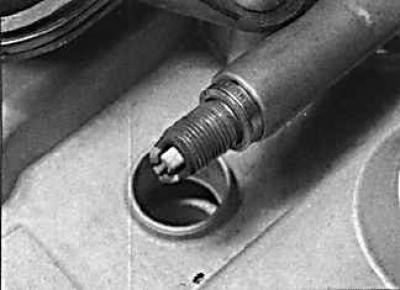
13. Before installing the spark plug in the engine, check that the threads are clean and that all threads are intact.
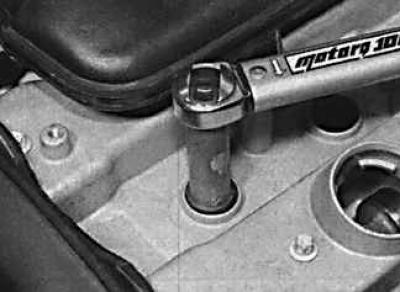
14. To screw the spark plug into several turns, you can use a piece of rubber hose, into which, on one side, insert the spark plug insulator and, turning the hose, wrap the spark plug into several turns. Then you need to remove the hose and screw the candle to the required torque.
15. Connect high voltage wires to spark plugs.
Checking the ignition system
1. Check the condition of the high-voltage wires, which must be clean and dry, and must not show signs of electrical breakdown and oxidation.
2. Check the internal condition of the spark plug tip, which should show no signs of corrosion, which is a hard white powder. Install the spark plug firmly onto the spark plug.
3. Replacement of candles is made in a set.
Visitor comments