
Changing the oil and oil filter
Periodic oil and oil filter changes are the most important preventive maintenance procedures. As engine oil ages, it becomes thin and contaminated, leading to premature engine wear.
Before starting this procedure, gather together all the necessary tools and materials. It is necessary that the engine be warm in order for the oil to drain better along with the bulk of the contaminants.
1. Apply the handbrake and raise the front of the vehicle.
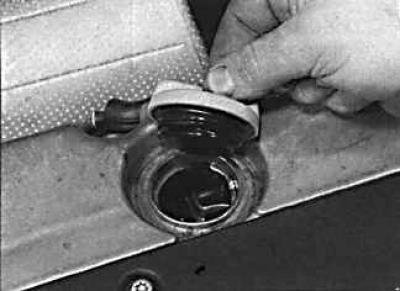
2. Remove the plug from the oil filler neck.
3. Loosen the drain plug about half a turn. Place an oil drain container under the drain plug and unscrew the plug completely. If necessary, press down on the plug when unscrewing to prevent the oil from leaking prematurely. Remove the O-ring from the oil drain plug.
4. When the oil is completely drained, wipe everything around the drain hole with a rag and screw the plug securely into place.

5. Use the special tool to loosen the filter, then unscrew it by hand.
6. Wipe off all traces of oil and dirt around the filter attachment. Check if there is any rubber seal left on the cylinder block. If it remains, then remove it.
7. Lubricate the rubber seal of the new oil filter with a light coat of engine oil and screw on the filter by hand without using any tools.
8. Fill the engine with oil using the correct grade of oil. Pour in half the required amount of oil and wait a few minutes for the oil to drain into the pan. Then continue adding oil in small increments until the oil level reaches the minimum level on the dipstick. Adding about one more liter of oil will raise the oil level to the maximum on the dipstick. Close the filler cap.
9. Start the engine and let it run for a few minutes. Check it for oil leaks around the filter and drain plug on the pan. Be aware that the oil pressure warning light may stay on for several seconds as oil must fill all channels and oil reservoirs in the engine.
10. Stop the engine and wait a few minutes for the oil to drain into the sump. Check oil level and top up if necessary.
Checking and replacing the auxiliary drive belt
Examination
1. With the engine off, inspect the condition of the drive belt along its entire length. Check the accessory belt pulleys for nicks, cracks, deformation, and corrosion.
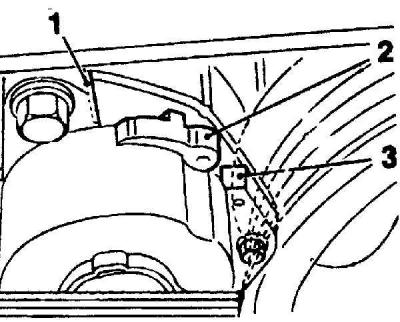
2 - indicator of the lever of the drive belt tension mechanism
2. Check the position of the drive belt tensioner assembly lever. The lever must be between the stops (1) And (3) on the base plate and move freely.
3. If the drive belt is worn or damaged, or the tension lever is against the stop, the drive belt must be replaced.
Replacement
1. Remove the air filter cover.
2. On air-conditioned models, remove the right front powertrain mount.
3. Before removing the drive belt, mark its position on the pulleys. If the belt is to be reinstalled, note the direction of rotation.
4. Using a wrench, move the tensioner lever away from the drive belt to release tension on the drive belt, and remove the belt from the pulleys.
5. Install a new drive belt.
6. Check that the belt is correctly positioned on all pulleys and slowly release the belt tensioner.
7. On air-conditioned models, install the power unit support.
8. On all models, install the air cleaner cover.
Checking the front brake pads and brake disc
1. Apply the handbrake, raise the front of the vehicle and support it on stands. Remove the front wheels.
2. Check the thickness of the brake pad through the inspection hole in the front of the caliper.
3. If the brake pad is worn to the minimum thickness, all four brake pads must be replaced as a set.
4. Install wheels and lower vehicle.
Checking the rear brake pads and brake disc
1. Raise the rear of the car and secure it on stands. Remove rear wheels.
2. Inspection of the brake pads can be done through the inspection hole in the rear caliper.
3. If the brake lining is worn to the minimum thickness, all brake pads in the set must be replaced.
4. Install wheels and lower vehicle.
Checking the tightness of the hoses and fluid leakage
Leaks in the cooling system are usually detected by a white or rust-colored coating in the area adjacent to the leak.
Fuel leaks are difficult to pinpoint until the leak is significant and therefore easily visible. Fuel tends to evaporate quickly as soon as it comes into contact with air, especially in a hot engine bay. Small drops may disappear before you can locate the leak. If you suspect that there is a fuel leak in the area of the engine compartment, then cool the engine and start it while it is cold with the hood open. Metal objects tend to shrink when cold, and rubber hoses tend to loosen, so any leaks will be more obvious while the engine is warm from start-up and cold.
If there are indications that some fluid is leaking, but you cannot recognize the type of fluid or the exact origin, then you should leave the car for a long time and put a large piece of paper or rag under the car. This will help you find where the fluid is leaking and will also help you identify the leaking fluid by color. But keep in mind that some leaks may only show up when the engine is running.
A leak in the vacuum hose means that air is being sucked into the hose (does not come out of the hose), and this makes the leak very difficult to detect. The detection method is to use an old vacuum hose as a kind of stethoscope. Hold one end of the hose close to your ear (but not in the ear), and use the other end to examine the area around the suspected leak. When the end of the hose is directly over the leak, a hissing sound will be clearly audible through the hose. Contact with hot and moving parts must be avoided, as the engine must be running during the test.
Replacing the pollen filter of the ventilation system
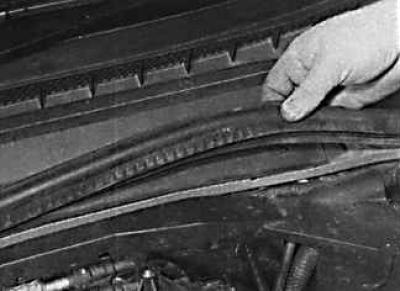
1. Open the hood and remove the rubber seal from the lug at the rear of the engine compartment by pulling.
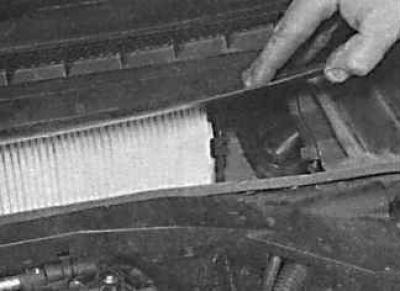
2. To access the pollen filter, remove the water baffle.
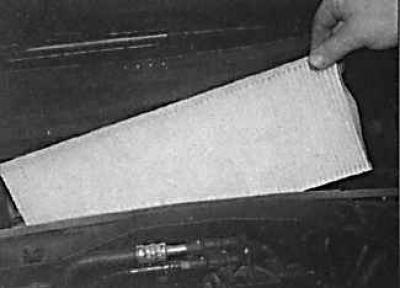
3. Release the bracket on both sides and lift up the pollen filter.
4. Install the new pollen filter in the reverse order of removal.
Visitor comments