
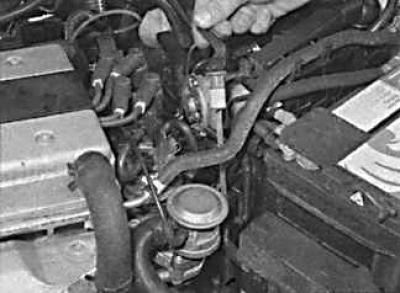
Replacing the air filter element
The air filter is located in the front right corner of the engine compartment.
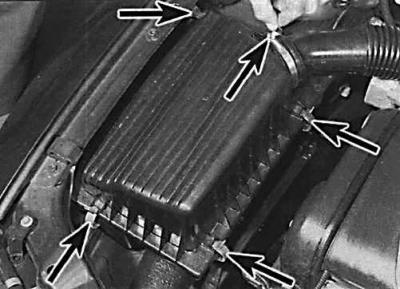
1. Disconnect the mounting brackets (indicated by arrows) and lift the air filter cover just enough to remove the filter element.
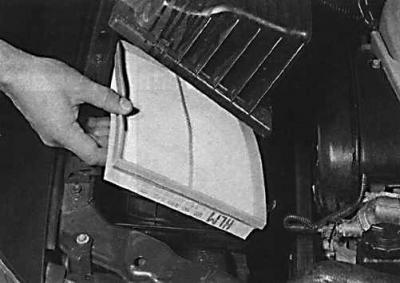
2. Remove the filter element.
3. Wipe the inside of the casing and air filter cover. Install the new filter so that the rubber seal on the filter element is on top.
Fuel filter replacement
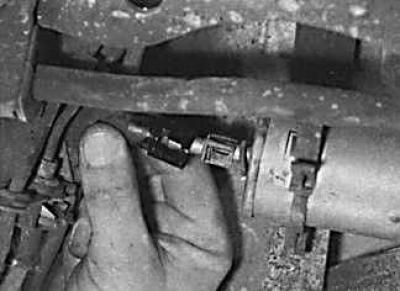
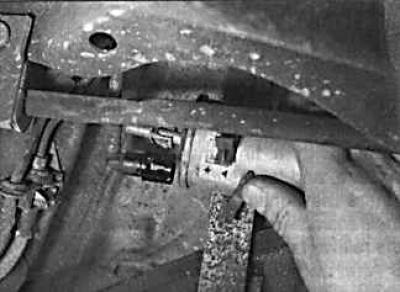
1. The fuel filter is located under the rear of the car and is attached to the fuel tank with a special belt.
2. Depressurize the fuel system.
3. Raise the rear of the car and secure it on stands.
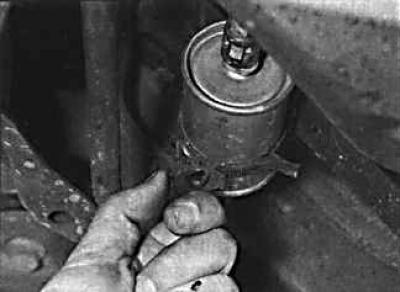
4. Release the bracket holding the filter. Before removing the filter, pay attention to the arrow on the filter housing indicating the direction of fuel flow.
5. Place a suitable container under the fuel filter to catch spilled fuel.
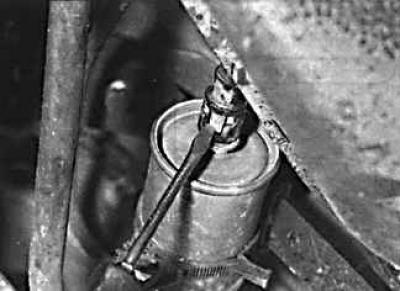
6. Loosen the hose clamps.
7. Remove the fuel hoses from the fuel filter.
8. Remove the fuel filter from under the car.
9. The fuel filter is installed in the reverse order of removal, taking into account the following points:
- check that the arrow on the fuel filter correctly indicates the direction of fuel flow;
- check that the fuel hoses are correctly connected to the fuel filter;
- Start the engine and check the fuel system for leaks.
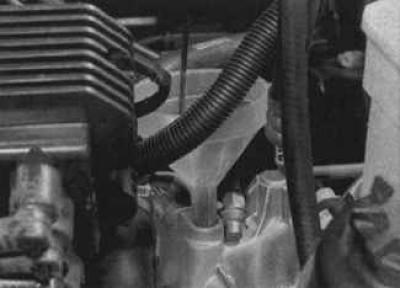
Checking the oil level in the manual transmission
1. Install the car in a horizontal position above the inspection hole. Check the oil level no earlier than 5 minutes after stopping the engine.
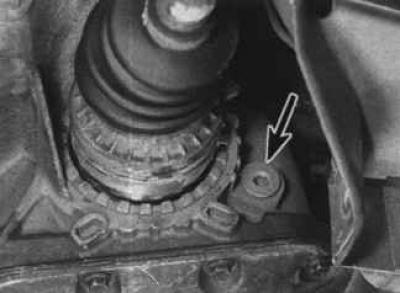
2. Clean the area around the gearbox oil level plug. On models with a 1.6L engine, the oil level plug is located on the left side of the gearbox behind the drive shaft (arrow). On 1.8L and 2.0L engine models, the level plug is located on the right front side of the transmission behind the drive shaft. Unscrew the plug and clean it.
3. The oil level should reach the lower edge of the oil level plug hole.
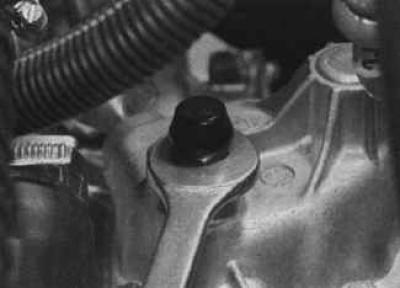
4. If it is necessary to add oil to the gearbox, unscrew the breather from the top of the gearbox housing.
5. Add the required oil through the breather hole until oil flows out of the oil level plug hole.
6. Screw in the oil level plug in the gearbox to the required torque.
7. Install the breather at the top of the gearbox.
Checking the oil level in automatic transmission
Location of oil level marks depending on engine temperature
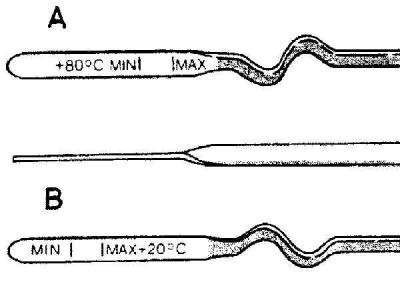
A - labels of a hot gearbox
B - labels of a cold gearbox
1. Park the vehicle on a level surface and apply the handbrake. The oil level is checked using the dipstick located on top of the transmission and visible between the battery and the engine.
2. Run the engine at idle for two minutes with the selector lever in position P.
3. With the engine idling, remove the transmission oil dipstick, wipe it clean and reinstall it, then remove it again.
4. The oil level at the end of the dipstick must be between the max and min marks. If the gearbox oil is cold, use the 20°C side of the dipstick. If the gearbox oil is hot, use the +80°C side of the dipstick (see fig. Location of oil level marks depending on engine temperature).
5. If the oil level is low, add oil through the dipstick hole.
6. Take a test drive and check the gearbox oil level again.
7. Always keep the oil level between the two marks on the dipstick. Lack of oil can lead to serious damage to the gearbox.
8. If there is a need to add oil frequently, then it means that there is a leak that must be found and repaired as long as it does not lead to serious consequences.
Checking the front suspension and steering
Raise the front of the vehicle and secure it on stands.
Visually inspect the ball joint dust boot and rack and pinion boot for cracks, abrasions and ageing. Any wear on these boots will result in loss of lubricant and ingress of water and dirt, resulting in rapid wear of the ball joints or steering gear.
Check the power steering gear hoses for chafing or aging, and pipes and hose connections for leaks. Also check for signs of a pressure leak in the protective rubber boots of the steering gear, which indicate damage to the steering seal.
Wheel bearing wear check
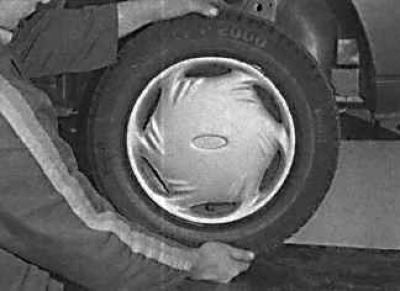
Raise the car with a jack, take the wheel with your hands at the 6 and 12 o'clock positions and try to shake it in a vertical plane.
Very little wheel play is acceptable, but if the play is large enough, further testing is needed to establish the source. Continue pumping the wheel while the assistant applies the foot brake. If the play is eliminated or significantly reduced, it is likely that the hub bearings are damaged. If the play is still significant with the brake applied, then there is wear in the connection and suspension mount.
Now take the wheel to the 9 and 3 o'clock position and try to shake it in a horizontal plane. The presence of play in the horizontal plane can be caused by wear of the hub bearing or tie rod ball joints. If the outer or inner ball joint is worn, play will be evident.
Using a large screwdriver as a lever, check for wear in the suspension mount bushings between the suspension element and the application point. Some movement should be visible as the mount bushings are made of rubber, but excessive wear should be evident. Also check the condition of any visible parts of the rubber bushings for cracks, wear and deformation.
Shock absorber check
Check the shock absorber for any signs of fluid leaks. If a leak is found, then the shock absorber is damaged and needs to be replaced.
Warning! Shock absorbers must be changed in pairs on the same axle.
The effectiveness of the shock absorber is also tested by pressing on the corner of the body and releasing it abruptly. The body should return to its original position after it is released. If the body rises above its original position and continues to sway, it is likely that the shock absorber located on this side is out of order and must be replaced. Also check the shock absorber mount for wear.
Checking the protective cover of the drive shaft
Raise and carefully secure the vehicle on stands. Turn the steering wheel to the right or left as far as it will go and turn the wheel.
Checking the protective cover of the constant velocity joint
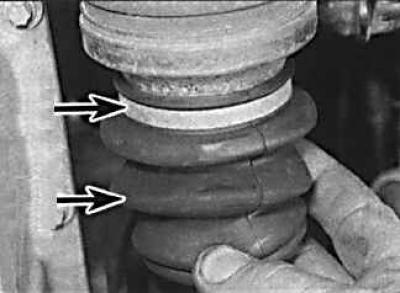
Inspect the CV joint rubber boots by squeezing them to open the folds. Check them for cracks, which can lead to grease leakage, as well as water and dirt ingress.
Also check the condition of the mounting clamps, inspect the covers of the internal hinges and casings on the other side. If any damage is found, the protective cover must be replaced immediately.
At the same time, check the general condition of the CV joints by holding the shaft while trying to turn the wheel. Try again, holding the inner CV joint and rotating the shaft. Any noticeable play indicates wear on the pivot, wear in the shaft slots, or a loose shaft lock nut.
Visitor comments