
Disassembly
1. Remove an amortization rack. Rack Assembly Components Presented in the accompanying illustration.
Shock absorber assembly
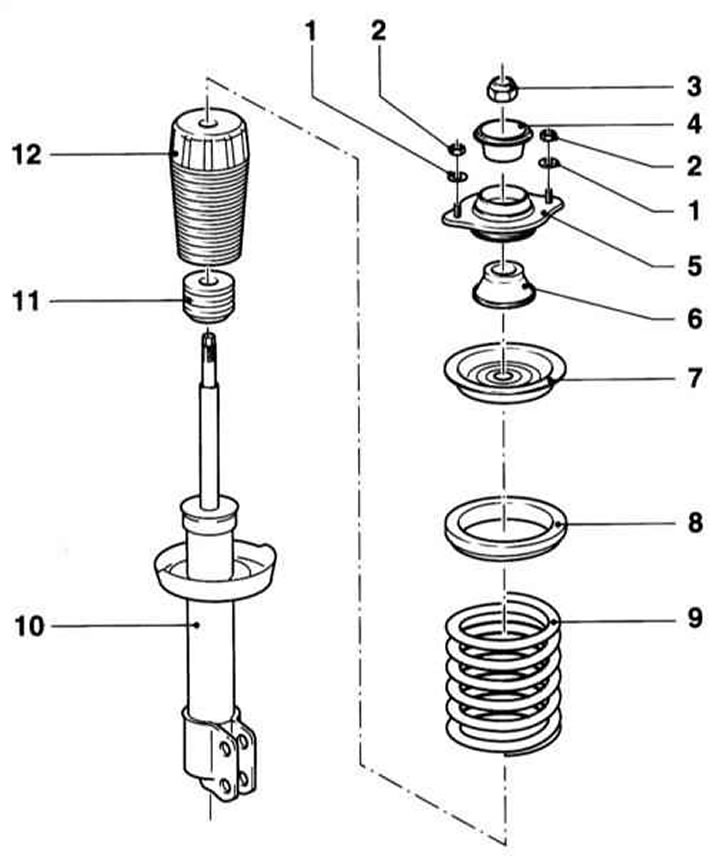
1 - Washer
2, 3 - Self-locking nut
4 — Plate of the top support
5 - Thrust bearing
6 - spacer
7 — the Top cup of a spring
8 - Damping ring
9 - Spring
10 - Shock absorber
11 - Buffer stroke compression
12 — Cover
2. Use the tool to compress the spring about 10 mm so that you can turn the top leg of the strut by hand.
Insert the fixture into the coils of the spring so that they are securely gripped and the fixture cannot slip. The spring must be compressed necessarily in two, and better - in three opposite points. The spring is compressed with great force, so only a reliable device should be used. Never compress the spring with wire. The shock absorber rod mounting nut can only be released when the spring is compressed.
3. Loosen the self-locking nut on the damper rod, holding the rod from turning by the hexagon.
Loosening the self-locking nut on the shock absorber rod
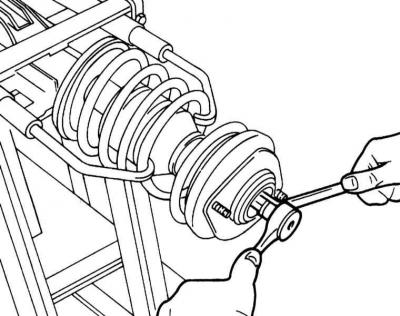
Do not loosen the nut with an impact tool to avoid damaging the stem O-ring.
4. Remove the plate and thrust bearing with spacer from the shock absorber rod.
5. Remove the upper spring cup with damping ring from the shock absorber.
6. Slowly loosen the spring and remove it along with the boot.
7. Remove the compression stroke buffer from the shock absorber rod.
Checking and assembly
1. Check the shock absorber. To do this, holding the shock absorber vertically, check the correct operation of its operation, both at full and short (50 ÷ 100 mm) stroke of the stock. In both cases, the resistance should be soft, even and constant. If signs of a malfunction are detected, both shock absorbers should be replaced.
2. Check the rubber parts of the support and the spring for cracks and deformations, if necessary, replace the defective parts.
3. Install a new compression buffer on the shock absorber rod.
4. Put the shroud on the stem.
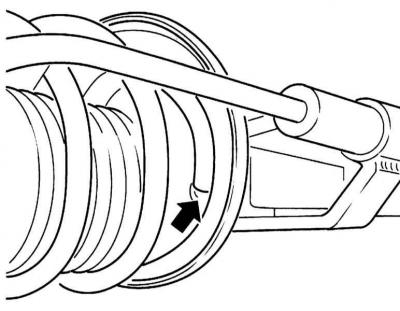
5. Install the spring on the lower cup and compress with a special tool.
The end of the spring should rest against the lower cup.
The lower end of the spring should rest against the stopper of its cup
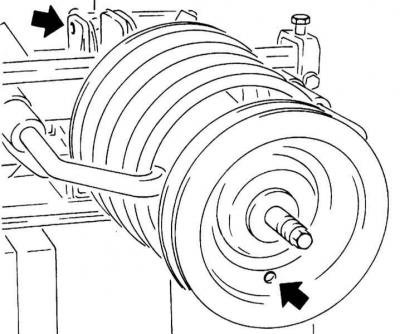
6. Install damper ring and top cup. The spring cup must overlap so that the mounting hole (down arrow) was located opposite the lower suspension strut mount (arrow above).
Damping ring and top cup
7. Put the spacer, support bearing and upper support plate on the shock absorber rod and secure with a new self-locking nut. Tighten the nut firmly 55 Nm.
8. Unload the spring.
9. Reinstall the suspension strut (see Section Front suspension).
Visitor comments