


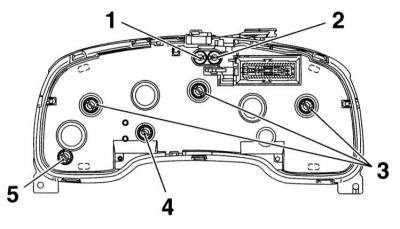
1 — High beam indicator lamp (12V/1.1W)
2 — Fog light indicator lamp (12V/1.1W)
3 — Instrument lighting lamps (12V/1.5W)
4 — Backlight LED (12V/1.5W)
5 — Trailer direction indicator lamp (12V/1.1W)
Instrument cluster - rear view (models without tachometer)
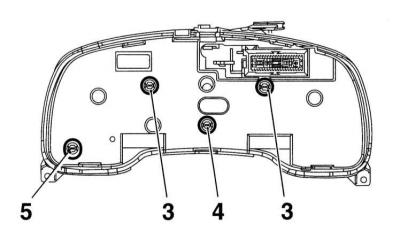
3 — Instrument lighting lamps (12V/1.5W)
4 — Backlight LED (12V/1.5W)
5 — Trailer direction indicator lamp (12V/1.1W)
Instrument cluster upper locking screws and lever
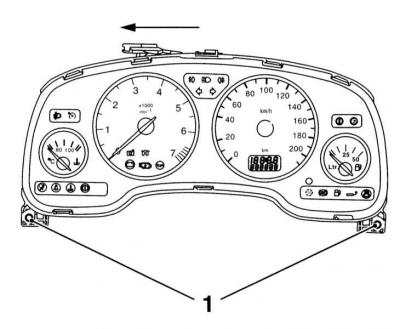
1 - Mounting screws
1. Remove the steering wheel (see Chapter Suspension and steering).
2. Remove the mounting screws and remove the upper section of the steering column cover (see Chapter Suspension and steering), - access to the screws is opened after removing the plugs.
Original posted on the website OpelBook.ru
3. Loosen the mounting screw and remove the handle from the steering column position control lever.
4. Remove the mounting screws and remove the lower section of the steering column cover (see Chapter Suspension and steering).
5. On astra models remove the plugs, unscrew the mounting screws and remove the instrument panel trim panel from the instrument panel.
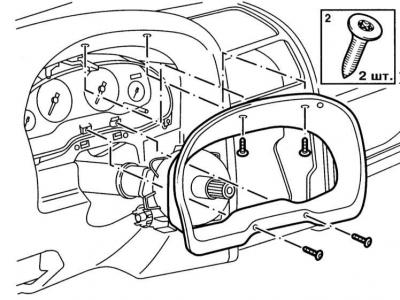
6. On zafira models remove the switch that controls the operation of the external lighting devices (see Removal and installation switches), remove the radio (see Checking the correct operation and repairing the rear window heater), carefully remove the side air duct deflector from the instrument panel, then unscrew the mounting screws and remove the instrument panel trim, disconnecting the wiring as necessary. Note that the inner screw is unscrewed through the deflector grille (see Chapter Body).
7. On astra models loosen the lower mounting screws. Remove the upper mount by sliding the lever, remove the cluster assembly from the instrument panel and disconnect the wiring from it (see illustrations Instrument cluster - rear view (models with tachometer), Instrument cluster - rear view (models without tachometer) and Instrument cluster upper locking screws and lever).
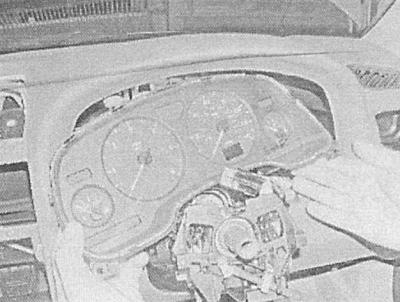
8. Installation is carried out in the reverse order. Finally, check the proper functioning of the corresponding lamps and switches.
Visitor comments