
Models without sunroof
1. Set the rotary switch for outdoor lighting to position «0» (see chapter «Controls and methods of operation», Section 17) and turn off the ignition. Disconnect the battery (see chapter 5).
2. Open the glove box on the overhead console, squeeze the glove box cover on both sides and fold it down over the stop.
3. Turn out 2 screws of fastening of a ware box and remove it from the ceiling console.
Note: On Signum models, open the storage boxes and remove the 6 fixing screws.
4. Remove the overlay located before assembling the fixtures from the ceiling console (see resist. illustration), if equipped, separate the microphone on the back of the trim.
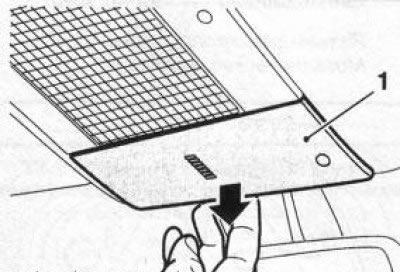
19.4 Removing the trim (1) ceiling console
5. Wring out the clamps and remove the diffuser of the diffuser of the directional lamps of the front seats as shown in the resist. illustrations.
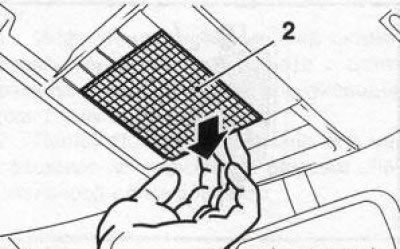
19.5 Removing the diffuser (2) canopy of directional individual lamps of the front seats (models without sunroof): 3. Lamp fixtures
6. Remove 3 fixing screws (see resist. illustration). Using a small screwdriver, first pry out 2 latches (left and right) at the front of the cover and then the 2 rear clips, tilt the cover down and remove it by pulling forward.
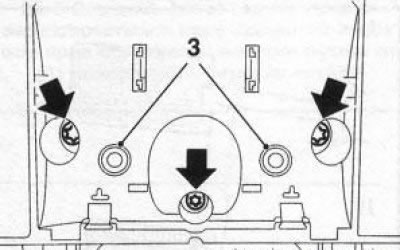
19.6 Screws (indicated by arrows) fixing the ceiling of directional individual lamps of the front seats
7. Disunite the wiring connector on the back side of the ceiling.
8. On models equipped with an anti-theft alarm, use a screwdriver to disconnect the wiring connector, wring out the latches and remove the sensor unit.
9. Installation is carried out in the reverse order. Check the correct functioning of the lamps.
Top hatch models
10. On these models, the removal / installation of the ceiling of individual directional lamps in the front seats does not fundamentally differ from the similar procedure for models without an upper hatch. The following are just the features.
11. Using a plastic wedge (e.g. Hazet 1965-20) remove the cover from the back (in the direction of the car) edges of the ceiling lamps of the front seats.
12. Wring out the clamps and remove the diffuser of the diffuser of the directional lamps of the front seats as shown in the resist. illustrations.
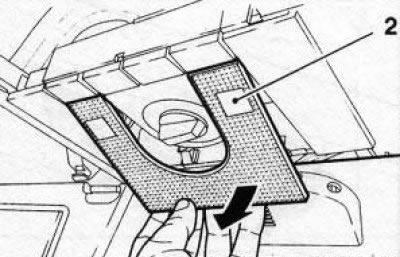
19.12 Removing the diffuser of the plafond of the directional individual lamps of the front seats (top hatch models)
13. Disconnect the electrical wiring connector of the rotary switch for controlling the functioning of the top hatch from the back of the dome light.
Visitor comments