


Note: Later models may have headlights of a different design.
1. Set the rotary switch for the outdoor lighting modes to the "O" position (see Chapter "Controls and operating techniques", Section 17) and turn off the ignition. Disconnect the battery (see Chapter 5).
2. Remove the 3 front wheel arch protection mounting bolts for the corresponding front wheel (see accompanying illustration) and remove the headlight unit retainer from the front bumper trim.
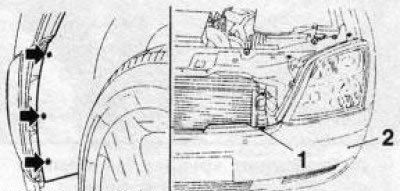
12.2 Fixing device (1) of the headlight unit; the bolts for fastening the front wheel arch protection are indicated by arrows: 2. Front bumper trim
3. Remove the 2 upper headlight mounting bolts (see accompanying illustration), separate the side of the bumper cover and unscrew the lower headlight mounting bolt.
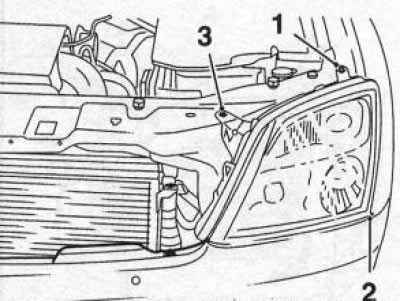
12.3 Upper (1 and 3) and lower (2) headlight mounting bolts
Note: On newer models, complete removal of the bumper cover may be required.
4. Pull the headlight unit forward a little, disconnect the wiring connector from the back of the headlight and remove it.
5. Installation is performed in the reverse order of removal. In this case, pay attention that the gap between the outer edges of the headlight and all mating surfaces is the same along the entire perimeter of the headlight. The mounting bolts should be tightened in the numbered order (from 1 to 3) (see illustration 12.3).
6. After replacing the headlight unit, be sure to adjust the direction of the optical axes of the headlights. Approximate adjustment can be made using the appropriate adjusting bolts (see accompanying illustration). However, at the first opportunity, take the car to a service station where special equipment is used to adjust the headlights.
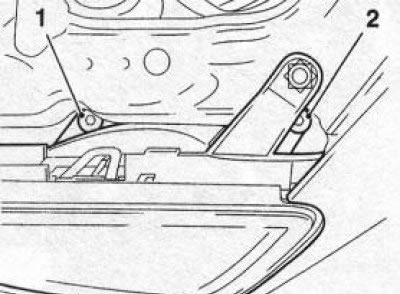
12.6 Headlight adjustment bolts: 1. Vertical adjustment; 2. Horizontal adjustment
Visitor comments