


Contents: Directional individual front seat…⬇ Rear directional lights ⬇ Luggage compartment/main storage…⬇ Door sill lights ⬇
1. Before starting work, set the rotary switch for the outdoor lighting modes to the "O" position (see Chapter "Controls and operating techniques", Section 17) and turn off the ignition. Disconnect the battery (see Chapter 5).
2. All lamps are installed in the reverse order. After installation, check the correct functioning of the replaced lamps and the reliability of the fixation of the lampshades and diffusers.
Directional individual front seat lights
3. Using a screwdriver, carefully remove the diffuser from the front seat lamps (see accompanying illustration).
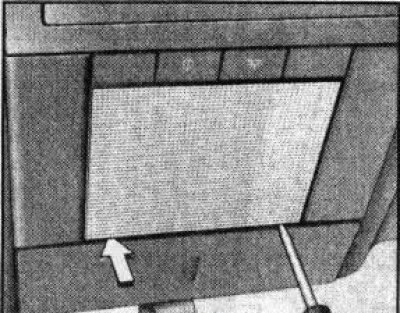
20.3 Removing the diffuser of the individual directional lamps of the front seats to replace the lamps (using the example of a model without a top hatch)
4. Remove the faulty lamp from the socket (see illustration 19.6) and replace.
Rear directional lights
5. Using a screwdriver, pry up the light on the left (in the direction of the vehicle's movement) sides, press the lamp and remove it from the socket.
6. Press the retainer spring and open the metal protective cover on the back of the lamp (see accompanying illustration). Disconnect the wiring connector and replace the faulty lamp.
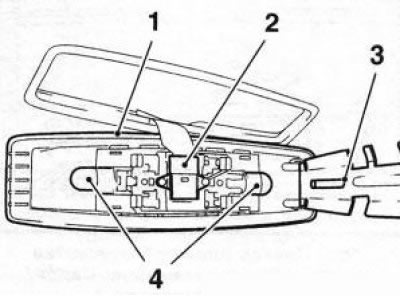
20.6 Replacing the lamps (4) of the directional lights (1) of the rear seats: 2. Electrical wiring connector; 3. Metal lid
Material copied from this resource (OpelBook)
Luggage compartment/main storage compartment lights
7. Carefully, using a screwdriver, remove the diffuser from the trim in the corresponding part of the interior (see accompanying illustration).
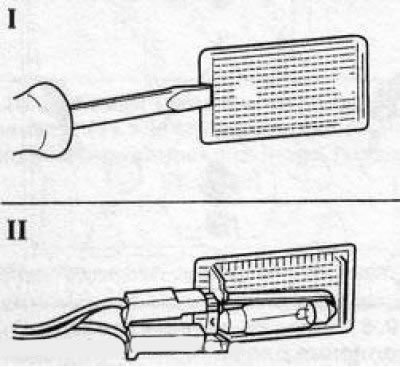
20.7 Replacing the luggage compartment/main storage compartment lamp bulbs
8. Gently press the spotlight in the spring-loaded holder and remove it.
Door sill lights
9. Open the door.
10. Press the backlight upwards (see accompanying illustration) and using a plastic wedge (for example, Hazet 1965-20) remove the light from the door. Disconnect the electrical connector and remove the light.
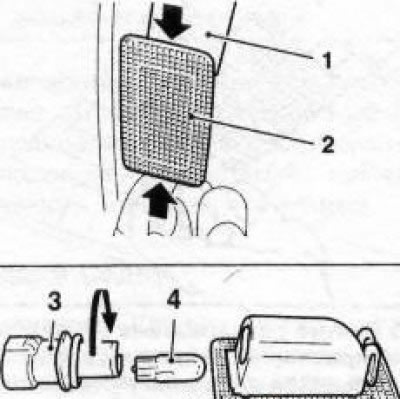
20.10 Replacing the lamp (4) of the light (2) of the threshold illumination: 1. Plastic wedge; 3. Lamp holder
11. Press the cartridge into the lampshade, turn it counterclockwise and separate it from the lamp (see illustration 20.10). Remove the bulb from the socket and replace it.
Visitor comments