
Light switch
Removing
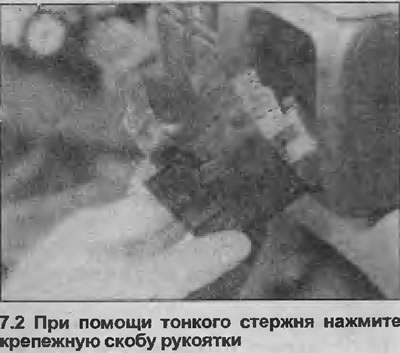
2. Turn the switch to the low beam position, then insert a small screwdriver or rod through the hole in the base of the switch handle to push the handle mounting bracket. Remove the handle from the switch (see illustration).
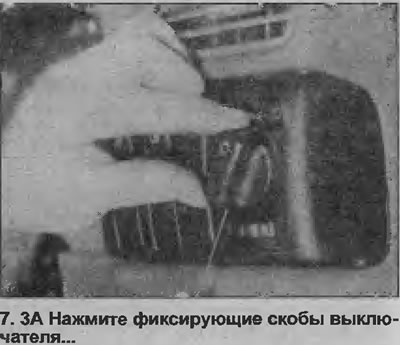
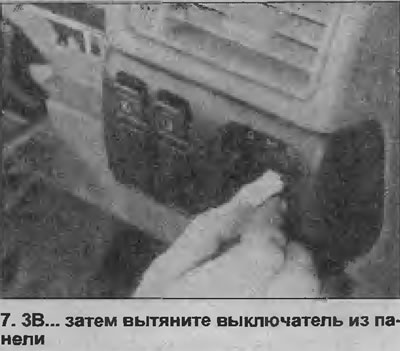
3. Press the lock on the switch bracket, then pull the switch out of the panel and disconnect the wiring pins (see illustrations).
4. Please note that the switch assembly is non-separable and if any part of the switch is defective, replace the switch assembly
Installation
5. Installation is carried out in the reverse order.
Pushbutton switches
Removing
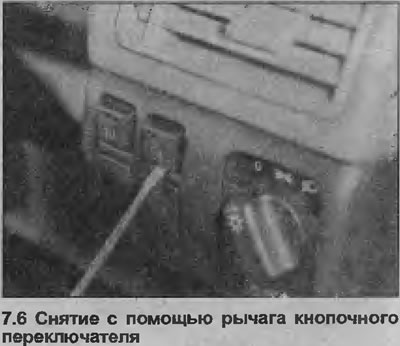
6. Check the bottom of the switch first, if there is a small hole in the panel, insert a thin screwdriver or a metal rod into it. Release the switch retaining spring clip by pushing it up, then remove the switch and disconnect the wiring. If there is no hole, remove the switch using a small screwdriver as a lever. Insert the lever under the lower edge of the switch (use sticky tape or a piece of cardboard to avoid damaging the edge of the panel). Disconnect the switch wiring contact and remove the switch (see illustration).
Installation
7. Installation is carried out in the reverse order.
Headlight beam leveling switch
8. The procedure is the same as for pushbutton switches.
Emergency light switch
Removing
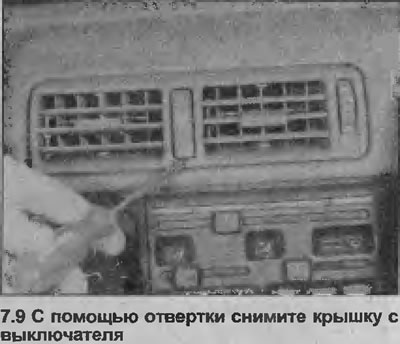
9. Using a screwdriver, carefully remove the cover from the switch (see illustration).
10. Using a screwdriver, remove the ventilation tip from the panel.
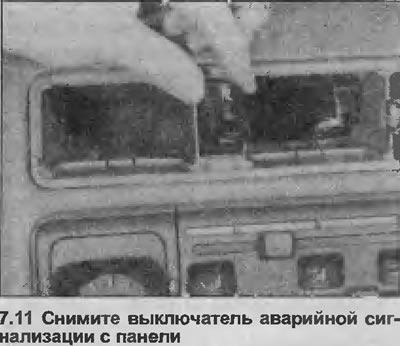
11. Remove the switch from the panel using the lever and disconnect the electrical wiring (see illustration).
Installation
12. Installation is carried out in the reverse order.
Heater blower motor switch
Removing
13. Remove the heater control panel as described in Section 11. Disconnect the wiring connector from the switch.
14. Use the lever to remove the switch at the back of the heater control panel.
Installation
15. Installation is carried out in the reverse order, but when installing the heater control panel see Section 11.
Visitor comments