


Contents: Removal ⬇ Installation ⬇
Caution: The following instructions apply to front-wheel drive vehicles.
Removal
Open the trunk. Remove the protective cap from the shock absorber rod.
Loosen the hex nut while holding the cylinder rod with a spanner.
Remove the plate and rubber buffer.
Attention! If you need to replace only the buffer, lift the car and remove the shock absorber downwards.
In cars with variable ground clearance (ground clearance): Release the pressure through the filling valve and disconnect the supply line from the shock absorber.
Raise the vehicle and place it on supports.
Slightly compress the suspension in the area of the shock absorber using a hydraulic jack.
Remove the hex bolt securing the shock absorber from the rear suspension arm.
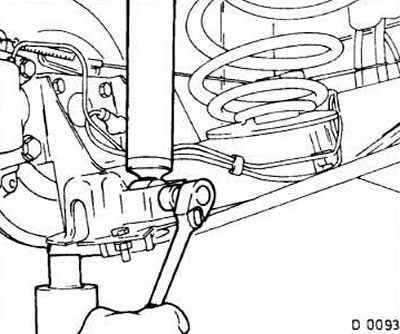
Remove the shock absorber from the bottom of the lever. If necessary, press the shock absorber out of the bracket using a pry bar.
Installation
Check the operation of the shock absorber.
Check the rubber buffer of the shock absorber, replace if necessary. When replacing the shock absorber, be sure to replace the buffer as well.
Insert the shock absorber into the bracket on the lever. Use a plastic hammer if necessary.
Use a suitable metal rod to align the bracket and shock absorber eye on the console.
Insert the mounting bolt using a hammer until it contacts the console. Tighten the bolt to 70 Nm.
For vehicles with variable ground clearance: connect the pipe to the shock absorber and tighten the union nut to a torque of 3 Nm.
Place a plate and rubber buffer on the shock absorber.
Slowly lower the car, inserting the shock absorber into the cap. To make this easier, you can lift the rear wheel with a jack.
(Article posted on an online resource: opelbook.ru)
Install the rubber buffer from the trunk, put on the plate and tighten the hex nut to 20 Nm.
For vehicles with variable ground clearance: increase the pressure in the system to 0.8 bar.
Put on the shock absorber protective cap.
Lower the car.
Visitor comments