
Signs of bad injectors:
- ignition interruptions;
- knocking in one or more cylinders;
- The engine gets very hot;
- drop in engine power, high fuel consumption;
- too dark exhaust smoke.
Examination
Start the engine at idle and loosen the injection glow cap nuts in order. If the knock disappears when you loosen any nut, then a faulty injector has been found.
Injectors can also be checked with a special tool (in the workshop).
Removing
1. Remove the engine cover and exhaust pipe from the muffler above the injectors.
2. Remove the brake booster vacuum pipe from the cylinder head holder.
3. Remove the intake manifold.
4. Clean the injection lines using the cold cleaning method.
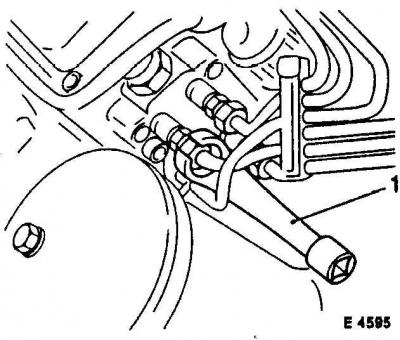
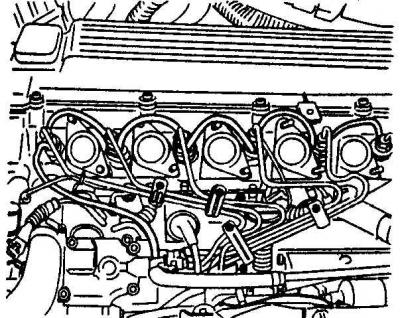
5. Remove all pipelines (1) injection by loosening the union nuts on the injectors and injection pump using a wrench, for example, HAZET 4550.
Warning! Do not change the shape of the piping bend. Put suitable protective caps on the injectors and high pressure pumps to prevent dirt from getting in.
6. If the injection pipe retaining clips are removed, mark their location in advance.
7. Carefully remove the return line from the injectors.
8. Remove the nozzles with a 27 mm wrench, e.g. HAZET 4555-1.
9. From below, protect the nozzles from dirt with protective caps.
Warning! Pay attention to the fact that the nozzles do not fall. In addition, disconnect the cable connector for the built-in injection start sensor from the injectors of the 4th cylinder. Reinstall all injectors.
Installation
1. Tighten the nozzles with a force of 65 N.m.
2. Fasten the injection pipes with a force of 25 N.m.
3. Put on the return line.
4. Connect the cable together with the injection start moment sensor to the injector of the 4th cylinder.
5. If removed, install retaining clips as marked.
6. Install the brake booster vacuum line to the cylinder head holder.
7. Install the intake manifold.
8. Start the engine, check the power system for leaks.
9. If the engine does not start, bleed the power system.
Visitor comments