


Contents: Removal ⬇ Installation ⬇
Since a lot of special OPEL tools are required, it is recommended to carry out this work in a specialized workshop. The camshaft can be removed both with the cylinder head installed and with it removed. Here is a description of removal with the cylinder head previously dismantled. It is also possible to remove it with the head installed, but it is necessary to carry out preparatory work up to unscrewing the cylinder head according to subsection 3.6.2.
Removal
1. If necessary, measure the camshaft: the required value for radial clearance is 0.04–0.078 mm.
2. Remove the cylinder head.
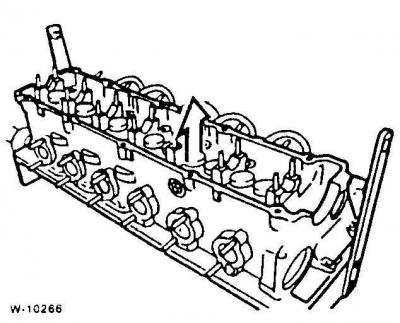
3. To remove the camshaft, you will need the OPEL pressure tool. It is used to hold the camshaft bearings in the installation position once the bearing shells have been loosened.
4. Install the fixture and screw it into place with the cylinder head cover bolts.
5. Tighten the bearing caps by rotating the eccentric shaft of the device.
6. Loosen all bearing cap bolts.
7. Remove the bearing caps and camshaft. The bearing caps are numbered 1 through 7 on the exhaust side.
8. If required, for example to remove the valves, remove the tappets.
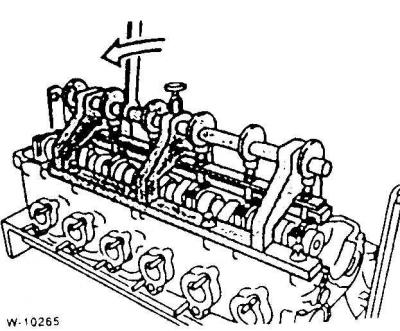
9. For removal in OPEL workshops a suction cup is used (indicated by the arrow), which is installed on the pusher from above.
10. The pushers must be installed in their original places.
Warning! Do not turn the valve lifters over for more than 10 minutes, otherwise the oil will leak out and the hydraulic lash adjusters will no longer work.
Installation
Warning! If the camshaft has been removed, please note the following: the hydraulic valve tappets expand without load and require some time to re-compress after installation. As a result, the valves may open more than the camshaft position and hit the pistons. The following pauses should be observed between installing the camshaft and the cylinder head: at +20°C (room temperature) – 4 minutes; at +10°C – 11 minutes. After installing the cylinder head, wait another 30 minutes before turning the crankshaft.
1. If the camshaft was removed with the cylinder head installed, turn the crankshaft 30° in the direction of rotation (for the hexagon of the belt pulley) beyond TDC. Due to this, no piston will be in the upper position, and the valves will not be able to collide with them.
2. Insert the camshaft and wait for the required time.
3. Only after this return the crankshaft to the TDC position of the piston of the 1st cylinder and install the drive chain.
4. Check valve lifters for wear, replace if necessary.
5. Install the old pushers back into their original locations.
6. Lubricate the camshaft bearings and insert the shaft so that the cams of the intake and exhaust valves of the 1st cylinder are evenly facing upward.
7. Install the bearing caps according to the markings; they must be installed in their original locations.
8. Install the pressing device and tighten the covers.
9. Tighten the camshaft bearing caps to 15 Nm.
10. Loosen the fixture and unscrew it.
11. Install the cylinder head.
Visitor comments