


Turn on the hazard warning lights, apply the parking brake, on an automatic transmission, move the gearshift lever to the P position, on a manual transmission or Easytronic, engage 1st gear or reverse.
Put up a warning triangle in accordance with legal requirements.
Remove the spare tire from the trunk or from under the floor of the car.
Before raising the vehicle, make sure the front wheels are straight.
It is strictly forbidden to change several wheels at the same time.
Block the wheel located diagonally to the one being replaced by placing wedges or similar objects in front of and behind the wheel.
If the ground is soft, place a strong pad with a maximum thickness of 1 cm under the jack.
Note: Using thicker pads may cause damage to the jack and vehicle.
Note: There must be no people or animals in the raised vehicle.
Note: Do not crawl under a jacked vehicle.
Note: Do not start the engine when the vehicle is raised.
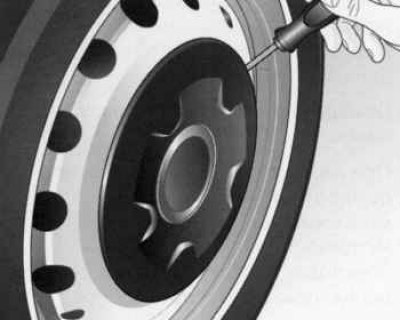
Unlock the wheel cap with a screwdriver and remove the cap. To do this, insert the screwdriver into the side recess of the wheel cap.
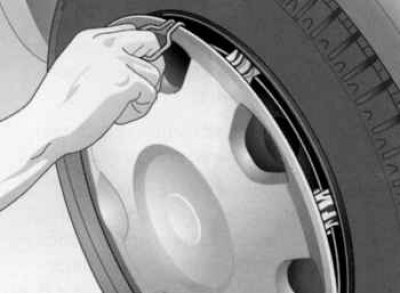
Remove the wheel cover using a hook.
On another version, the wheel cap is removed together with the wheel bolts.
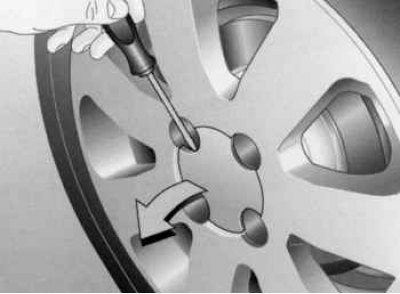
On alloy wheels: pry the wheel cap loose with a screwdriver and remove the cap by inserting the screwdriver into the side recess of the cap.
Remove the bolt covers from the wheel bolts.
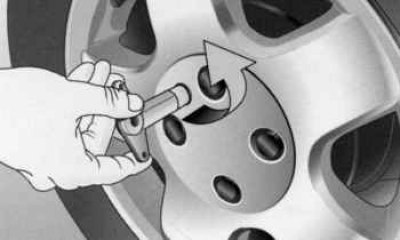
On alloy wheels with anti-theft protection: unscrew and remove the cap using the special key included in the tool kit.
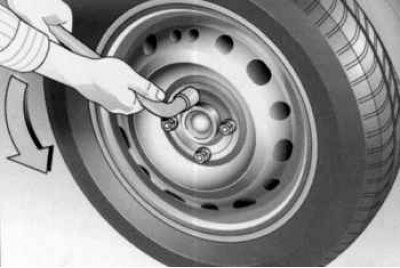
Loosen the wheel bolts using a wheel bolt socket wrench, inserting the wrench until it stops.
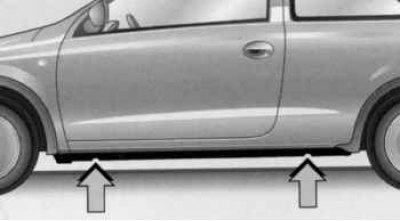
The marks on the lower edge of the body indicate the places for installing the jack under the bottom of the car.
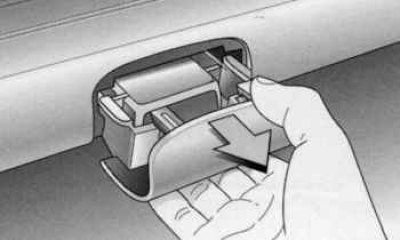
On some vehicle models, the installation locations are covered by hatches – pull the hatches outward.
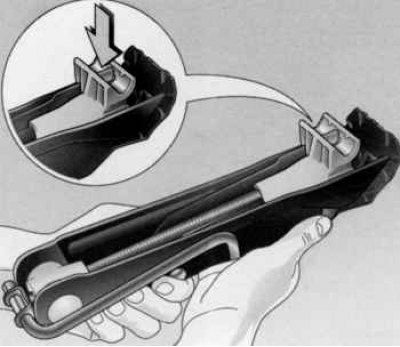
Before installing the jack, manually set the required height. Position the jack arm in front (or behind) so that the jack grip (indicated by the arrow in the figure) covered the vertical rib and entered the slot in it.
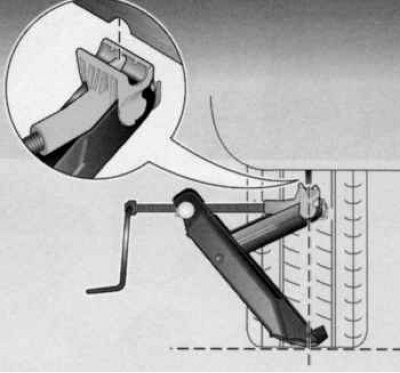
When turning the handle, make sure that the edge of the jack's heel rests firmly on the ground vertically under the gripping point.
If during the lifting process the heel pad is not exactly under the installation point, immediately carefully lower the vehicle and repeat the jacking procedure.
Raise the vehicle by turning the handle.
Remove the wheel screws and place them in a place where the threads do not become dirty.
On another version, the wheel cap is removed together with the wheel bolts.
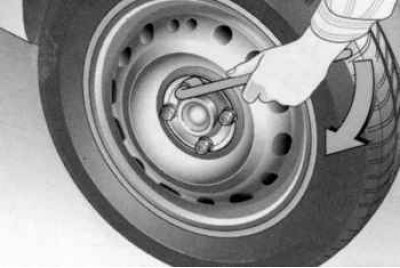
Replace the wheel.
Screw in the wheel bolts and tighten them lightly, while inserting the socket wrench until it stops.
On other versions, first install the wheel cover and then tighten the wheel bolts.
Lower the car.
Tighten the wheel bolts securely in a crisscross pattern while inserting the socket wrench until it stops.
Before installing the wheel cover, clean the wheel in the clamp holder area. The valve symbol on the back of the wheel cover should point to the wheel valve.
Install and secure the coppack or wheel cover and, accordingly, the wheel bolt covers.
On alloy wheels, install and secure the wheel cap, inserting the pin on the back of the cap into the corresponding hole in the wheel.
On alloy wheels with anti-theft protection, install the wheel cap. Insert and tighten the anti-theft protection device.
Cover the jacking point on the underbody of the vehicle. Remove the wheel that has been removed. Remove the tool and the warning triangle.
Check the tire pressure of the installed wheel and adjust if necessary.
Using a torque wrench, check the tightening torque of the wheel bolts on the installed wheel and adjust it if necessary.
Replace the defective tire that was replaced.
Replace the emergency wheel with a normal one as soon as possible.
Visitor comments