
Astra models
Non-folding rear seat cushion
1. Pull firmly on the 2 front loops (see resist. illustration) and release the rear bench seat cushion from the latches.
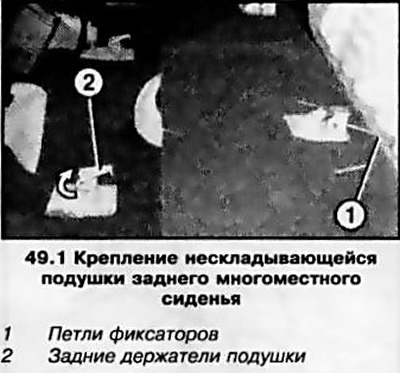
2. First, on one side, press the seat cushion back and pull it up - release the cushion from the holders on the passenger compartment floor (see illustration 49.1). Pull the seat cushion outward if necessary. Repeat this operation with the second fastener, remove and remove the seat cushion from the passenger compartment.
3. Installation is carried out in the reverse order.
Rear seat back
4. Remove the rear seat cushion (see above).
5. Turn out fixing screws and dismantle locks of seat belts from the bottom of the car.
6. Open the tailgate, disconnect and remove the luggage compartment shelf.
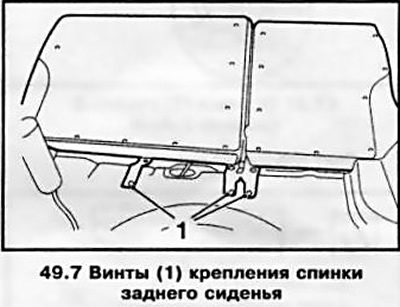
7. Fold the rear seat back forward and remove the 3 screws (see resist. illustration).
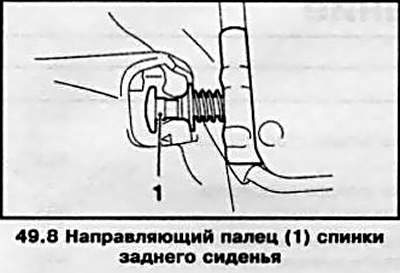
8. Use the help of an assistant and remove the rear seat back from the guide pins (see resist. illustration), located on both sides of the backrest on the right and left, pulling it up. Remove the backrest from the passenger compartment.
9. Installation is made in an order, the return to an order of removal. Pre-clean the threads of the fixing screws and lubricate them with a fixing compound. All fastening screws must be tightened to 20 Nm.
Folding rear seat
10. Tilt the rear seat cushion forward.
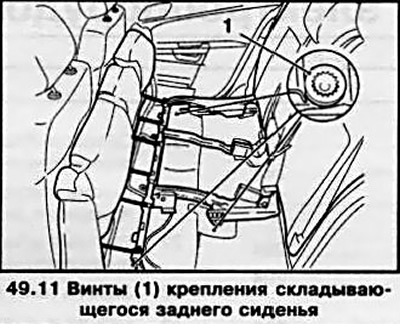
11. Remove 3 fixing screws (si. resist. illustration), then return the seat cushion to its original position.
12. Move the rear seat forward and fold the backrest.
13. Open the tailgate, disconnect and remove the luggage compartment shelf (see chapter «Controls and methods of operation», Section 17).
14. Disconnect the back cover of the seat back and remove the 3 fixing screws on the bottom of the car. Use the help of an assistant and remove the rear seat from the car.
15. Installation is made in an order, the return to an order of removal. Tighten all fixing screws to 20 Nm.
Models Zafira
Rear bench seat
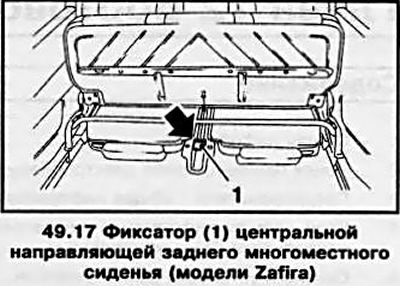
16. Remove the rear seat adjuster trim (see below).
17. Move the seat forward as far as it will go and press the lock of the central rail (see resist. illustration).
18. Turn out 8 fixing bolts (see resist. illustration), lift the seat and remove it from the vehicle.

19. When installing, insert the seat into the guide, if necessary, use the seat adjustment bracket, and tighten the fixing bolts with the required force.
Additional rear seat
20. If equipped, an additional seat is installed in the luggage compartment.
21. Open the tailgate, remove the luggage cover (see chapter «Controls and methods of operation», Section 17).
22. Move the main rear bench seat fully forward and remove the floor carpet.
23. Remove the plugs and unscrew the 3 mounting bolts (see resist. illustration) and remove the seat rail cover. Remove the fixing screw for the seat belt buckles.
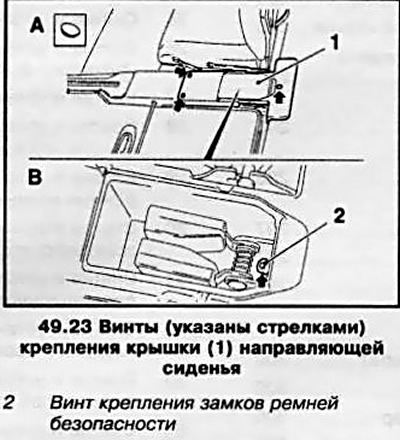
Seat belt buckle screw
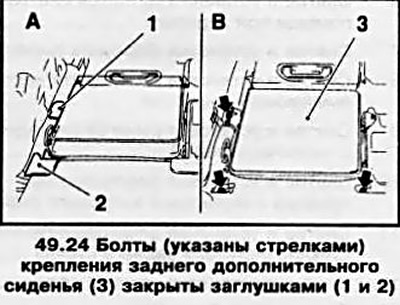
24. Remove plugs from the floor (see resist. illustration) and remove the 4 fixing screws. Raise the rear seat and remove it from the vehicle.
25. Installation is made in an order, the return to an order of removal.
Seat adjuster trim
26. Open the rear side door.
27. Insert a small screwdriver into the hole, press the adjusting lever forward (see resist. illustration), press the latch and remove the lever upwards. Then turn out the fixing screw and remove the second adjusting lever.
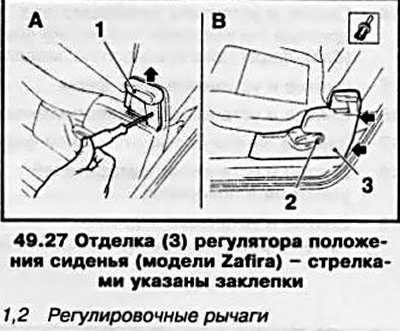
28. Remove 2 expansion rivets (see illustration 49.27) from the back of the trim and remove it.
29. Installation is carried out in the reverse order.
Visitor comments