
Hold the lamp only by the base to avoid contamination of the bulb and loss of brightness.
The new bulb must match the one being replaced (The rated power of the lamp is indicated on the base).
Headlight beam adjustment is carried out in a car service.
Headlight, low and high beam
The headlight has two separate bulbs for high beams (interior lamps) and near light (outdoor lamps).

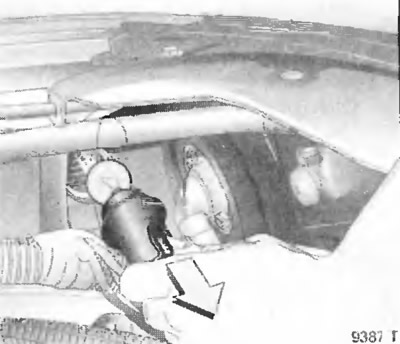
Dipped beam
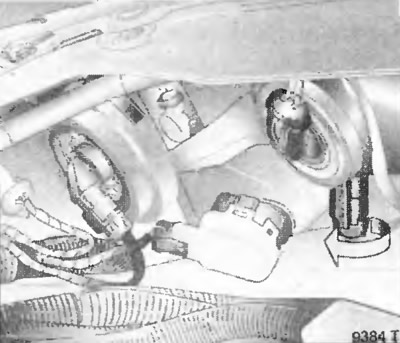
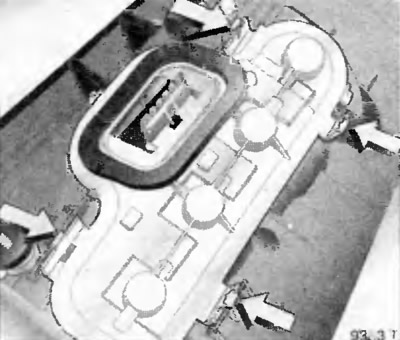
1. Open the hood.
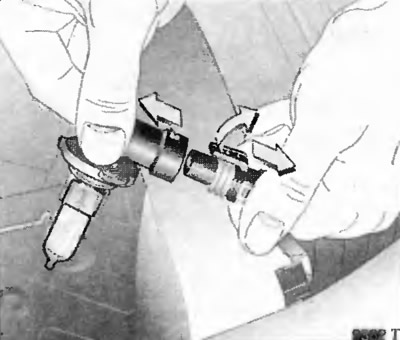
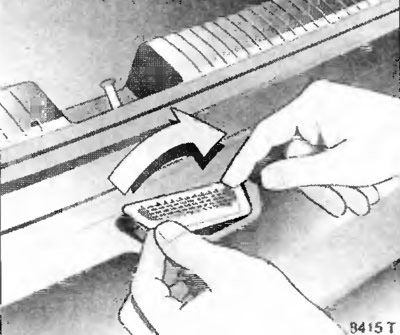
2. Rotate the pump holders counterclockwise.
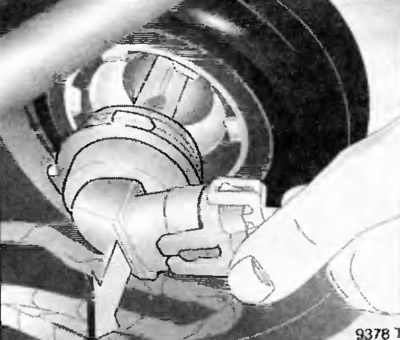
3. Remove the holder.
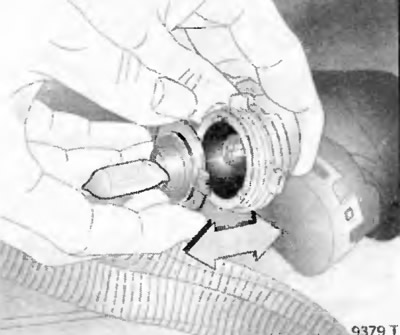
4. Unscrew the lamp.
5. Install a new lamp in the holder (without touching the balloon).
6. Attach the lamp so that the tabs in the holder line up with the slots in the reflector.
7. Screw the lamp in until it stops.
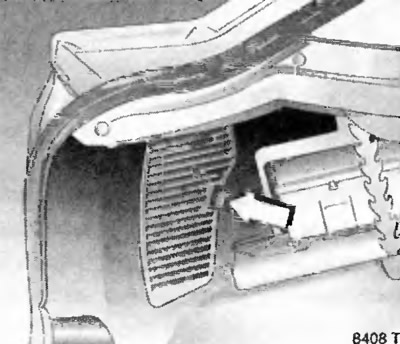
High beam
1. Open the hood.
2. Rotate the lamp holder counterclockwise.
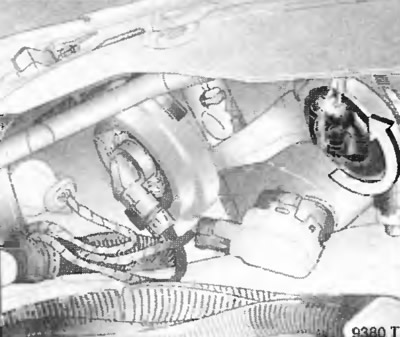
3. Remove the lamp holder.
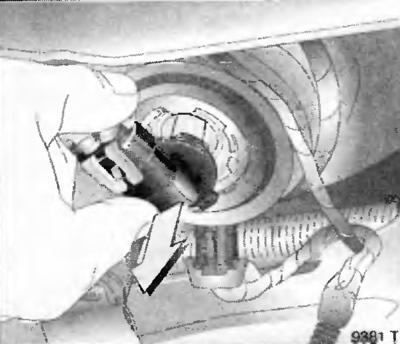
4. Remove the lamp.
5. Install a new lamp (without touching the balloon).
6. Insert the lamp with holder so that the protrusions in the holder fit into the recesses on the reflector.
7. Turn the lamp clockwise until it stops
Position lamps
1. Open the hood.
2. Turn the lamp holder counterclockwise.
3. Remove the lamp.
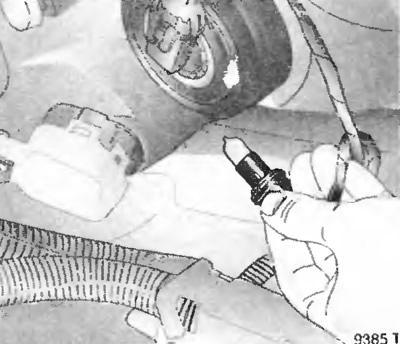
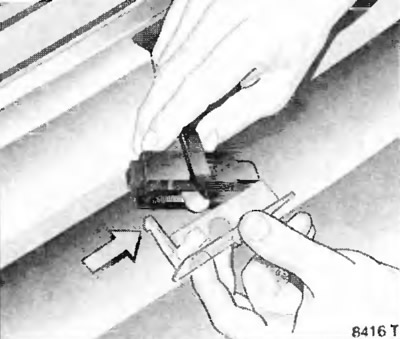
4. Lift the latch and disconnect the wire connector.
5. Install a new lamp with holder without touching the bulb.
6. Insert the lamp with holder so that the protrusions in the holder fit into the recesses on the reflector.
7. Turn the lamp clockwise until it stops.
Front turn signal lamp
1. Open the hood.
2. Turn the lamp holder counterclockwise.
Fog lamps
Replacement of lamps is carried out in a car service.
Tail lamps, direction indicators, reversing signal, rear fog lamps
3-door and 5-door sedan
1. Release the latch and remove the cover.

2. Disconnect the connector from the holder.
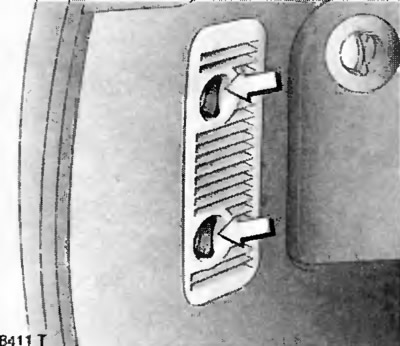
3. While holding the body, remove the two knurled nuts.
4. Remove the lamp holder housing.
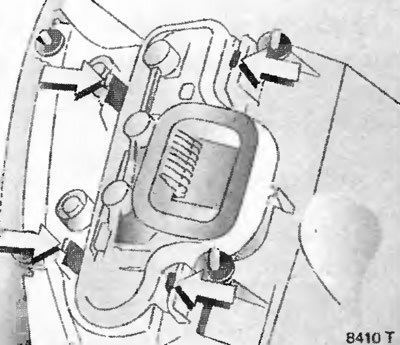
5. Press the latches in the direction shown and remove the lamp holder.
Lamps are arranged in the specified sequence (top down):
- Rear fog lamp
- Turn signal lamp
- Reversing lamp
- Side lamp / brake light (double strand)
6. Remove the lamp from the socket.
7. Replace the lamp in reverse order.
4 door sedan
1. Press the latches and remove the cover.

2. Disconnect the connector.
3. Remove knurled nuts.
4. Remove the housing.
5. Push the latches in the direction shown and remove the lamp holder:
- Rear fog lamp
- Turn signal lamp
- Reversing lamp
- Position lamp/brake signal lamp (double strand)
6. Unscrew the lamp.
7. Replace the lamp in reverse order.
Multi-seat option and camper van
1. Turn the latches and remove the cover. On vans, pry up and remove the cover.
2. Hold the body and remove the knurled nuts.
3. Remove the case.

4. Press the latches in the direction shown and remove the lamp holder.
Lamps are arranged in the specified sequence (top down):
- Rear fog lamp
- Turn signal lamp
- Reversing lamp
- Side lamp/brake signal lamp
5. Remove the lamp from the socket.
6. Replace the lamp by installing in reverse order.
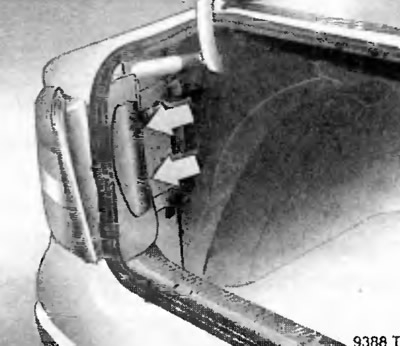
License plate lamp
Sedan
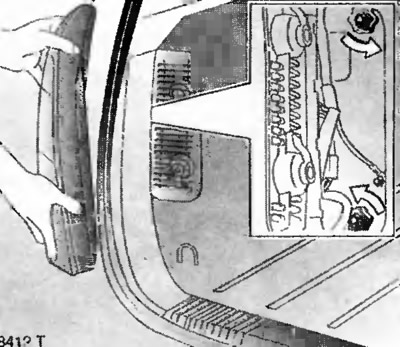
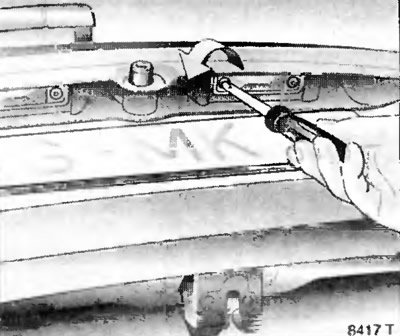
1. Open the trunk lid.
2. Use a screwdriver to pry and remove the spring.
3. Press on the cover on the right side and remove it by prying it on the left.
4. Press the tab and remove the diffuser.
5. Remove the lamp.
6. Replace lamp.
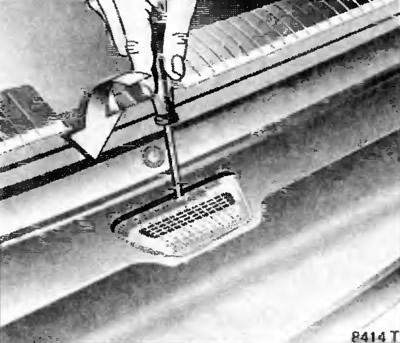
Multi-seat option and camper van
1. Open the rear compartment cover.
2. Turn away screws of fastening and remove a plafond of a lamp.
3. Slightly press on the lamp and remove.
4. Replace the lamp.
Door lamp, rear reading lamps, glove box lamp, trunk/cargo area lamp
Before removing the lamp, close the door or press the limit switch button, disconnecting the lamp from the on-board network.
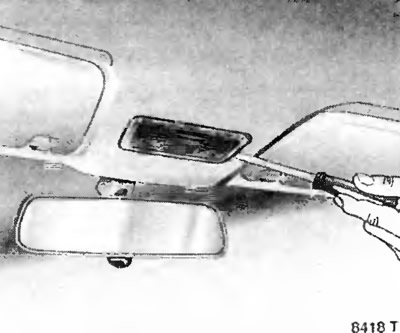
1. Pry up and remove the cover. On the door cover and on the cover, lift the reading paws and remove the lenses.
2. Move the lamp and remove.
3. Replace the lamp.
Illumination of the instrument panel, illumination of the information display
Replacement of lamps is carried out in a car service.
Visitor comments