
Front doors
1. Remove the door trim panel and insulating plastic membrane (see Removal and installation of interior trim panels).
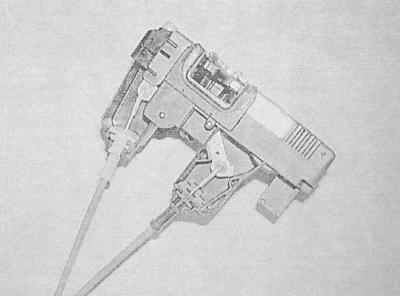
2. Raise the glass, drill out the rivets securing the guide chute to the inner door panel, and remove the chute through the hole in the panel. Through the hole in the door, pull out the red button and disconnect the single lock electrical wiring connector.
3. Through the hole in the door, disconnect the control rods from the lock - the rods are fastened with plastic clips.
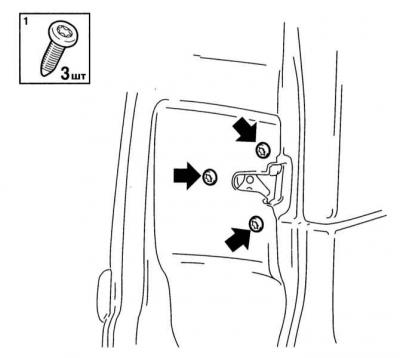
4. At the rear edge of the door, remove the three screws securing the lock to the door panel.
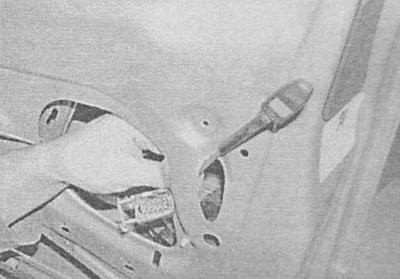
5. Lower the lock down and out of the door frame while releasing the lock release button and guide through the hole in the door panel.
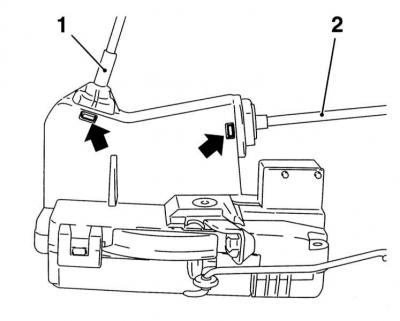
6. Release the latch securing the cable sheath to the inner door handle and the lock release button and disconnect the cables from the lock.
7. Installation is carried out in the reverse order. Check the proper operation of the lock by imitating the striker's finger with a screwdriver. If the lock does not open well with the handle, adjust the length of the rod accordingly by turning the plastic gear at the end of the rod.
Rear doors
1. Fully lower the window. Remove the door trim panel and insulating plastic membrane (see Removal and installation of interior trim panels).
2. Turn out fixing screws and separate a cover of a drive cable of the button of deactivation of the lock from a door panel, disconnect a tip of a cable from the intermediate lever.
3. After releasing the plastic retainer, disconnect the handle rod.
4. At the rear edge of the door, remove the three screws securing the lock to the door panel.
5. Slide the lock forward through the hole in the door to enable the electrical wiring to be disconnected - pull out the red button.
6. Disconnect the lock cable from the mount and remove the lock from the door frame assembly with the handle and drive cable of the release button, while releasing the latter.
7. Disconnect the tip of the cable sheath fastening from the inside door handle and the lock release button and disconnect the cables from the lock.
8. Installation is carried out in the reverse order. Check the proper operation of the lock by imitating the striker's finger with a screwdriver.
Visitor comments