
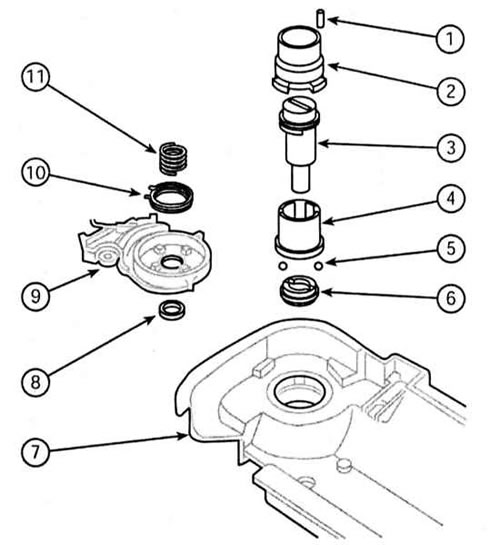
1 - Pin fixing spring
2 - Housing
3 - Lock cylinder
4 - Bushing
5 - Ball
6 - Retainer
7 - The base of the body
8 - Retaining ring
9 - Carriage with lever (single lock version)
10 - Torsion spring
11 - Helical spring
1. Remove the outer handle of the lock and the base of its body (see Removal and installation of the external door handle).
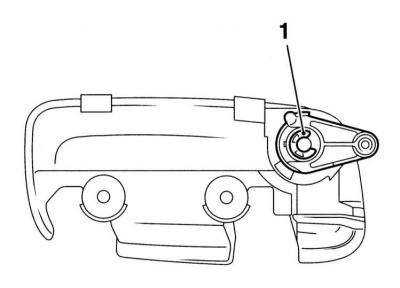
2. Insert the key into the lock and remove the retaining ring (1) from the inner end of the cylinder.
3. Remove the carriage and lever from the inner end of the cylinder - try to remember the installation position of the components. Also remove the torsion and coil springs (see illustration Front Door Lock Cylinder Installation Details).
4. Mark the position of the cylinder body relative to the plate with paint. Using a 2.5 mm diameter drift, knock out the pin of the fixing spring - try not to damage the edges of the hole.
5. Remove the lock cylinder, guide bushing, balls and retainer.
The lock cylinder is replaced complete with a latch.
6. Installation is carried out in the reverse order - do not forget to caulk the pin of the fixing spring.
Visitor comments