


Front doors
1. Remove the door trim panel and plastic insulating membrane (see Removal and installation of interior trim panels).
2. Raise the window completely. On models equipped with side airbags, disconnect the negative battery cable and wait at least 1 minute to allow the capacitor in the independent power source to discharge. Disconnect the wiring, unscrew the fasteners and remove the airbag sensor assembly with the support bracket.
The right sensor is different from the left one - do not mix them up when installing.
3. Drill out the rivets securing the rear window regulator guide channel to the inner door panel and remove the channel from the door frame through the hole.
4. On models with electric windows temporarily connect the regulator switch and connect the negative cable to the battery. On models with manual windows, temporarily place the window lifter handle on its axle. Position the glass so that the bolts securing it to the regulator are visible through the holes in the door. Remove the bolts.
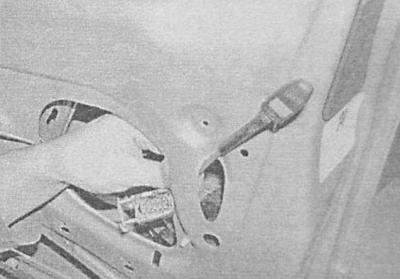
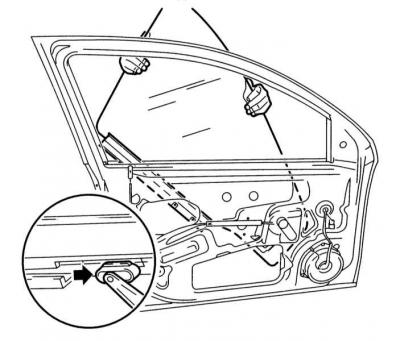
5. Tilt the glass forward enough to release the window regulator roller from the rear guide channel, then lift the glass up and out of the door, pulling it outwards - you may have to move the glass with the window regulator due to the limited opening.
[Material provided by this website OpelBook]
A. Front door glass mounting diagram
B. Removing the front door glass
A.
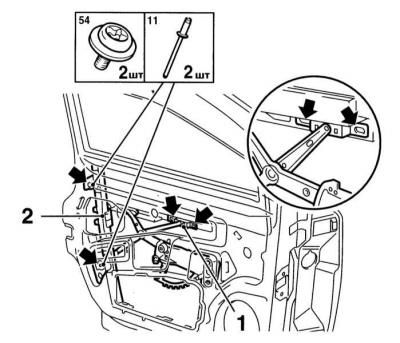
1 - Screws for fixing the glass to the regulator
2 - Glass guide channel
B.
6. Installation is carried out in the reverse order. Install new rivets for fastening the guide channel. The bolts for fastening the glass to the regulator should be tightened by hand at the first stage, before finally tightening the bolts the glass should be completely raised, then lowered to the appropriate position.
Rear doors (including fixed window)
1. Remove the door trim panel and plastic insulating membrane (see Removal and installation of interior trim panels).
2. On models with electric windows temporarily connect the regulator switch and connect the negative cable to the battery models with manual windows temporarily place the window lifter handle on its axis. Lower the window completely.
3. Carefully pull the rubber seal out of the rear glass guide channel, then remove the screw securing the upper guide channel. Using a TORX key, through the holes in the inner door panel, remove the screws securing the lower guide channel.
4. Carefully separate the grooves from the fixed glass and lift them up off the door. The seal of the fixed glass should remain in the groove.
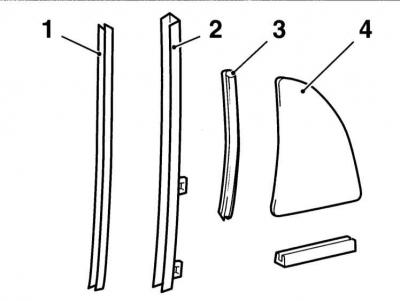
1 — Guide chute insert
2 - Guide chute
3 - Seal
4 - Fixed glass
5. Lift the fixed glass up and remove it from the door.
6. Tilt the lowering glass slightly, releasing it from the window regulator groove and, pulling it upwards, remove it from the door frame.
Procedure for releasing the rear door glass from the window regulator guide channel
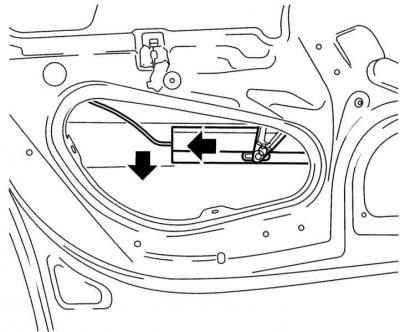
Due to the limited opening, it may be necessary to partially remove the seal and move the glass with a window lifter.
7. Installation is carried out in reverse order.
Visitor comments