
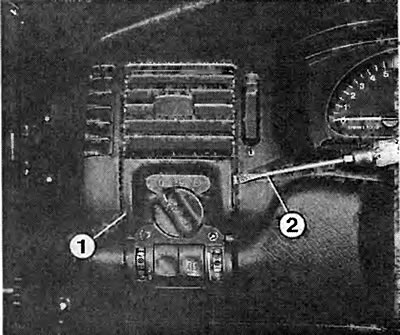
Removing the light switch: insert a wide screwdriver (2) between airflow mixing nozzle and light switch (1) and press the light switch out of the cutout.
Removing the alarm switch. Left: insert two screwdrivers on the right and left of the switch trim and carefully pry the trim away from the hazard switch.
On right: use small grips to gently squeeze the latches (arrows) alarm switch. Pull the switch out of the cutout at the same time.
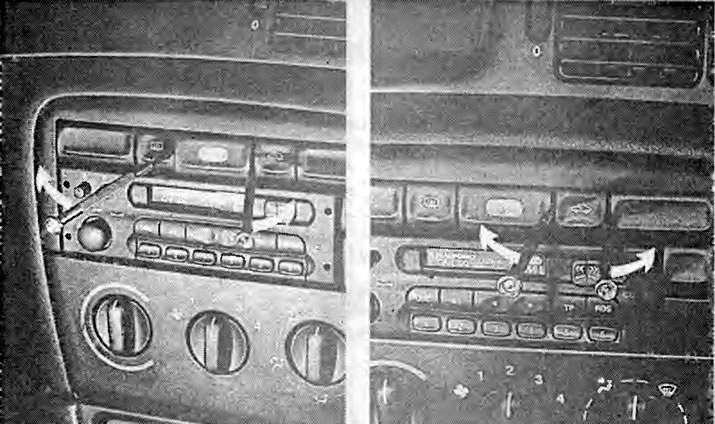
Removing the fog lamp switch and lamps
Remove the light switch.
Removing the switch in the control module
Insert a small screwdriver into the hole at the bottom of the switch and the switch element will unlock
Depress the switch of fog lamps and lanterns from the light switch.
When mounting, press the switch element until it locks into the light switch.
Removing the switch in the control module
Pry the switch out of the cutout with two small screwdrivers or a crochet hook. To protect against damage, place a piece of paper between the screwdriver and the cutout.
You can also make your own detachable tool to remove the switch.
To do this, you need a metal strip 5-10 mm wide, max. 1 mm.
Clamp the end of the metal strip about 1 mm in a vise and bend it with a hammer at a right angle.
At the same time, tap with a hammer near the edge of the fold so that, if possible, a small rounding is obtained in the corner area.
Slide the hooks of the removable tool and the tool between the cutout and the switches and remove the switch.
Removing the hazard switch
Turn on the alarm.
Insert a screwdriver at the bottom of the switch trim and carefully pry the trim away from the hazard switch.
On the side of the switch, squeeze the locking tabs with small grips.
Remove the hazard switch from the cutout.
When installing, push in the alarm switch until it locks into place.
Press on the switch cover.
Visitor comments