


Contents: Removal ⬇ Installation ⬇
Removal
1. Disconnect the battery.
2. Disconnect the gear shift lever cover A, then unscrew the four console mounting bolts B (figure 9.2)
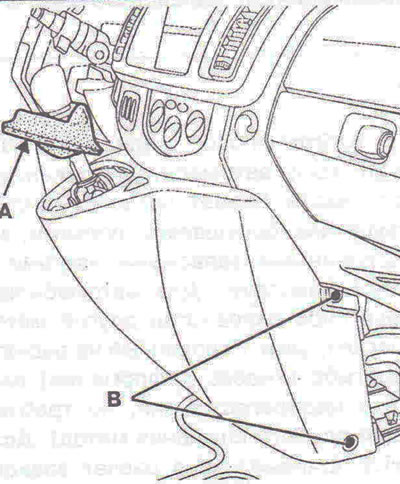
Figure 9.2. Disconnect the gear shift lever cover A, then unscrew the four console mounting bolts B.
3. Remove the center console to access the hazard warning light switch connector C (figure 9.3).
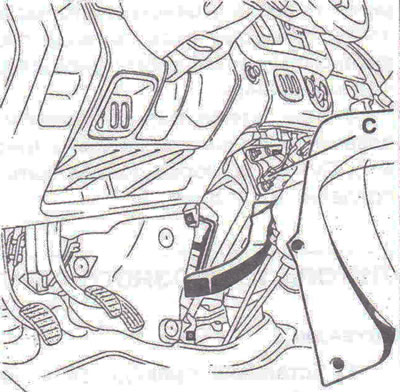
Figure 9.3. Remove the center console to gain access to the hazard warning light switch connector C.
4. Remove the control panel together with the bracket by unscrewing bolt D (figure 9.4).
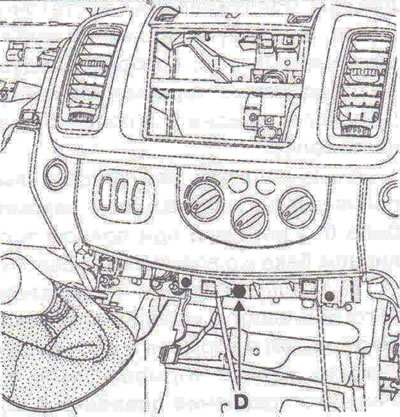
Figure 9.4. Remove the control panel together with the bracket by unscrewing bolt D.
5. Disconnect wiring connectors A, B and C (figure 9.5).
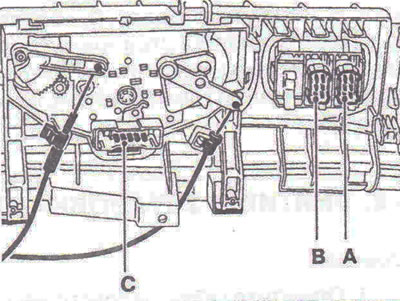
Figure 9.5. Disconnect wiring connectors A, B and C.
6. Remove the heater control flap rod D and the air distribution flap rod E (figure 9.6).
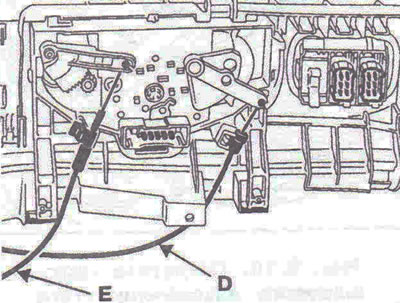
Figure 9.6. Remove the heater control flap rod D and the air distribution flap rod E.
(Original posted on the website OPELBOOK)
7. Unscrew the two bolts securing the F control panel to the bracket (figure 9.7).
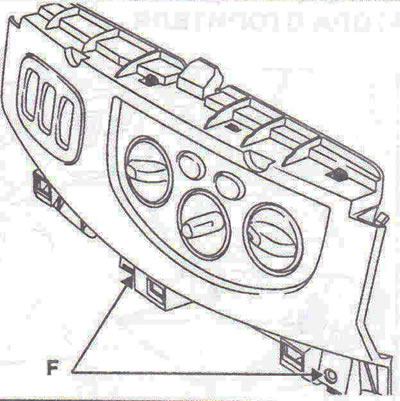
Figure 9.7. Unscrew the two bolts securing the F control panel to the bracket.
8. Press the lower spring latch I and remove the control panel (figure 9.8).
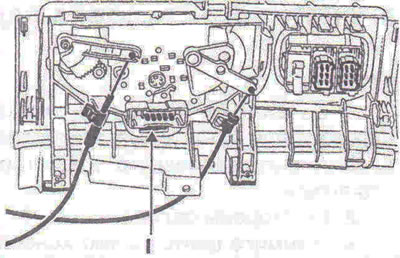
Figure 9.8. Press the lower spring latch I and remove the control panel.
Installation
9. Installation is carried out in the reverse order of removal.
Visitor comments