
Removal and installation of incandescent headlights
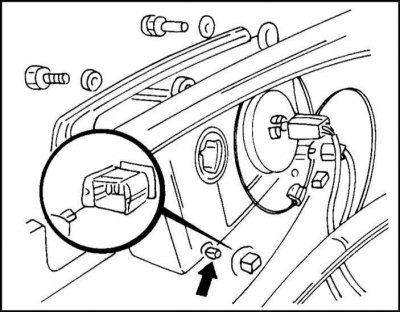
1. Open the hood, press the spring latch on the back of the headlight and remove the cover.
2. Disconnect the three-prong plug from the back of the headlight. The incandescent lamp is now visible, held by a wire clamp.
3. Squeeze the ends of the clamp by removing it.
4. Take out the lamp, taking it by the contacts.
5. Pick up a new lamp with a clean cloth. Do not handle the lamp with your hands, as marks may remain on the lamp.
6. Insert a new double-filament lamp so that its fixing nose on the base fits into the groove of the reflector hole. In this case, the middle of the three contacts should be in the upper part of the lamp base.
Further assembly is carried out in the reverse order of removal. In conclusion, it is necessary to check the headlight adjustment (usually it doesn't change).
Removal and installation of a headlight
1. If you have headlight range adjustment, set the adjustment switch to position "0" and then turn off the headlight.
2. Remove the grille.
3. Disconnect the multi-pin plug connection of the headlight bulb from the inside of the engine compartment (after removing the cover).
4. If you have headlight range adjustment, remove the servo as described below.
5. Unscrew the two bolts and remove the headlight from the mounting in the front facing.
The headlight is installed in the reverse order of removal. Adjust the position of the headlight.
Headlight adjustment
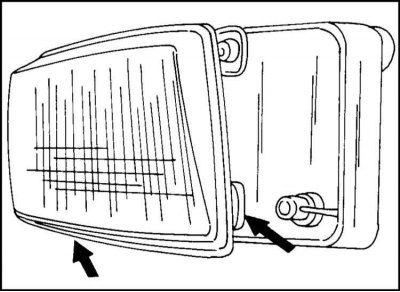
The headlight adjustment screws are located at the bottom. Access to them is through the holes in the grille. The location of both adjustment screws is shown in the illustration.
Visitor comments