


Contents: Removal ⬇ Installation ⬇
Removal
1. Remove the front bumper.
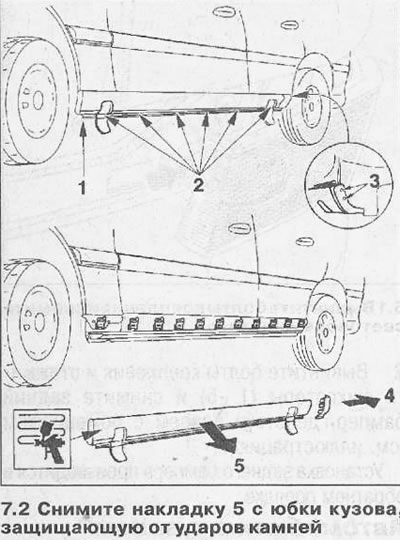
2. Remove the stone chip protection 5 by unscrewing the bolt 1 and pressing the six expansion clamps 2, as well as the two clamps 3, at the rear of the protective pad the front screws 1, loosen the 6 pressure clamps, remove the 2 rear pressure clamps 3 (see illustration).
3. Remove the support corners 4 of the cover and release the cover from the 11 clamps (see illustration 7.2).
4. Remove the mudguards.
5. Unscrew the mounting bolts and remove the bracket 1 of the gas-filled bonnet strut (see illustration)
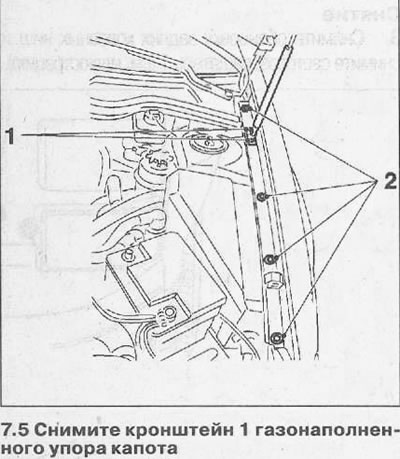
6. Unscrew the four bolts 2 that secure the fenders to the mudguard (see illustration 7.5).
7. Unscrew the bolts 3 that secure the side guides 4 of the front bumper (see illustration).
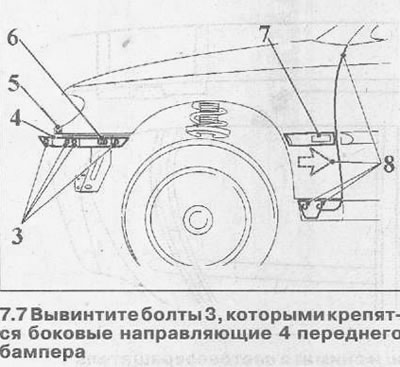
8. Unscrew bolt 5 of the fairing and bolt 6 (see illustration 7.5).
9. Remove the turn signal repeater 7 (see illustration 7.5).
10. Unscrew the four bolts 8 that secure the wing to the front body pillar (see illustration 7.5).
11. Separate the wings, freeing them from the sealing mass, and remove them from the body. The sealing mass can be cut or softened by heating it with a hair dryer.
12. Remove any remaining sealant from the wing seating areas on the body, being careful not to damage the paintwork.
Installation
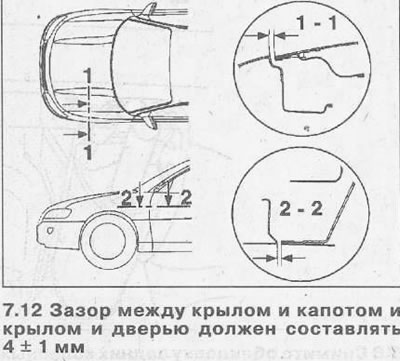
The installation of the wings is performed in the reverse order of removal. In this case, it is necessary to maintain the nominal values of the gaps, and also apply a layer of sealant to the mating surfaces of the body.
The gap between the wing and the hood and the wing and the door should be 4±1 mm (see illustration).
Visitor comments