
Examination
1. A clearly broken CV joint can be identified by characteristic shocks when the load changes, as well as by ear by the characteristic click that it makes when turning - the steeper the turn, the greater the load on the hinge, and the more clearly clicks are heard.
2. For a more detailed check, raise the car and place it on stands. If necessary, remove the crankcase protection.
3. Forcefully press the transverse arm up and then pull it down (see resist. illustration), then press firmly on the lower part of the wheel and press it first outward, and then pull it inward. When checking, observe the hinge - if any noticeable play is detected, the hinge must be replaced.
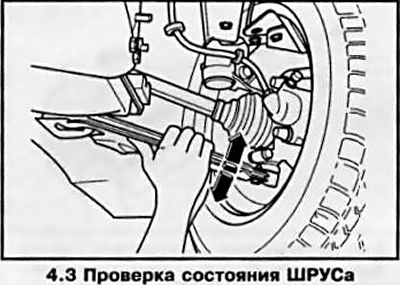
Note: When checking, it is necessary to exclude the influence of the play of other elements of the suspension and running gear.
4. Check the integrity of the anther - if there is damage, replace.
Replacement
Note: Damaged hinges are only replaced as a set. Tripod-type CV joints in the event of their failure are changed assembled with the shaft.
5. To replace the joint, the drive shaft must be disassembled.
6. Remove the drive shaft (see section 2).
7. Release bandage tapes and shift anther from the damaged hinge.
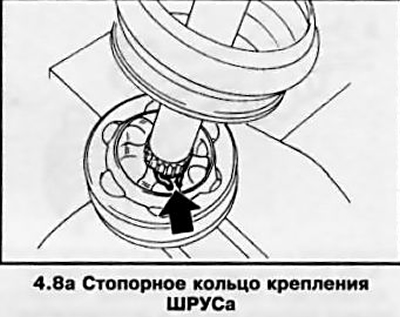
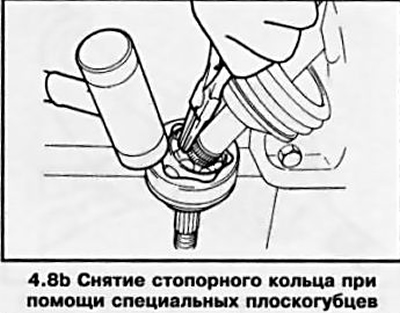
8. Using a screwdriver or circlip pliers, pry apart the circlip retaining the hinge (see resist. illustrations).
9. Use a soft-faced hammer to knock the joint off the shaft.
10. Install a new retaining ring in the groove of the new joint.
11. If dirt is found in the grease, for example, as a result of damage to the protective cover, completely remove the old grease, wash the hinge in gasoline.
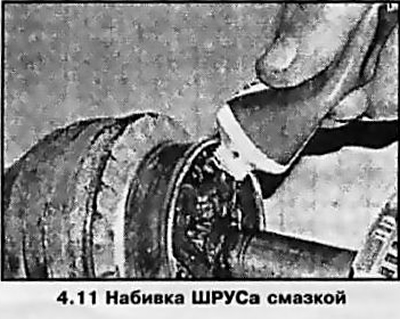
Attention: Even a small amount of dirt leads to the destruction of the hinge!
Pack the joint with the correct type of grease (e.g. LM 47 Liqui Moly) as shown in Ref. illustration or with a wooden spatula. Use a soft-faced hammer to seat the joint onto the shaft until the circlip snaps into place.
12. Fill the boot with the remaining grease, pull it over the hinge and secure with bandage bands (see Section 5).
13. Install the drive shaft on the car (see section 2).
Visitor comments